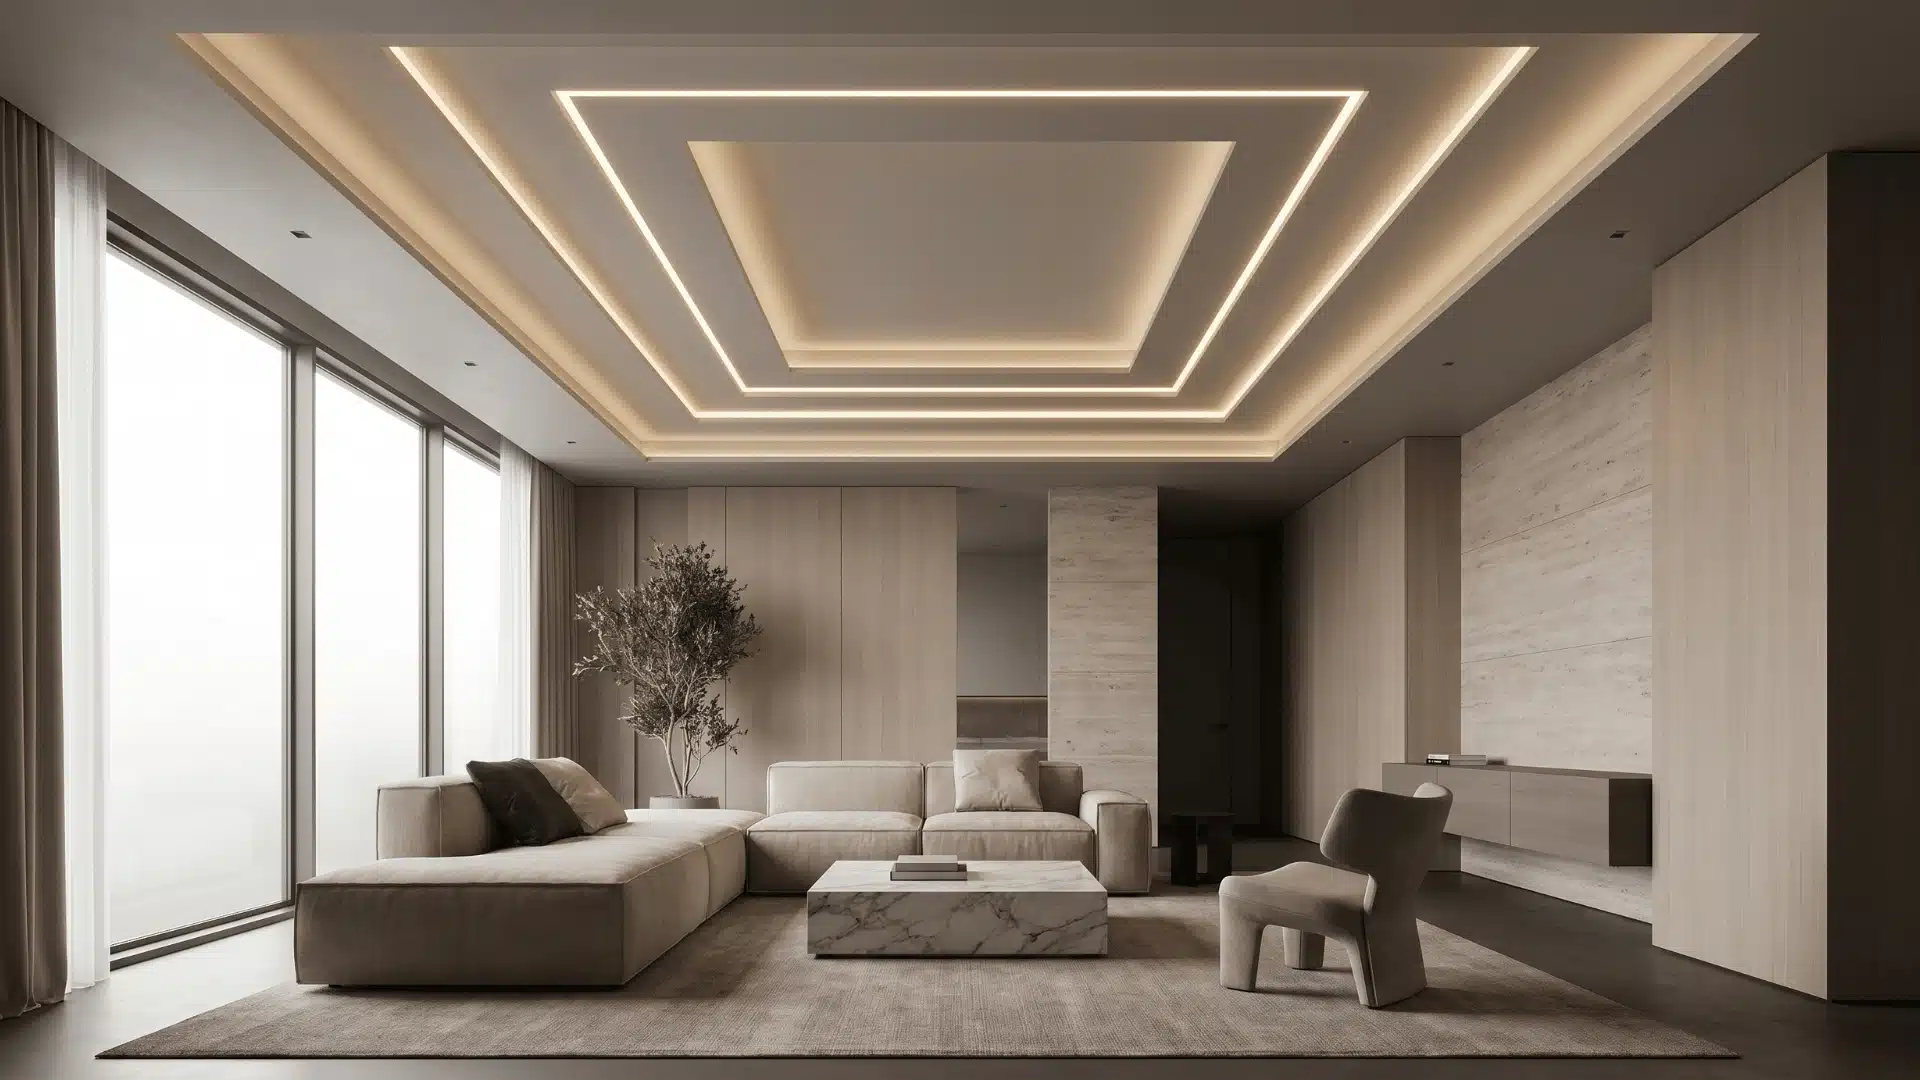




Tray ceilings tend to stand out the moment you walk into a room, but they’re often read as just a decorative ceiling step. Once you look closer, it’s really a composition of planes, edges, and levels working together like architecture, not surface detail.
What actually shapes the result isn’t the tray itself, but how it’s treated. Lighting direction, paint transitions, trim proportions, and how the depth is defined end up doing most of the work.
That’s also why the same ceiling form can feel balanced in one room and slightly off in another. Small shifts in light placement or finish choices change how the whole structure reads in space.
Less common tray ceiling approaches show how flexible this basic form really is, depending on how intentionally those details are handled.
What a Tray Ceiling Actually Gives You to Work With?
A tray ceiling has three clear parts: the recessed center panel, the vertical step that drops down from it, and the outer flat border that frames everything.
Most people only notice the center and the border. That’s where the design starts to feel flat or incomplete.
The step face is usually overlooked, but it’s doing most of the visual work. It’s the transition surface, and it decides whether the ceiling feels intentional or like a construction detail that was never thought through.
If everything is painted the same color, the tray loses definition and blends into the ceiling. When the step is treated differently, even subtly, the depth becomes readable and the structure starts to stand out.
Depth isn’t just aesthetic either. Most tray ceilings sit around 3 to 6 inches, and that range sets the limits. A shallow drop won’t accommodate hidden lighting well. A deeper one opens up options like indirect lighting or stronger shadow lines.
It’s also easy to confuse tray ceilings with coffered ones, but they’re not the same system. Coffered ceilings use a grid of repeated recessed panels, while a tray ceiling is a single recessed field framed by one continuous step. The design logic behind each is completely different.
Advanced Tray Ceiling Variations
Tray ceilings start with a simple recessed frame, but the real range comes from how that frame is pushed, split, and reinterpreted through light, material, and proportion. Small shifts in depth, edge detail, or surface treatment can completely change how the ceiling reads in a space.
The variations below move beyond standard tray layouts and focus on how perception changes when structure and finish work together.
Paint: The Fastest Way to Get It Right or Wrong
Of all the treatments available, paint is the one most people reach for first. It’s also the one that causes the most confusion because the choice isn’t just about color. It’s also about direction.
There are two approaches, and they produce opposite results.
1. Contrast Direction: Darker Interior
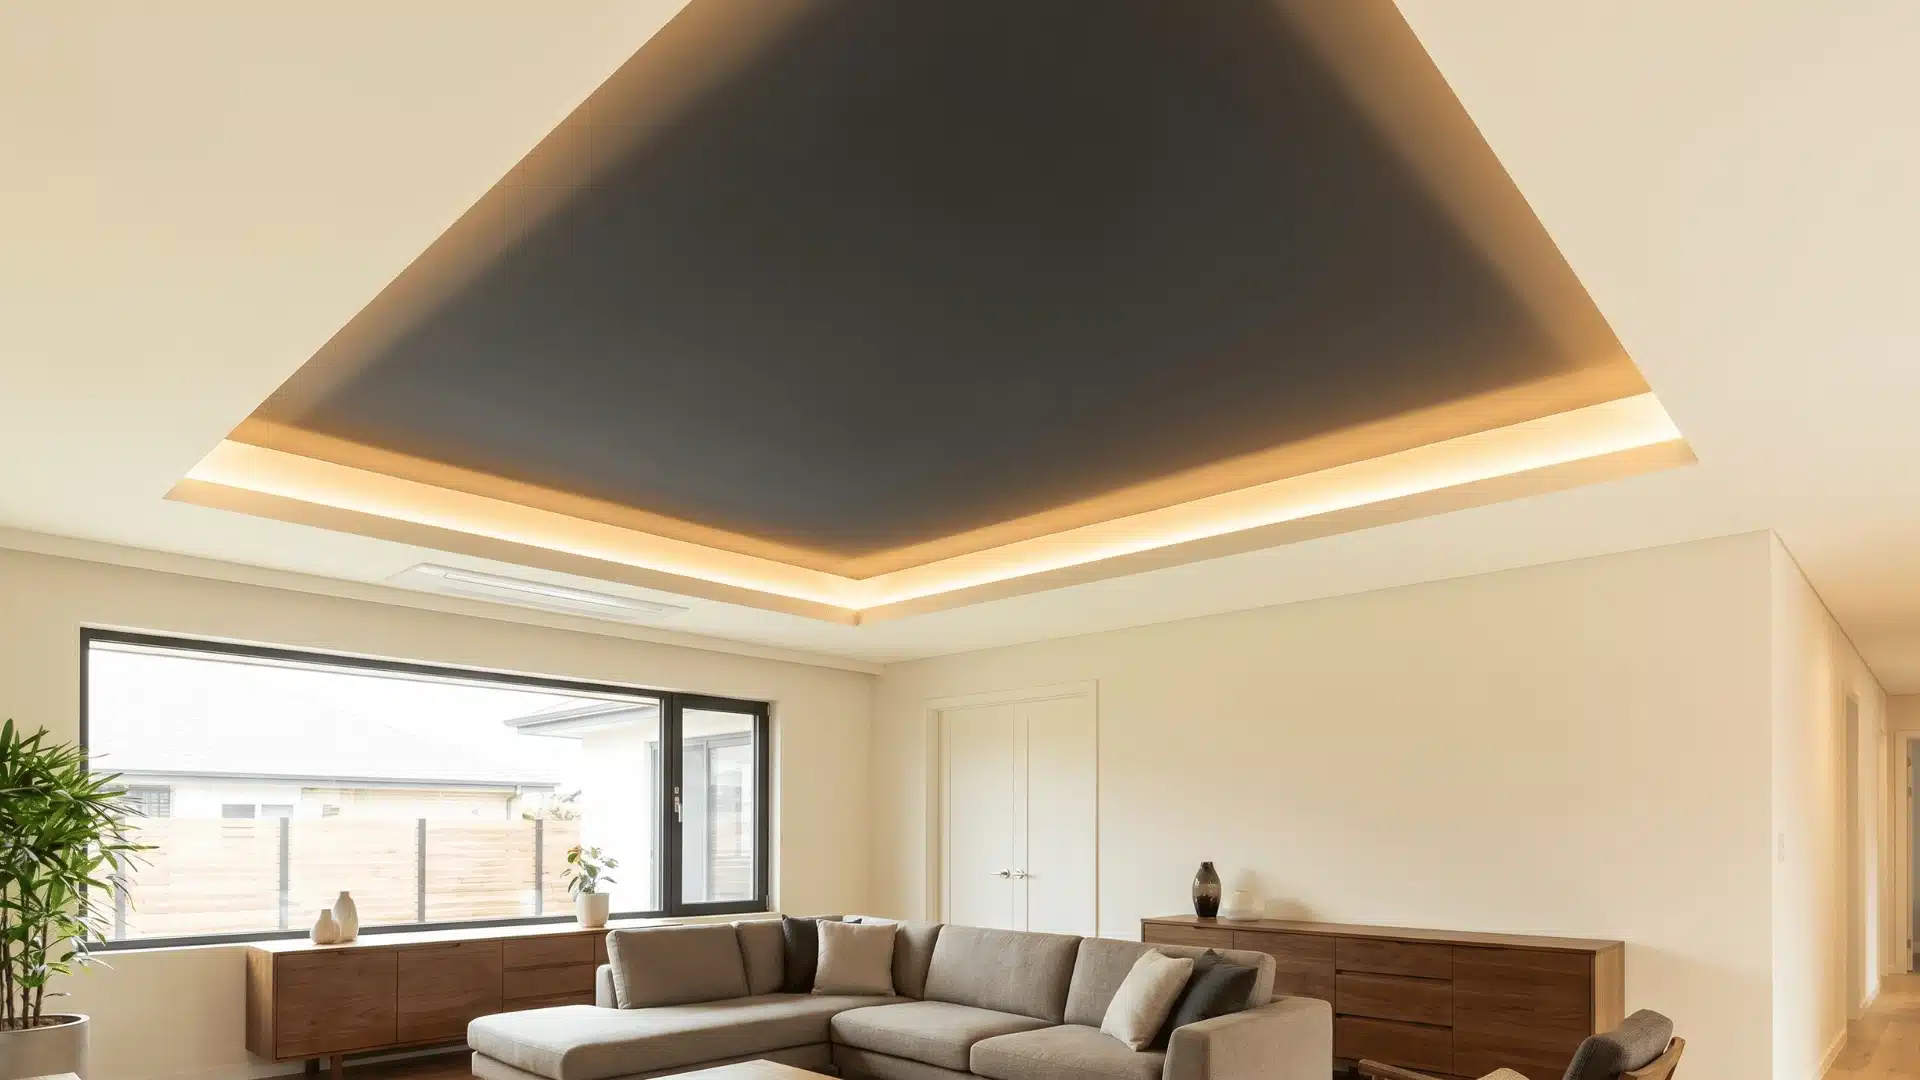
Painting the recessed part darker than the surrounding walls makes the ceiling feel framed. It adds depth and draws your eye up, but in a controlled way rather than something loud.
I’ve seen it work best in rooms with higher ceilings where there’s space for that contrast to breathe. In lower rooms, especially under 9 feet, it can start to feel heavy and a bit closed in, like the ceiling is sitting lower than it actually is.
2. Contrast Direction: Lighter Interior
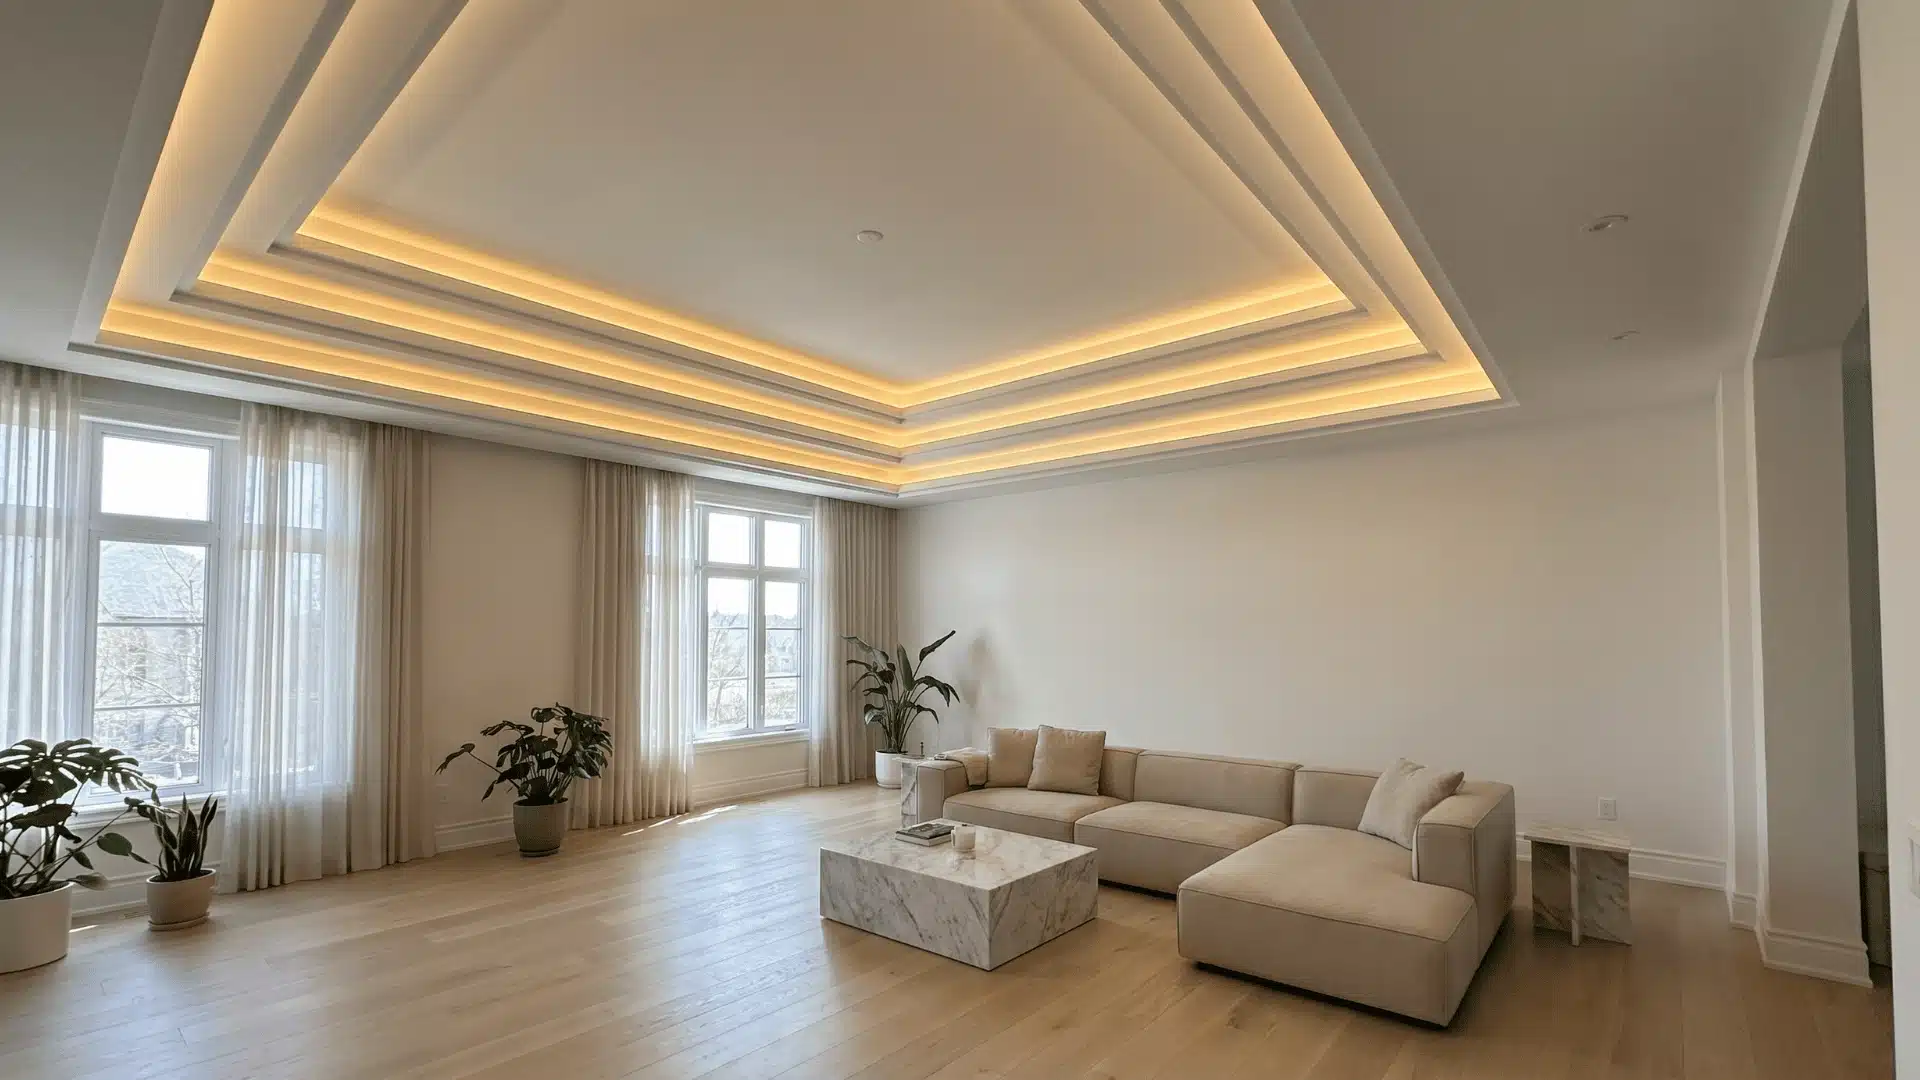
A lighter recessed field, often white against colored walls, visually lifts the ceiling and makes the room feel more open. It’s the safer, more common approach.
It only works when the step face is handled with intent. Matching or aligning it with one plane preserves depth; ignoring it makes the tray look flat and unfinished.
Lighting: What Works and Why the Step Depth Decides It
Lighting shows up in almost every tray ceiling photo you’ll find. What those photos don’t show is why it works in some rooms and looks wrong in others. The answer is almost always structural.
There are two approaches worth understanding before you commit to either.
3. Cove LED Strip
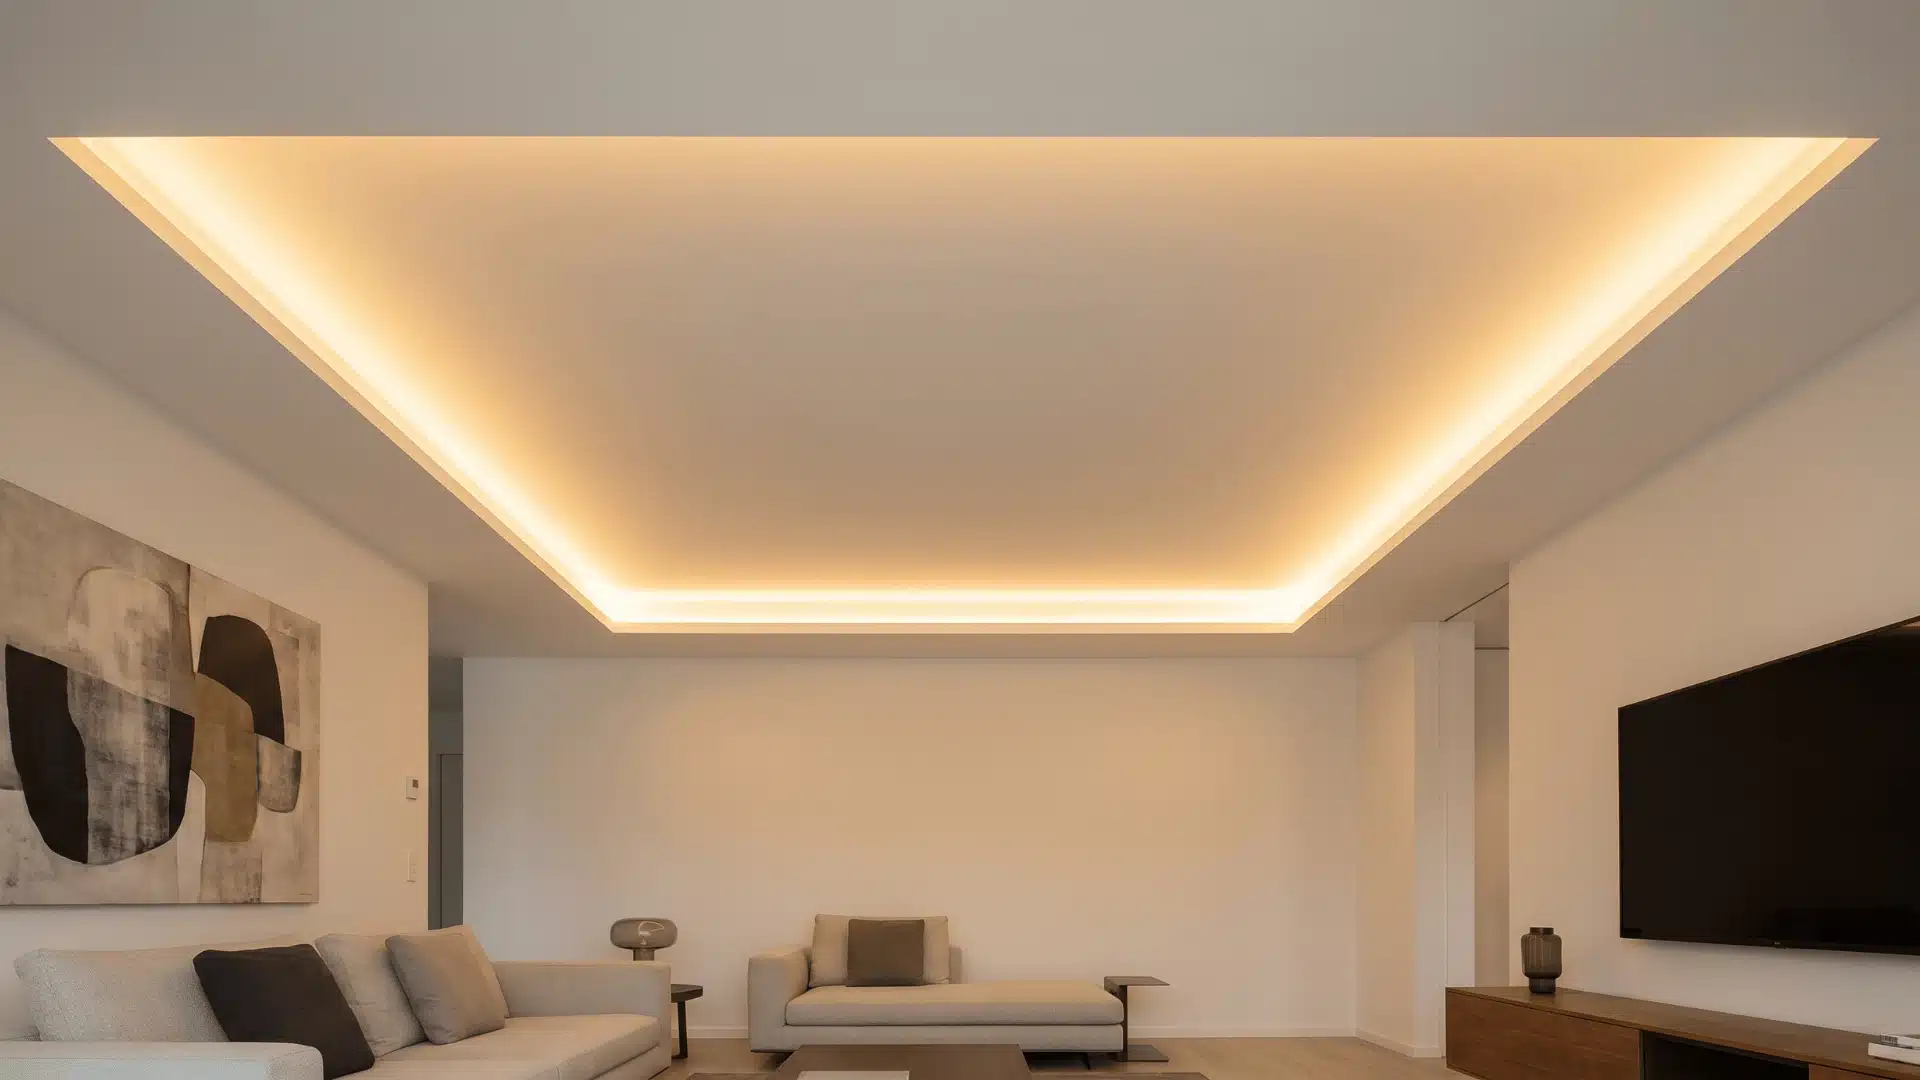
Cove lighting hides LED strips behind the step face so light bounces upward into the recessed field. The source stays invisible, creating a soft ambient glow across the ceiling.
It only works with enough step depth, usually around 4 inches or more, to conceal the fixture. Warm tones (2700–3000K) feel natural, while cooler light flattens the effect. Dark surfaces absorb more light, making the wash more subtle.
4. Centered Fixture
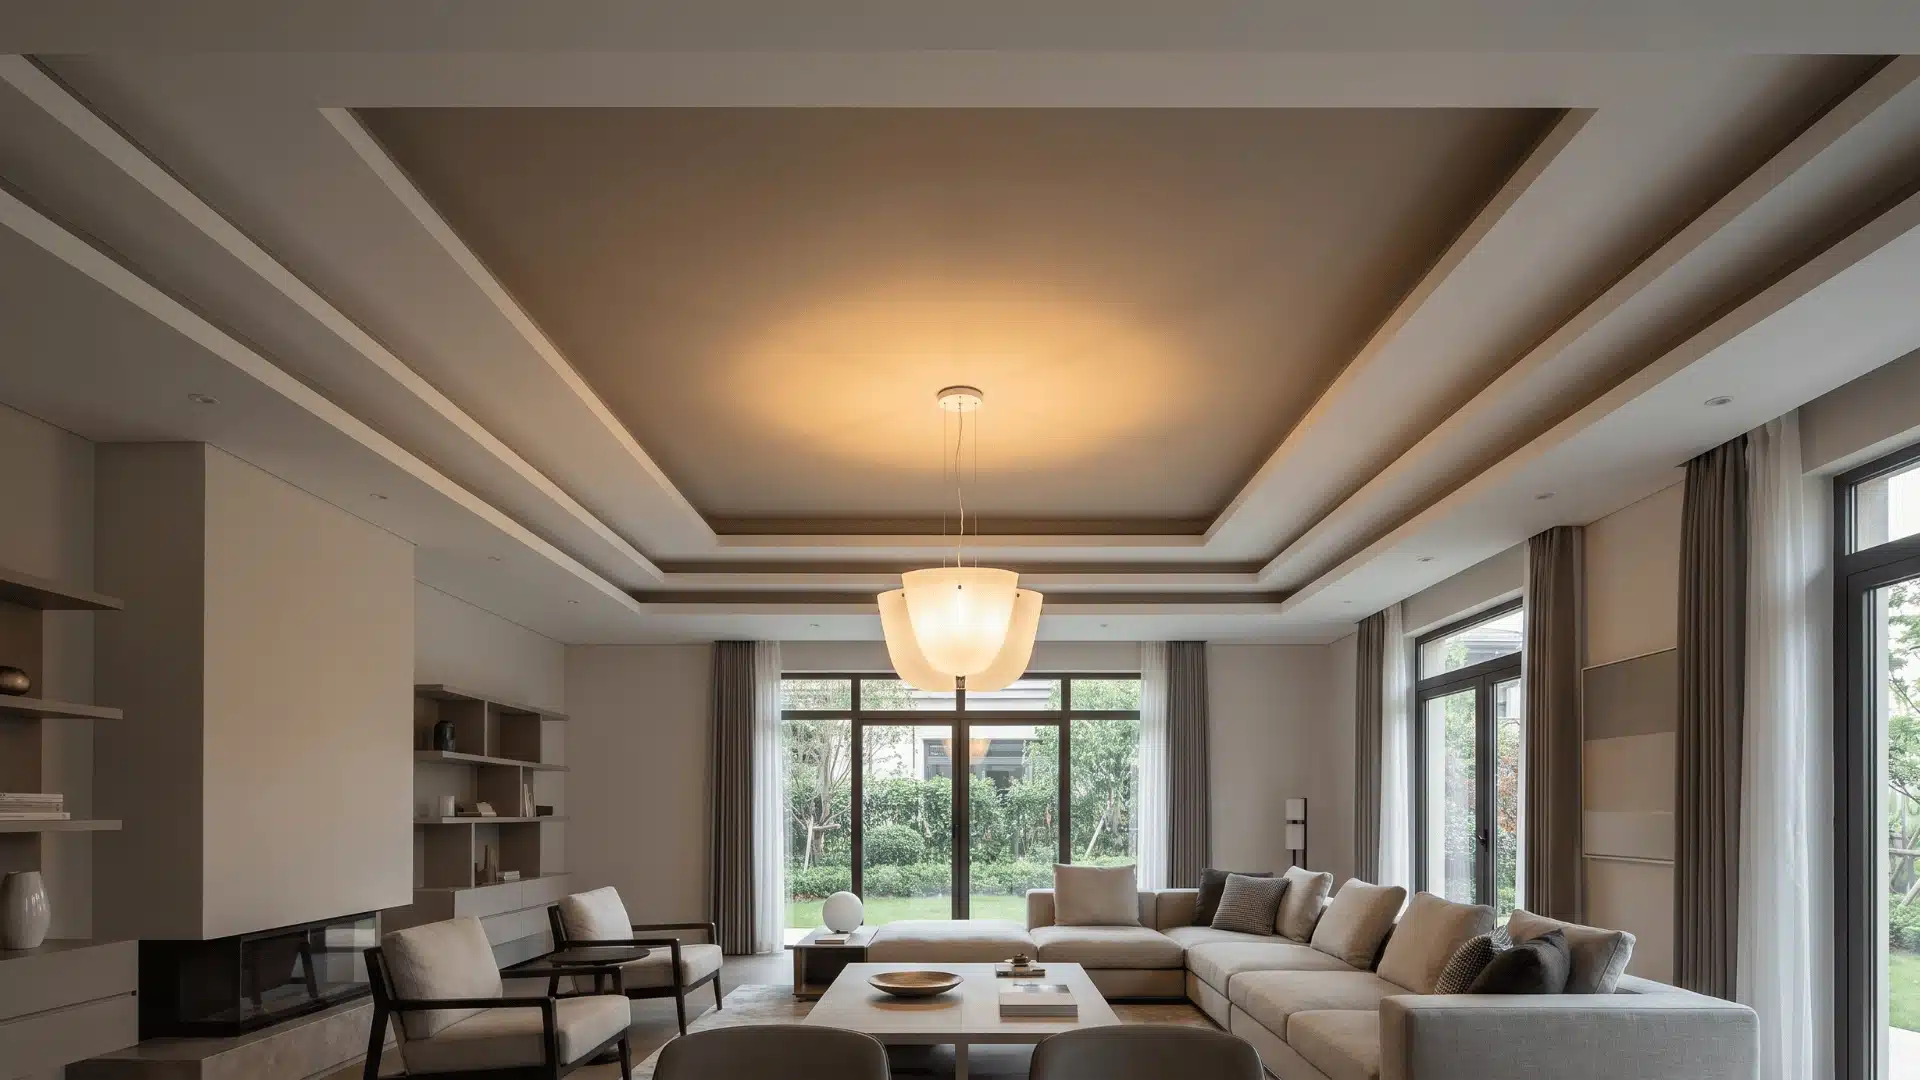
A centered pendant or semi-flush fixture sits within the recessed field and draws attention downward into the tray rather than washing it out from the edges. The focus becomes the object, not the ceiling glow.
It needs enough space, generally at least 5 feet across, to avoid feeling cramped. Darker ceilings can create a shadowed, enclosed feel instead of a balanced focal point.
Trim, Texture, and Wood: Adding the Third Layer
Paint and lighting set the base for the room. Everything else builds on top of that.
These three treatments only work when the conditions are right. I’ve seen them lift a space when used well, but the same ideas can easily feel too much if the room isn’t suited for them.
5. Crown Molding and Trim
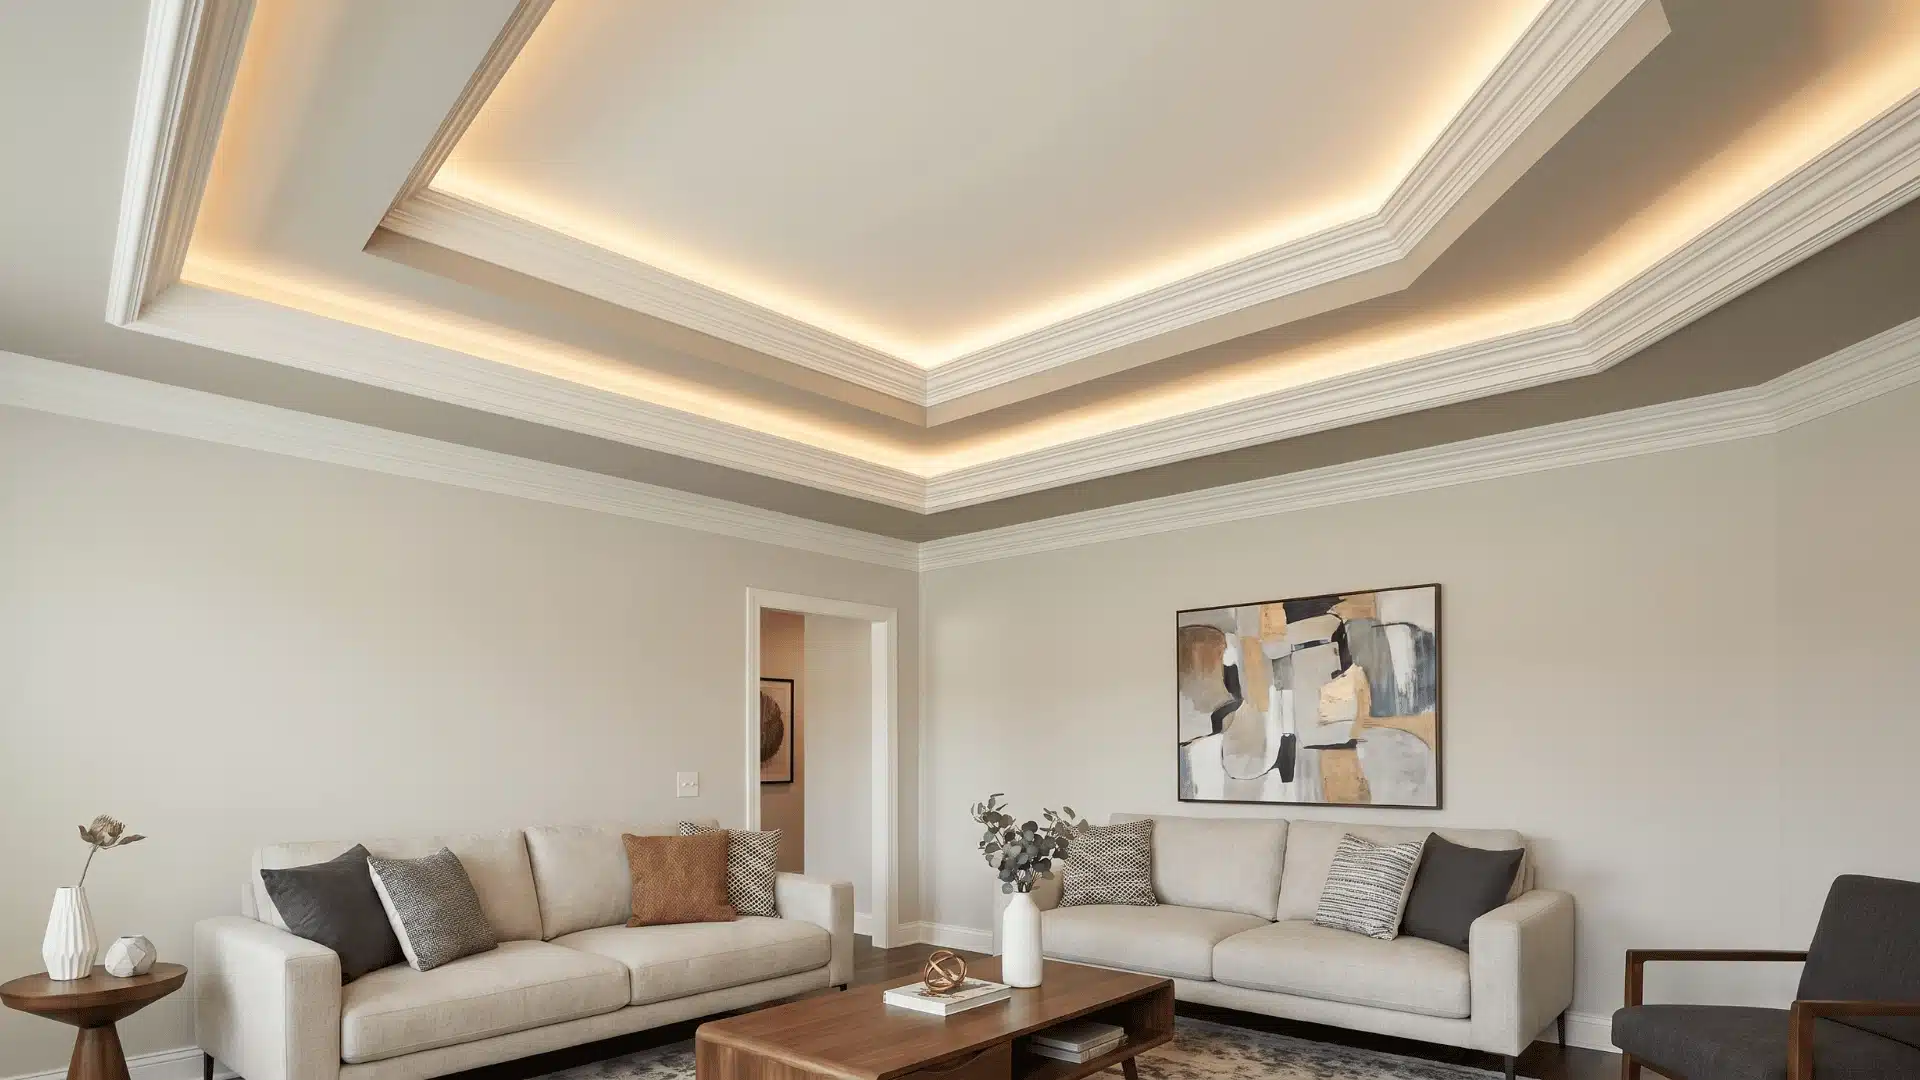
Crown molding marks the shift between the step in the ceiling and the outer edge. When the size is right, it sharpens that break and makes the ceiling feel more defined. If it’s too bulky, it takes over the recess and you lose that sense of depth.
In practice, scale matters more than style. Slim molding keeps the separation clear, while thick profiles blur everything together.
Paint changes the feel too. Matching it to the border keeps things clean and quiet, while a contrast color makes it feel more formal and a bit more structured.
6. Wallpaper or Texture Inset
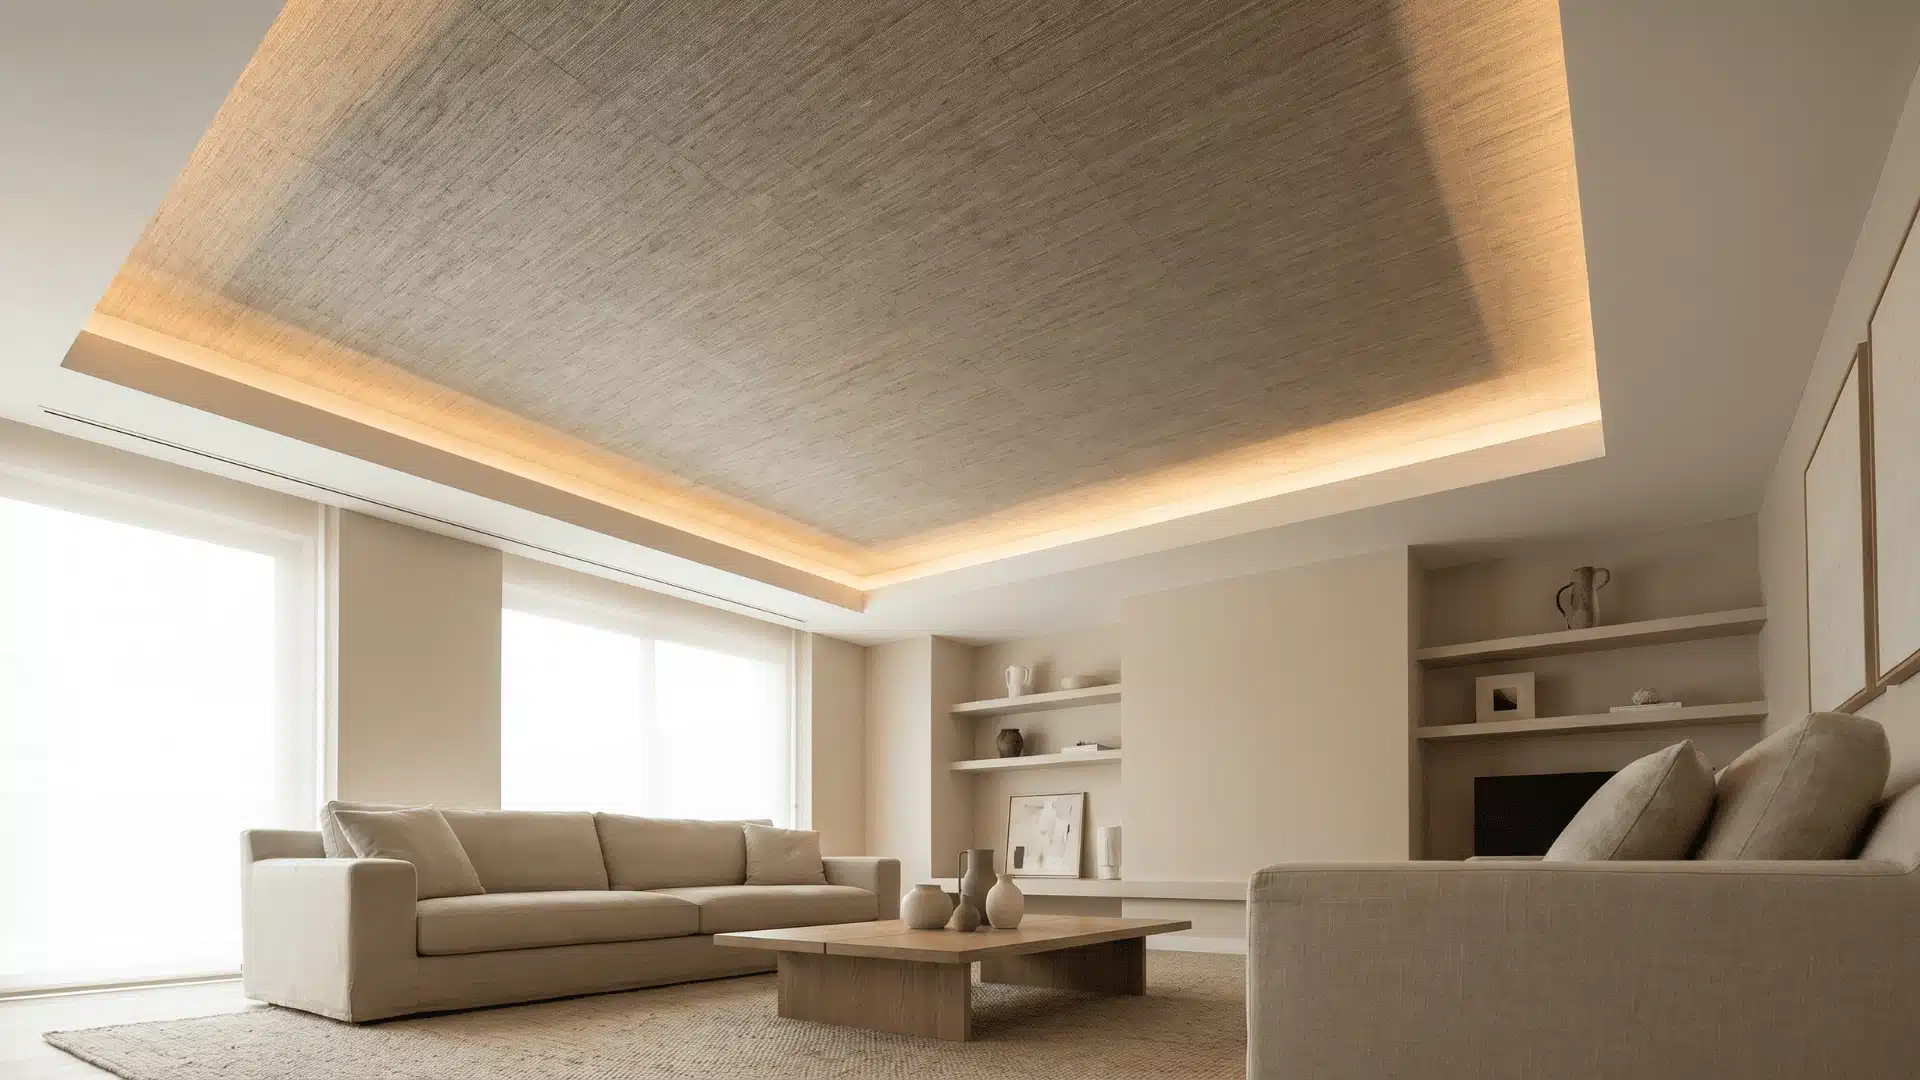
Wallpaper or texture inside the recessed ceiling turns it into a strong visual surface. It stops being just a ceiling and starts feeling like a framed feature above the room.
This only works when you keep it controlled. I’ve seen it fall apart in rooms with low ceilings or already busy walls, where everything starts competing. It only really holds when the rest of the surfaces stay simple and quiet, so your eye knows where to land.
7. Wood Inlay
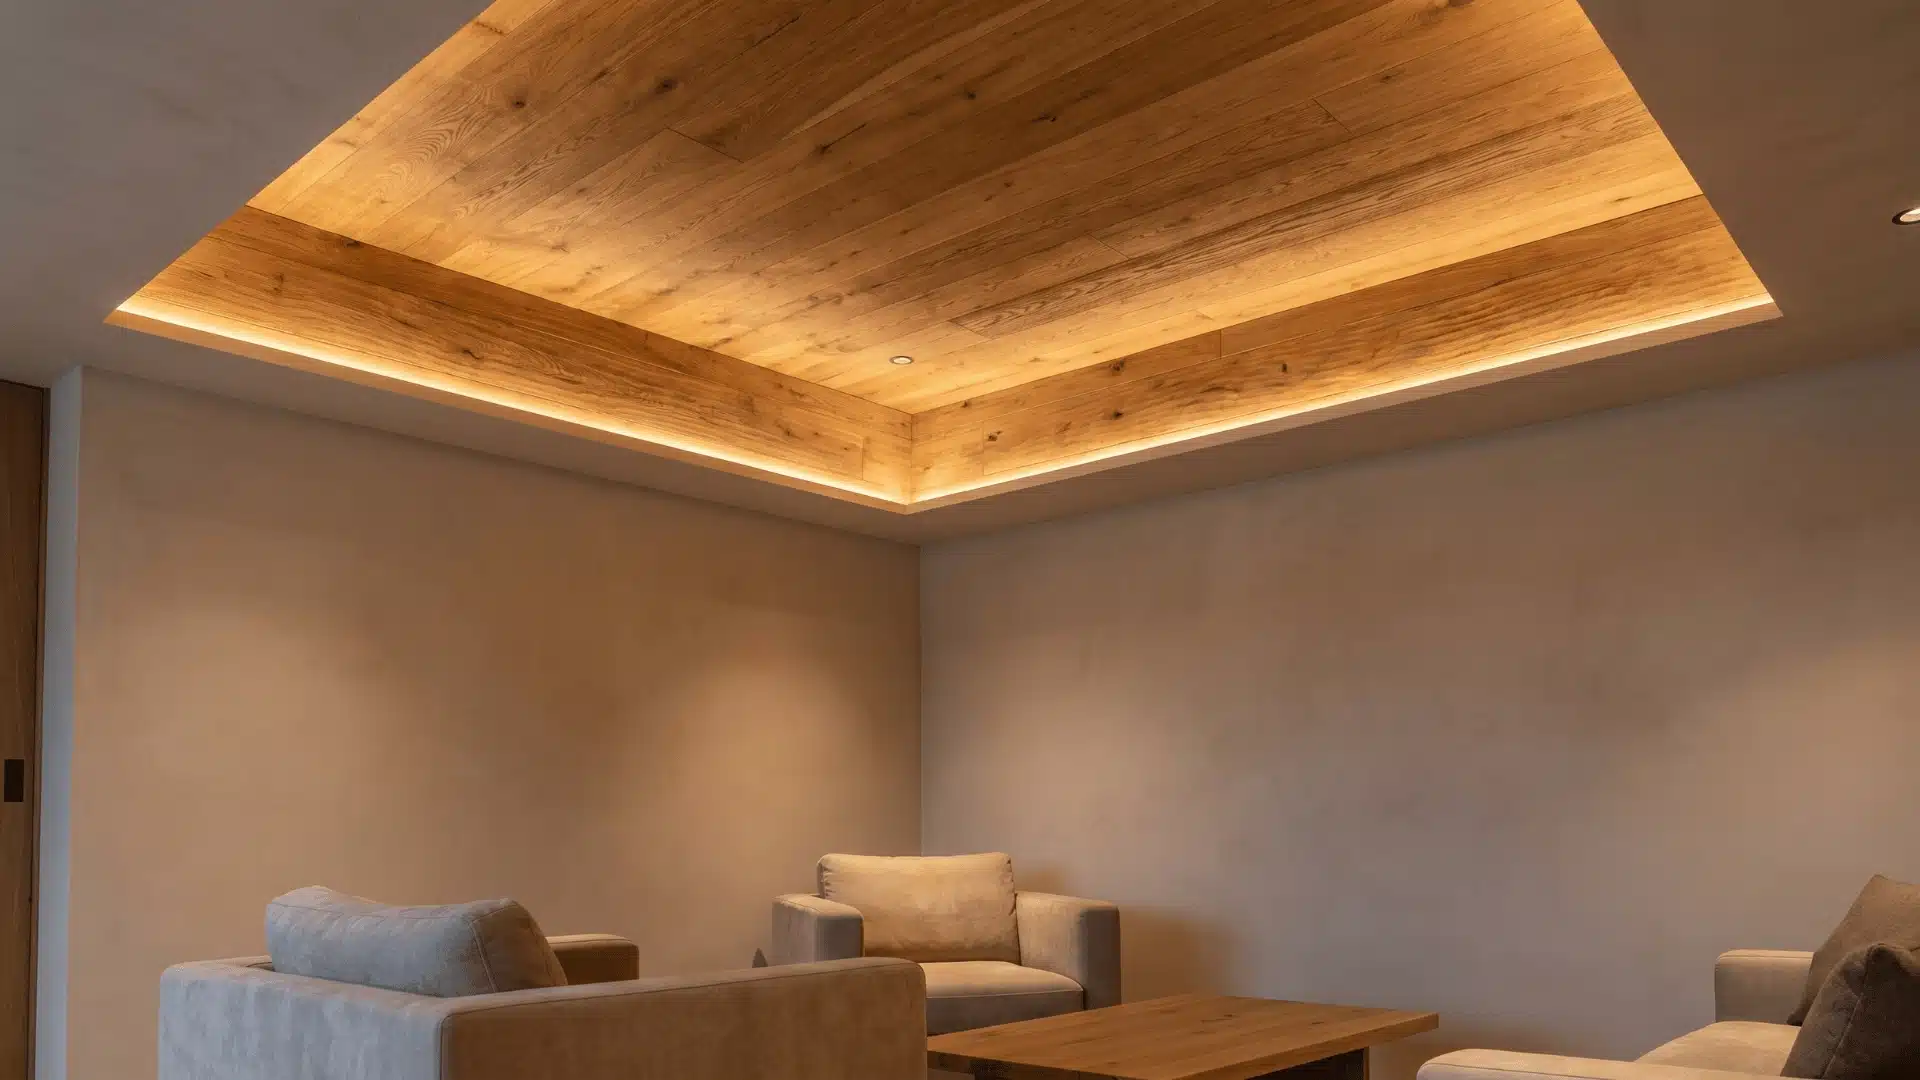
Wood in the recessed field adds strong contrast through material alone, with planks, slats, or paneling defining the tray. It quickly becomes a dominant design feature.
It must align with the room’s overall palette. Warm wood needs careful lighting and balanced surroundings, or it can feel disconnected or overly heavy in cooler interiors.
Additional Tray Ceiling Variations Worth Knowing
Beyond the core tray ceiling setups already covered, there are more specialized variations that shift how space, rhythm, and perception behave overhead.
These are less about basic structure and more about subtle spatial manipulation, control of proportion, and visual direction.
Asymmetry and Direction-Based Designs
These tray ceiling types move away from strict symmetry. They use tilt, angles, and directional cuts to introduce controlled movement across the ceiling plane, changing how the room feels without adding extra detail.
8. Slanted Tray Ceiling
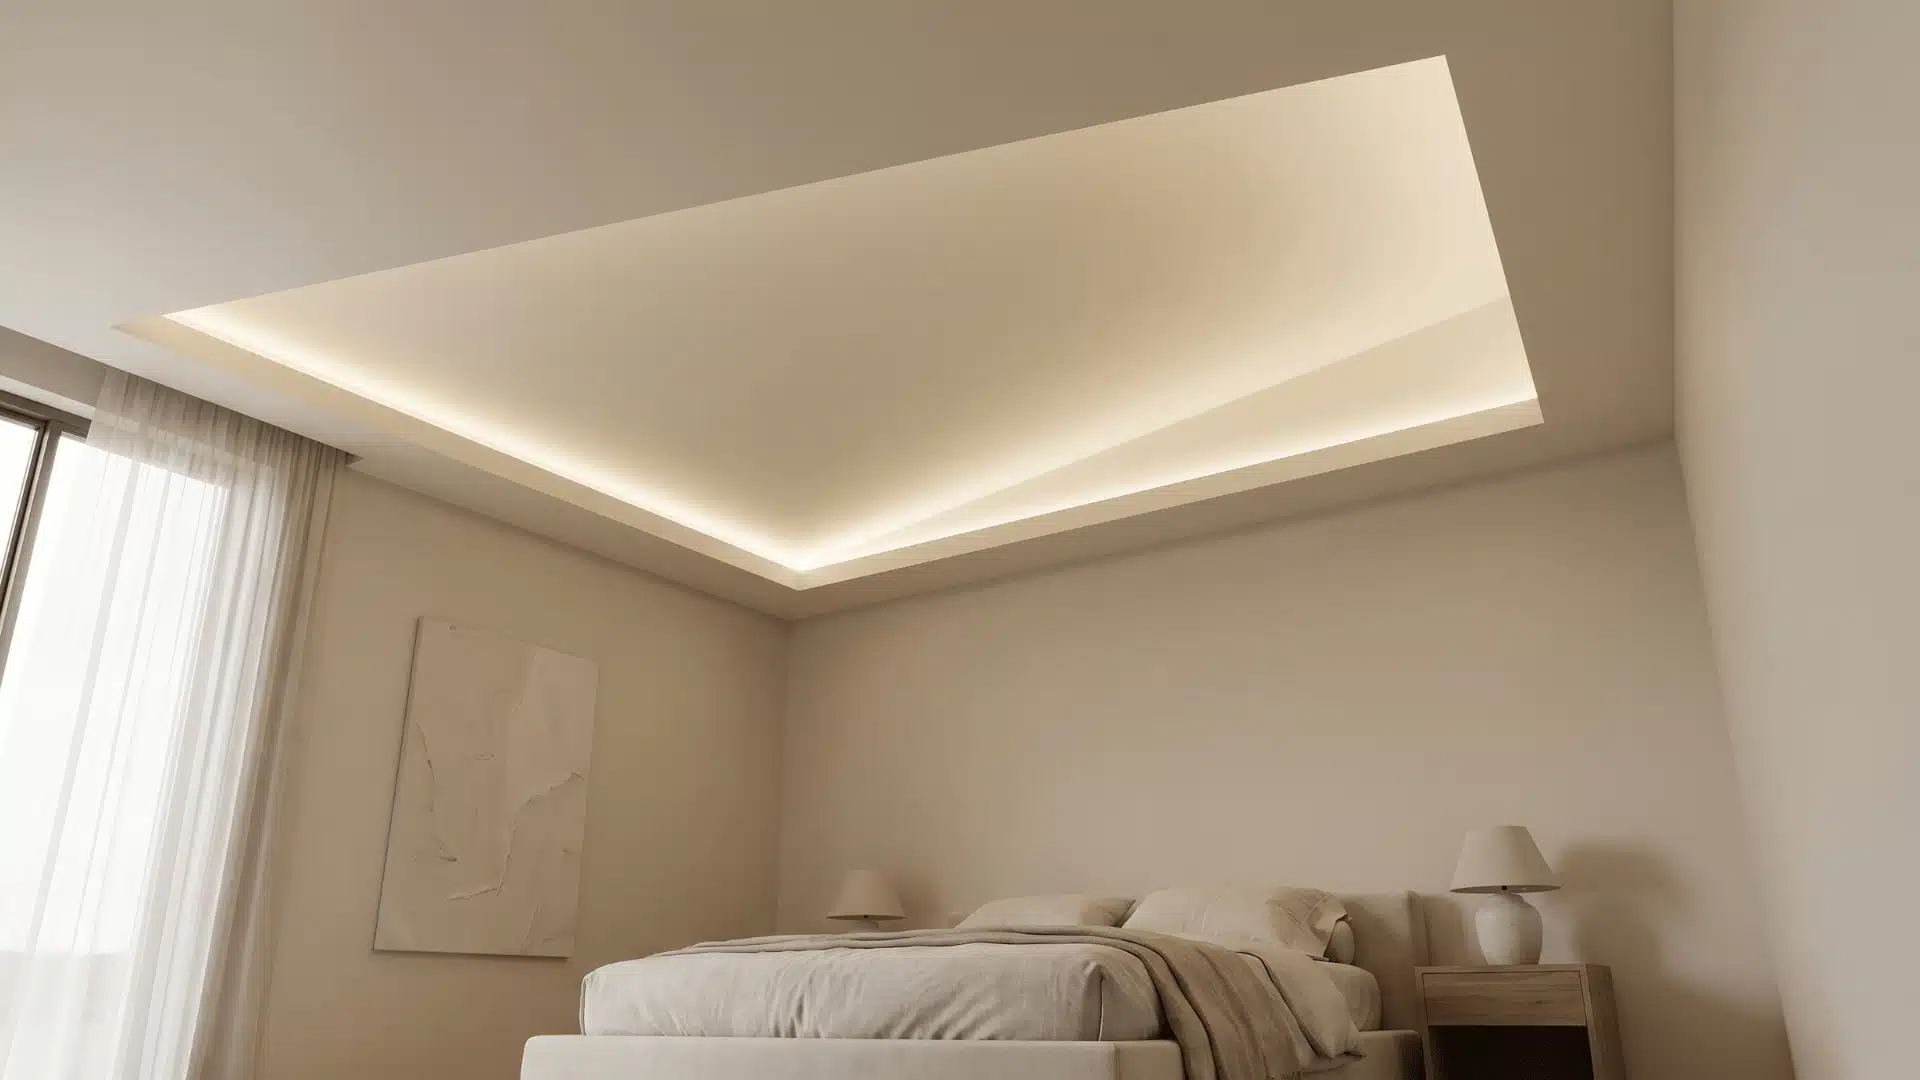
Slanted tray ceilings tilt the recessed field slightly instead of keeping it perfectly horizontal. The angle is subtle but changes how light travels across the surface.
This works in spaces where a static ceiling feels too rigid. It pairs well with directional lighting that follows the slope, creating controlled variation across the surface.
9. Diagonal Split Tray Ceiling
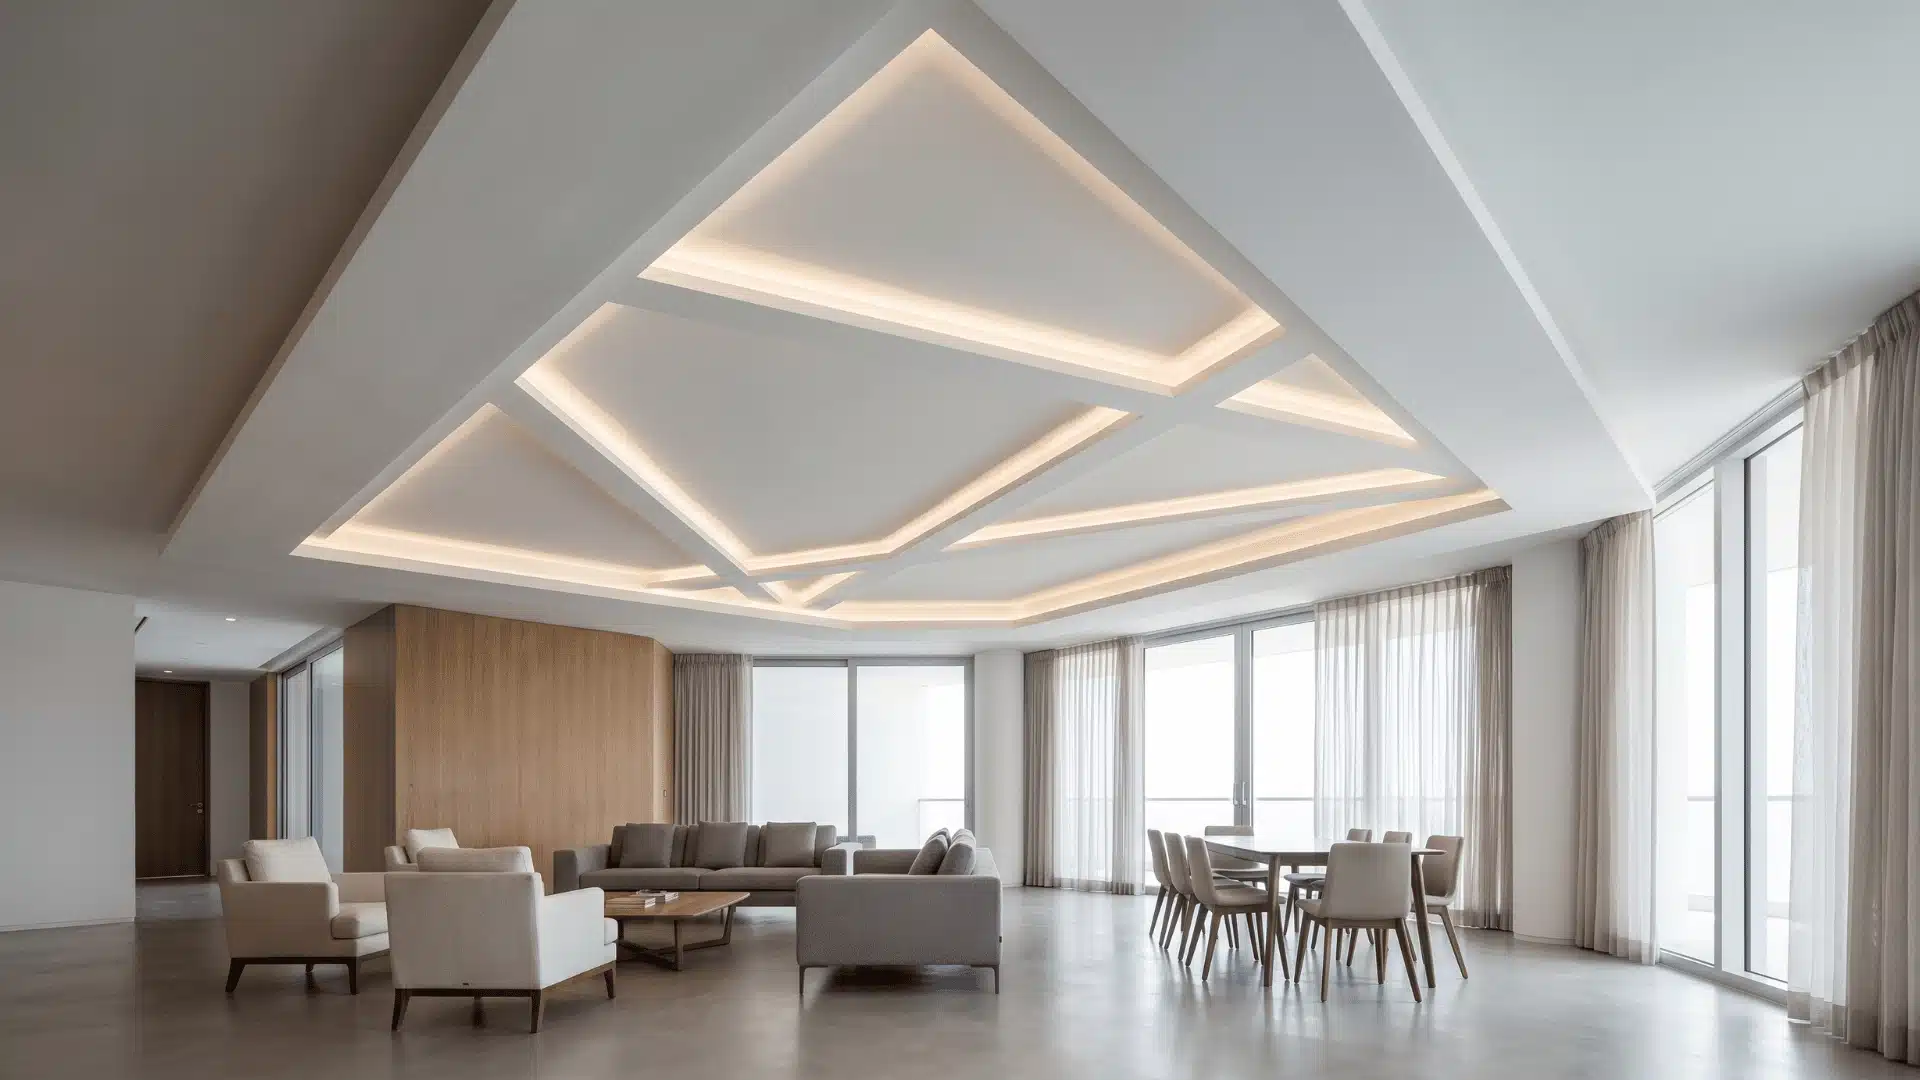
Diagonal split trays break up the recessed ceiling with angled lines instead of straight ones. That shift in direction adds a bit of movement across the surface, so the ceiling doesn’t feel flat or static.
I’ve seen this work best in modern rooms where everything lines up on purpose, like furniture placement or floor patterns.
It needs simple wall finishes, though, because if too many directions start competing, the whole space can feel visually noisy.
Light-Integrated Geometry Variants
These tray ceiling types use lighting as a structural element rather than an add-on. Light defines edges, builds depth, and controls how each plane separates from or blends with the others, replacing traditional trim or ornament.
10. Shadow Gap Tray Ceiling
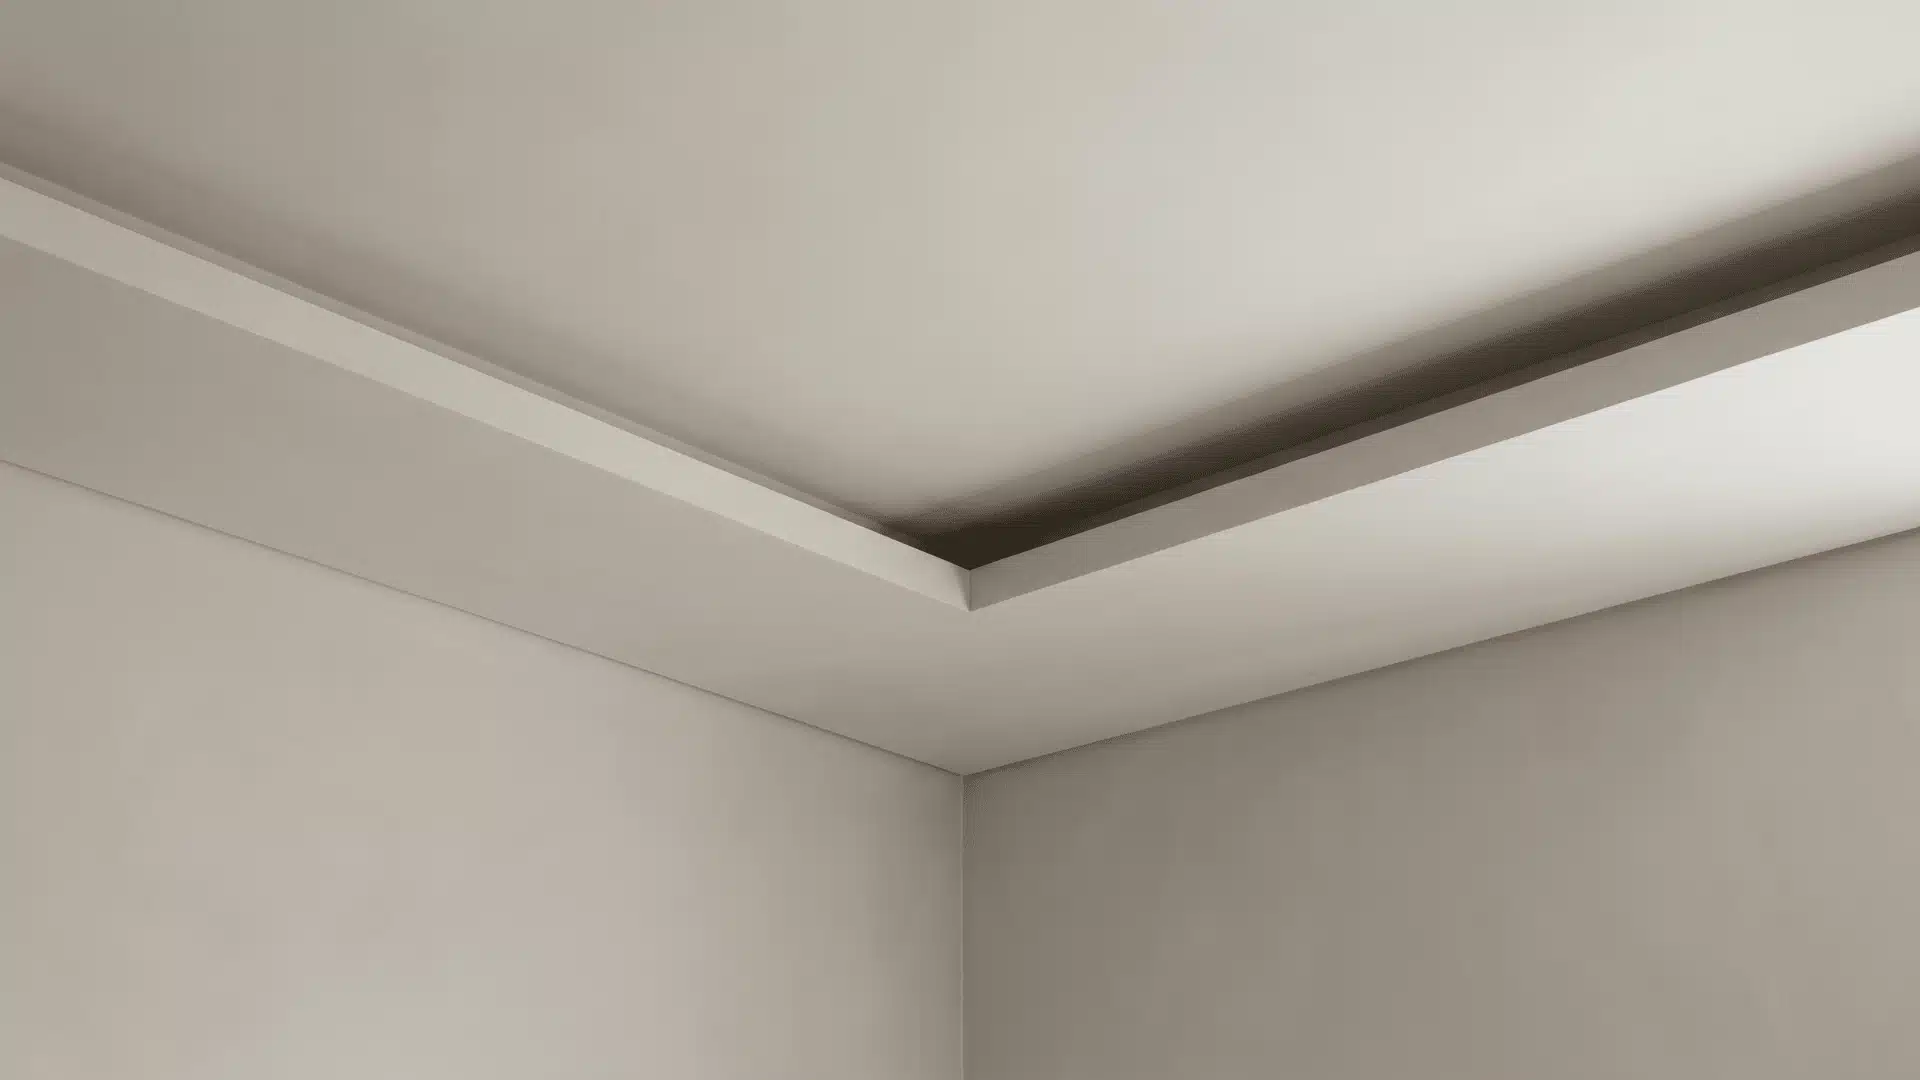
Shadow gap trays use a narrow separation between ceiling planes instead of molding or visible trim. The gap itself becomes the defining edge.
This creates a crisp floating effect without visible lighting. It relies on precision finishing so the shadow line stays consistent and sharp across the room.
11. Backlit Frame Tray Ceiling
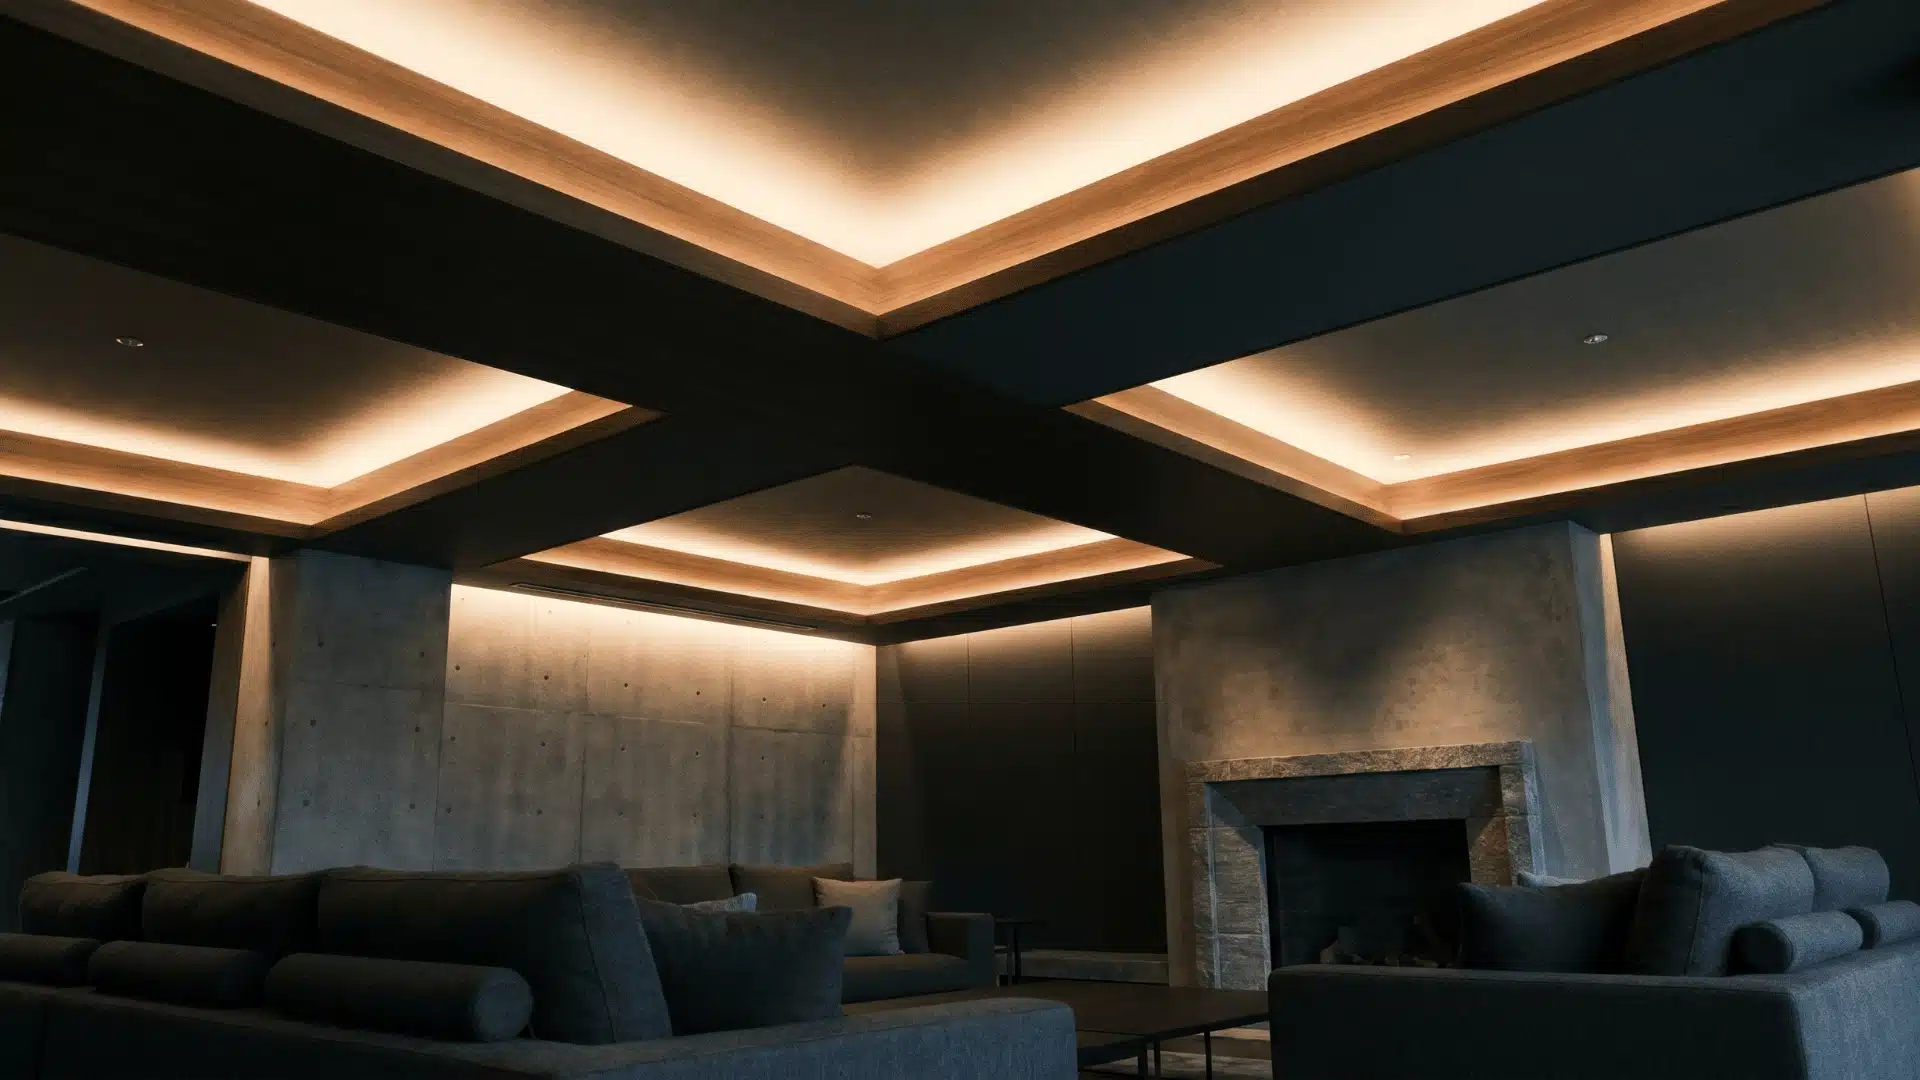
Backlit frame trays place lighting behind the perimeter edge so the glow spills outward from hidden channels. The light defines the geometry instead of paint or trim.
This works well in darker interior schemes where soft edge illumination replaces overhead fixtures and reduces visual weight.
12. Layered Glow Tray Ceiling
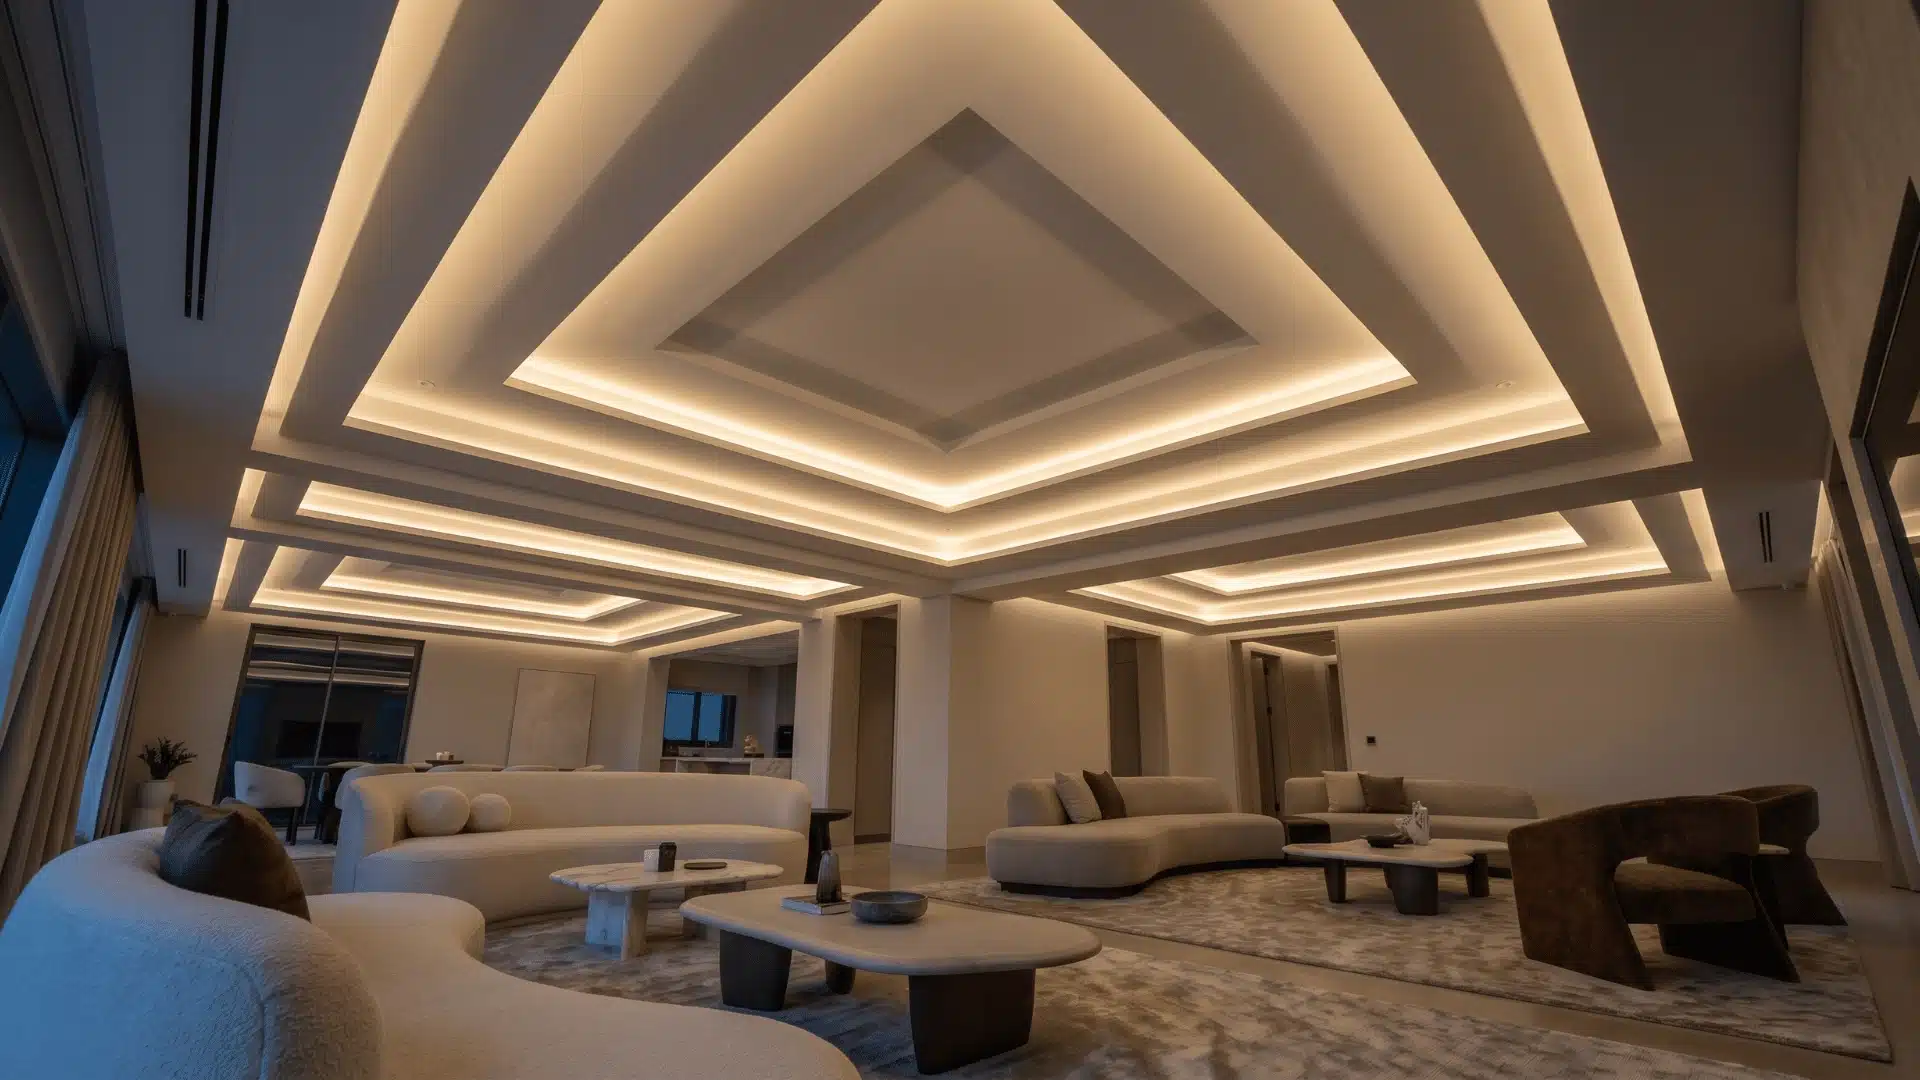
Layered glow trays combine multiple concealed light zones within a single recessed system. Different depths carry different light intensities.
This setup creates controlled gradation across the ceiling rather than a single wash. It needs careful planning so that brightness transitions feel intentional rather than uneven.
Material-Driven Experimental Variants
These tray ceiling types focus on material changes inside the recess rather than structural edits. The shift in surface texture or reflectivity changes how light interacts with the ceiling and how visually active the space feels.
13. Plaster Sculpted Tray Ceiling
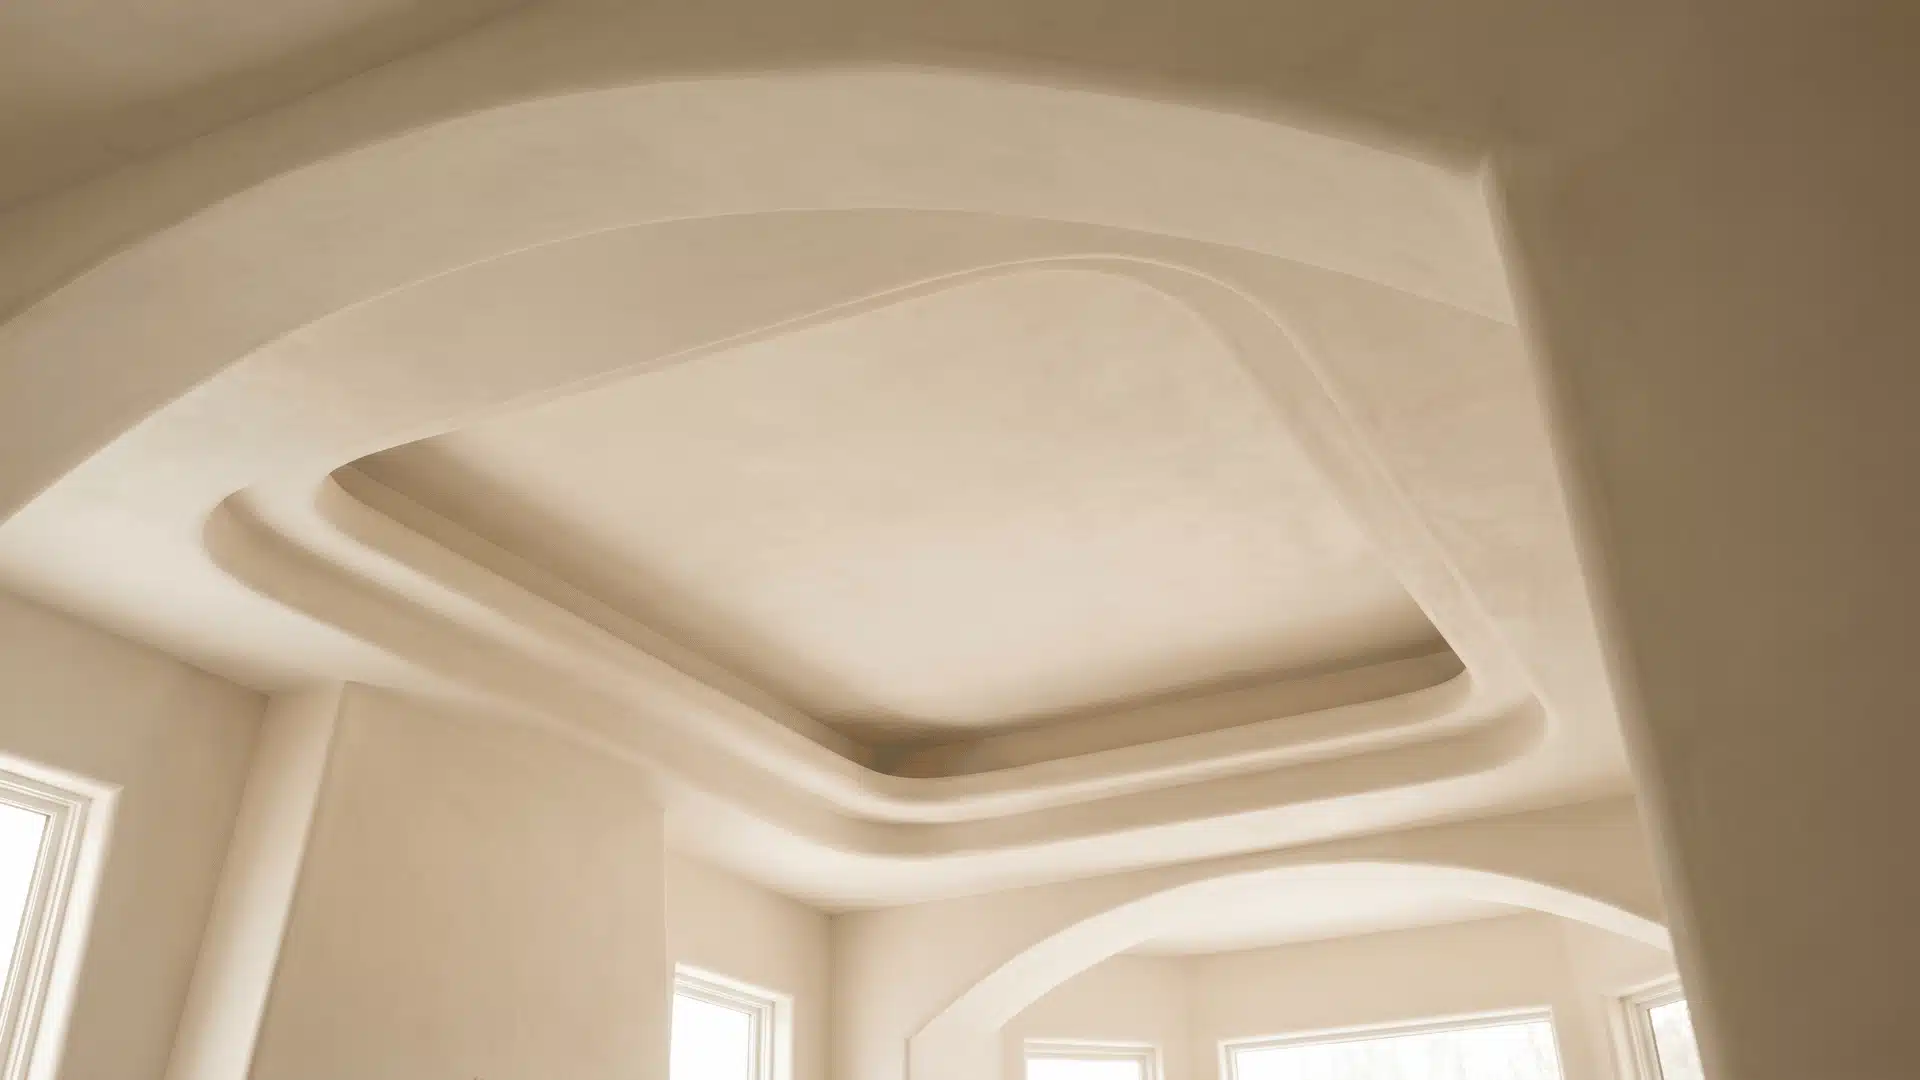
Plaster-sculpted trays use hand-shaped or molded plaster within the recessed field rather than flat surfaces. Subtle curvature replaces strict geometry.
This approach softens light behavior across the ceiling. It works best in quiet interiors where surface detail is meant to be felt more than immediately noticed.
14. Metallic Panel Tray Ceiling
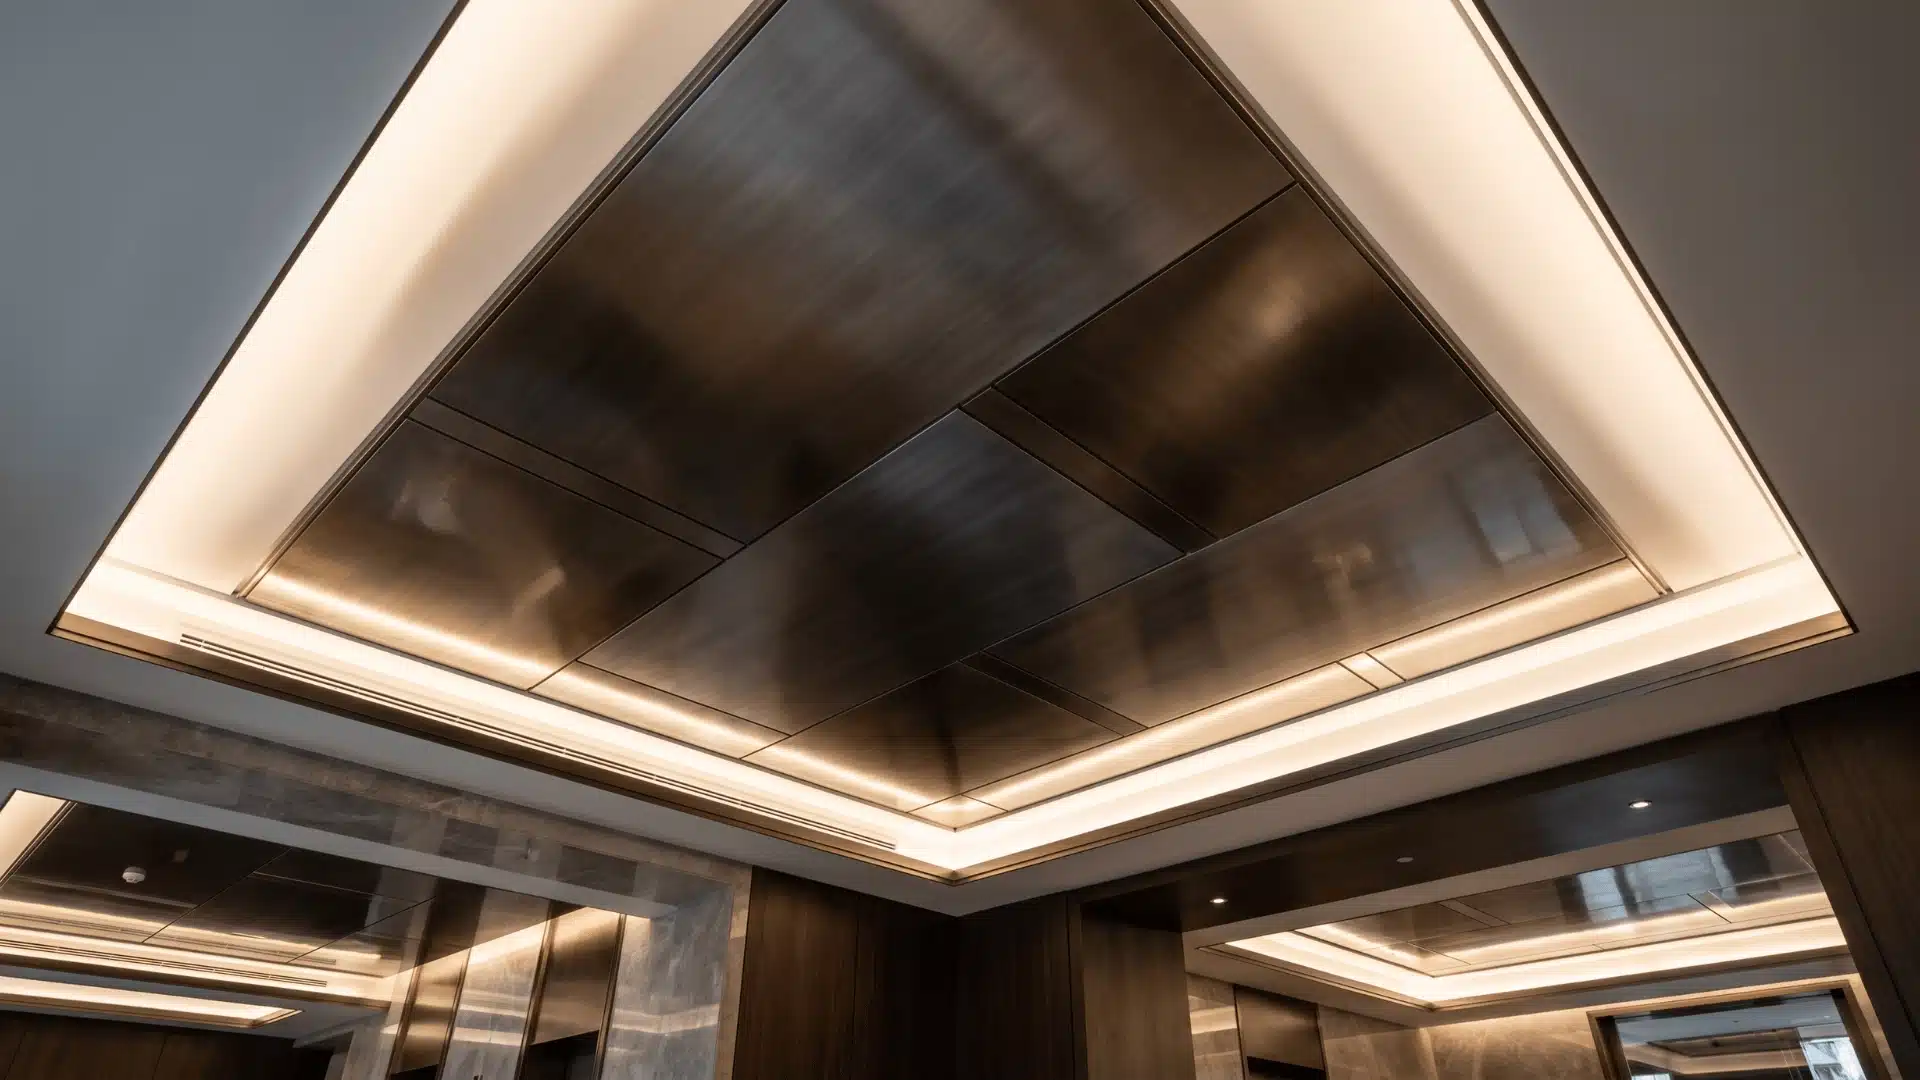
Metallic panel trays introduce reflective or semi-reflective materials into the recessed field. The ceiling reacts to light rather than absorbing it.
This can make smaller rooms feel more active visually. It requires careful lighting control to avoid glare or excessive reflection.
Spatial Illusion Variants
These tray ceiling types rely on visual tricks rather than physical changes in depth. They manipulate proportion, edge alignment, and contrast to create the perception of deeper or more elevated ceiling space.
15. Extended Depth Tray Ceiling
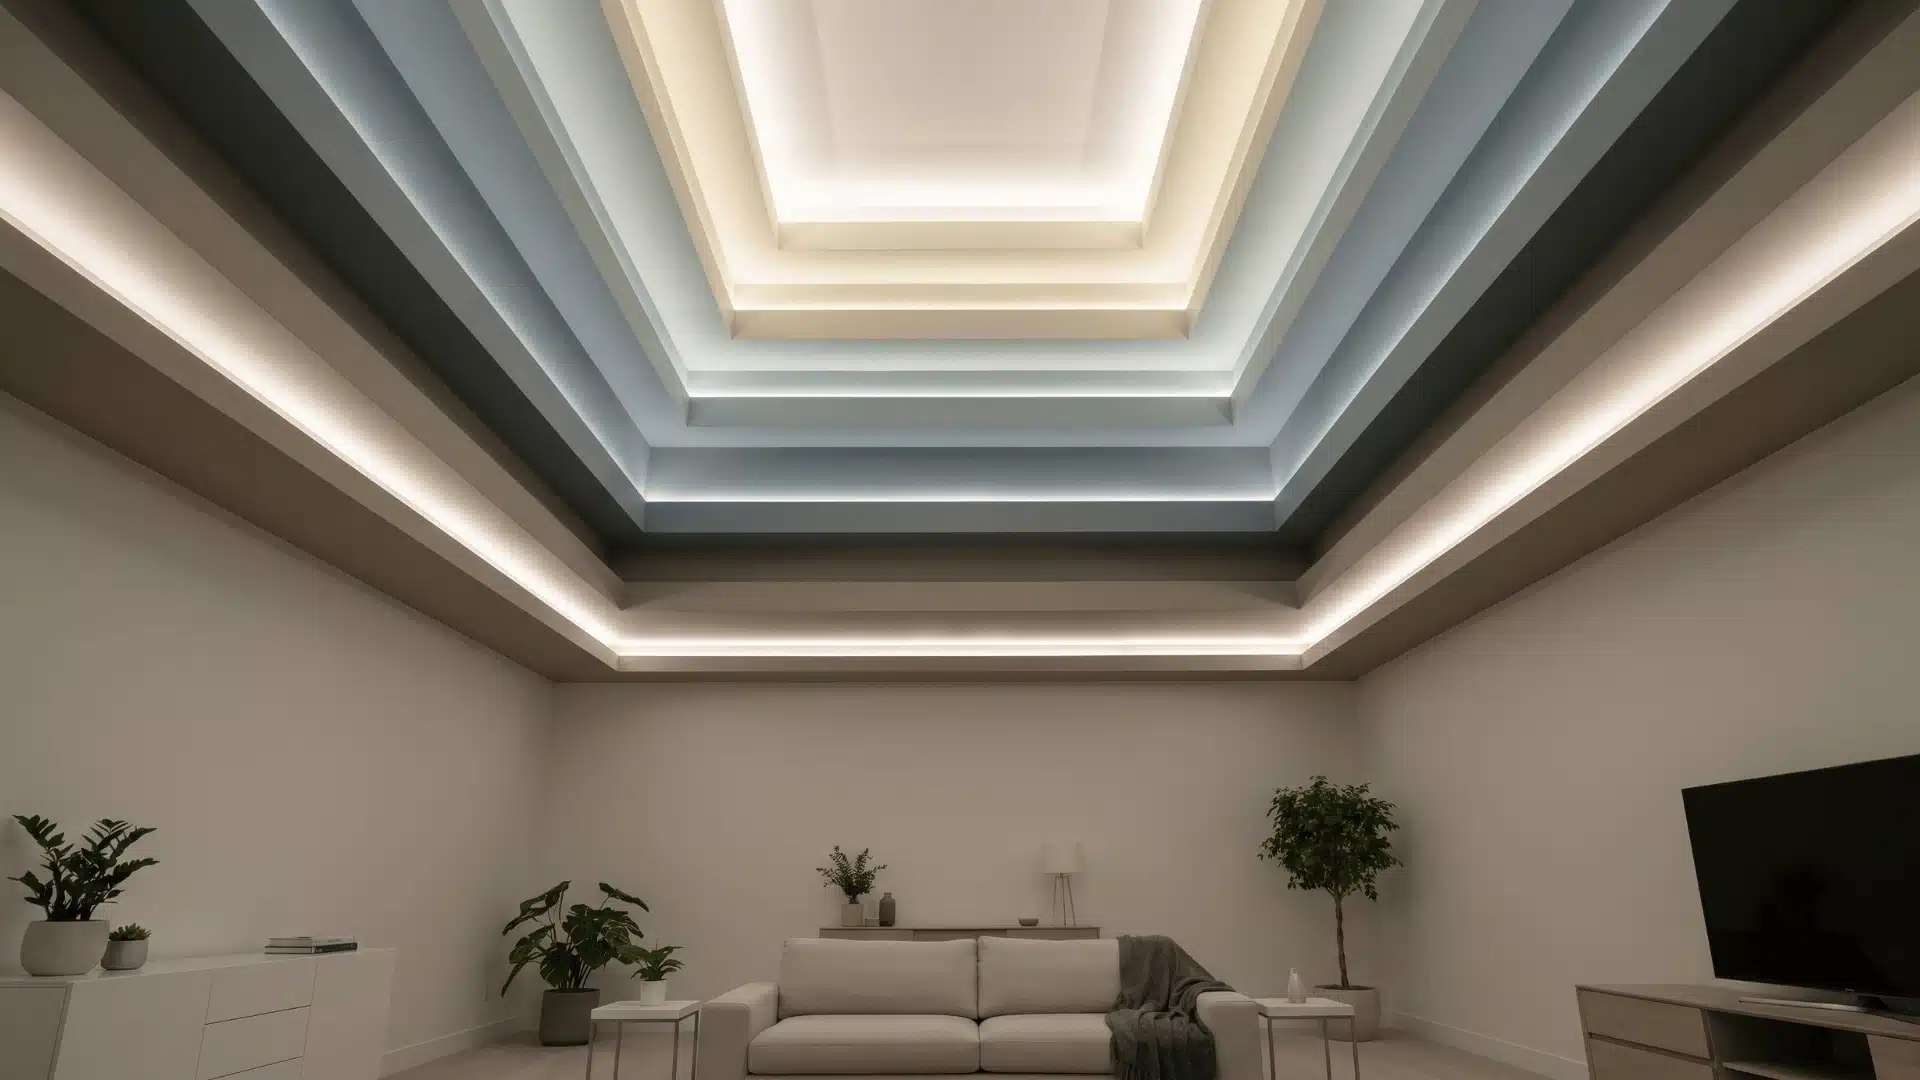
Extended depth trays exaggerate the recessed illusion by visually stretching the step proportions through proportion manipulation rather than actual structural depth.
This creates a stronger sense of elevation without major construction changes. It relies heavily on paint transitions and edge precision.
16. Illusion Edge Tray Ceiling
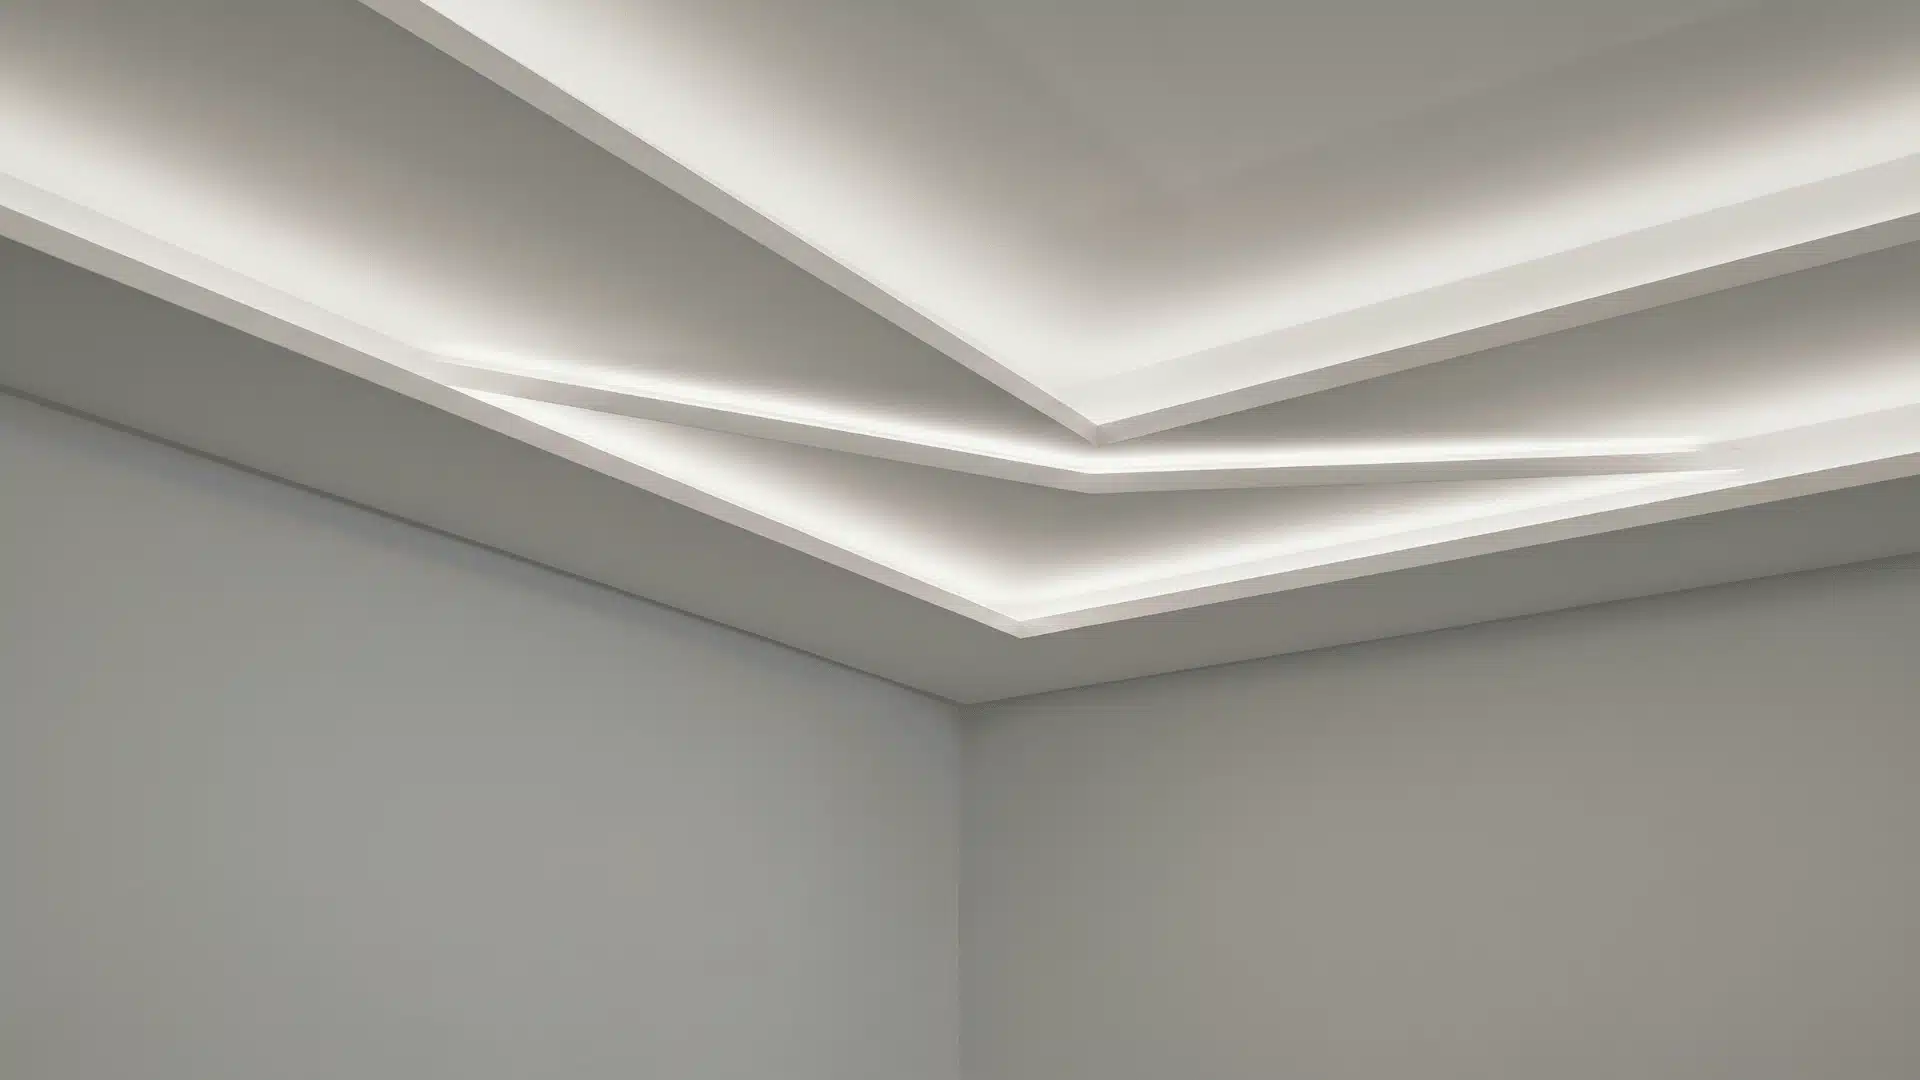
Illusion edge trays use optical separation techniques where edges are visually offset to appear deeper than they physically are.
This works best in minimal interiors where subtle visual tricks can enhance depth perception without additional structural complexity.
Light Behavior Control Variants
These tray ceiling types focus on controlling how light behaves inside the recess. Instead of even illumination, they use directional shifts, intensity changes, and diffusion to shape mood, focus, and spatial perception.
17. Directional Wash Tray Ceiling
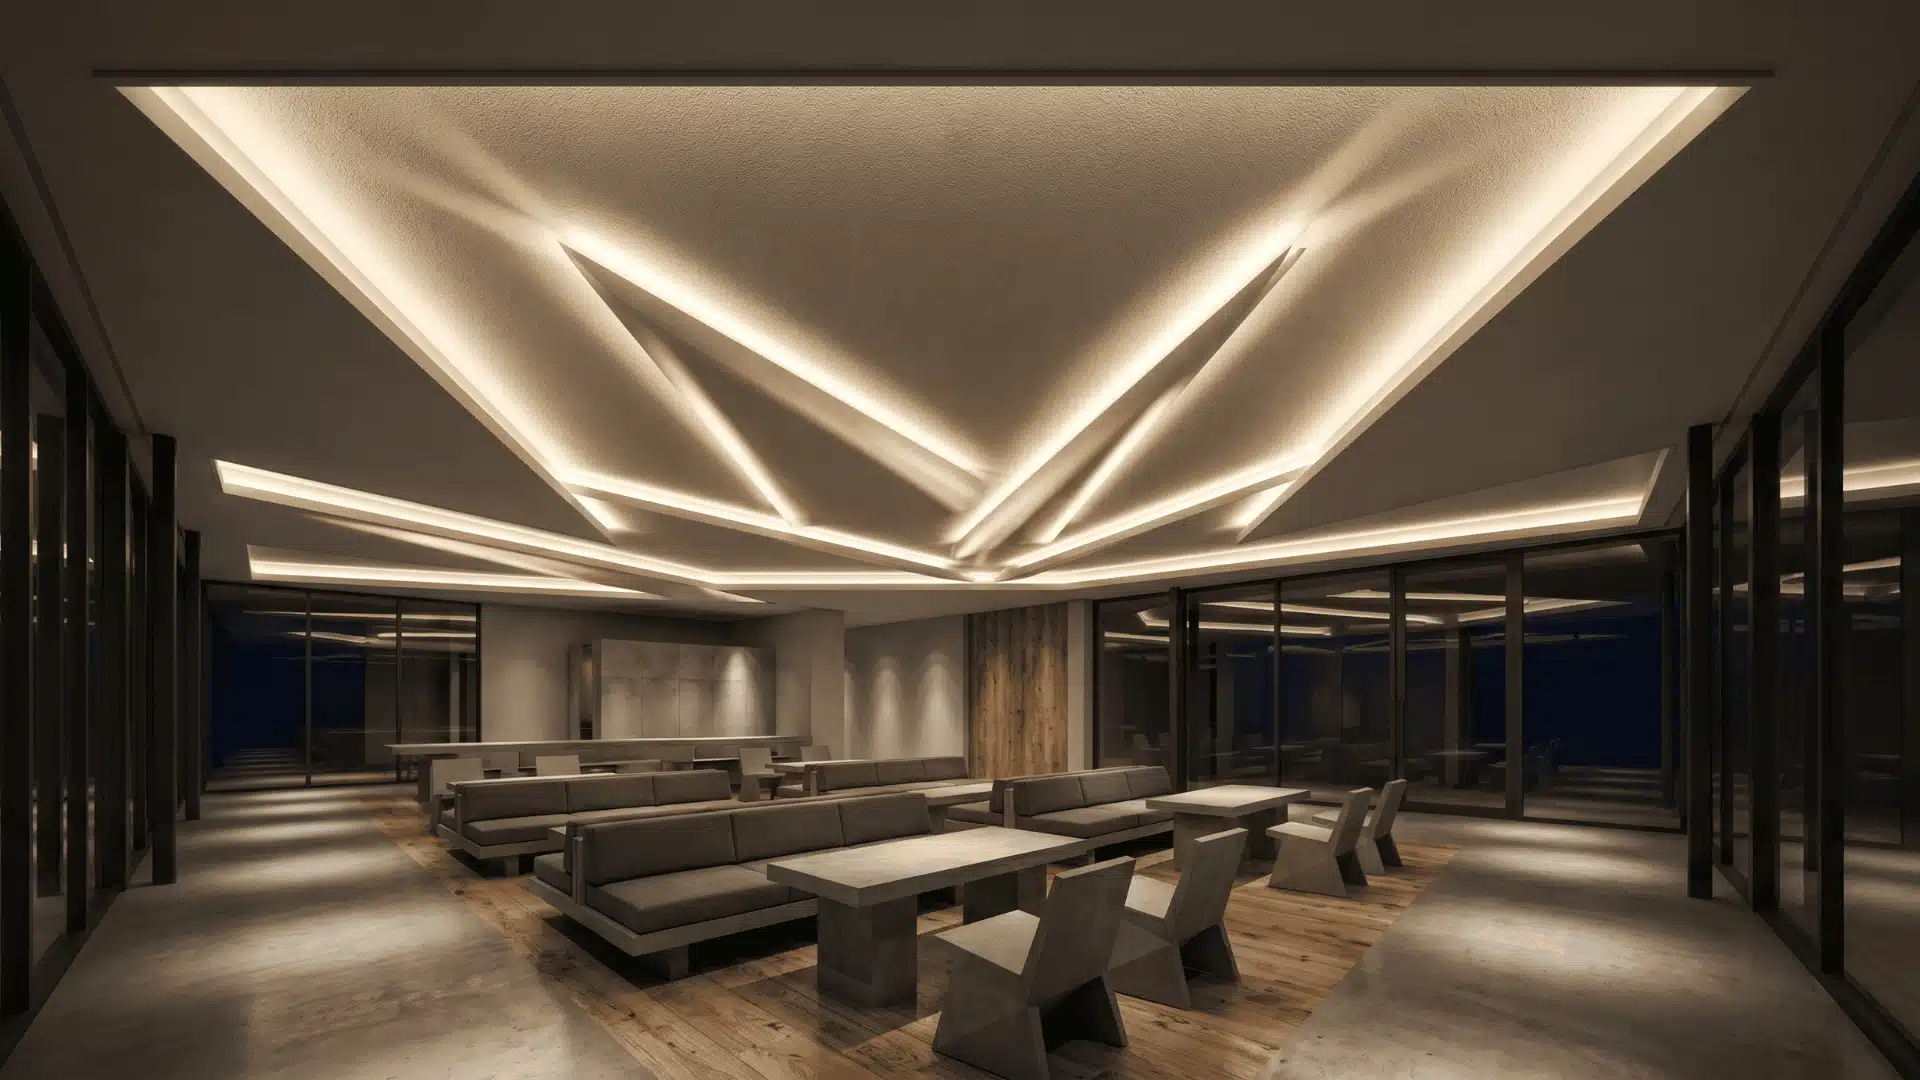
Directional wash trays use angled lighting to push light toward one side of the recessed ceiling instead of spreading it evenly across.
In practice, it creates a visible shift in brightness that pulls your eye along the room or follows the direction the space is built in.
18. Soft Fade Tray Ceiling
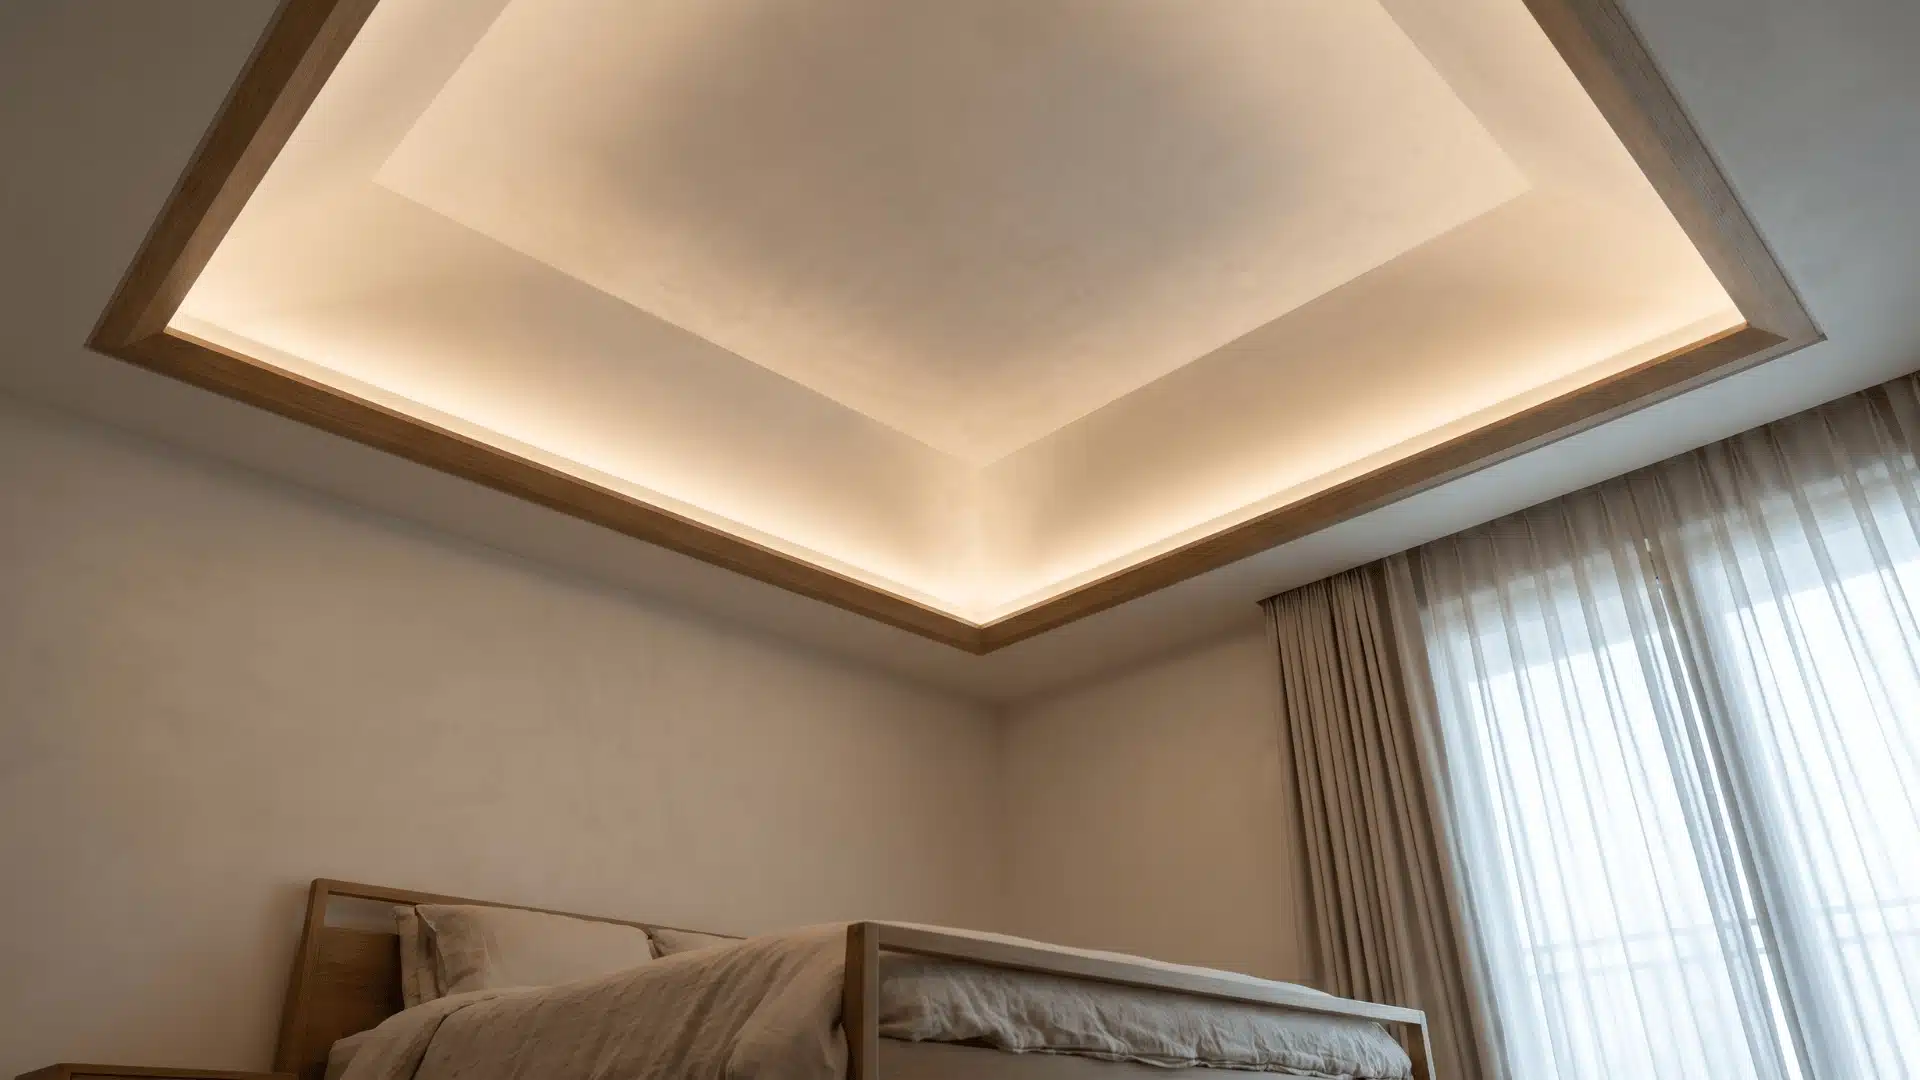
Soft fade trays gradually reduce light intensity across the recessed field instead of maintaining uniform brightness.
The effect creates a slow visual transition across the ceiling surface. It depends on diffused lighting systems and careful calibration of output levels.
Architectural Integration Variants
These tray ceiling types connect the ceiling design directly with surrounding architecture. Rather than being an isolated feature, the recess interacts with walls and structural elements to create a more continuous spatial relationship.
19. Wall-Merge Tray Ceiling
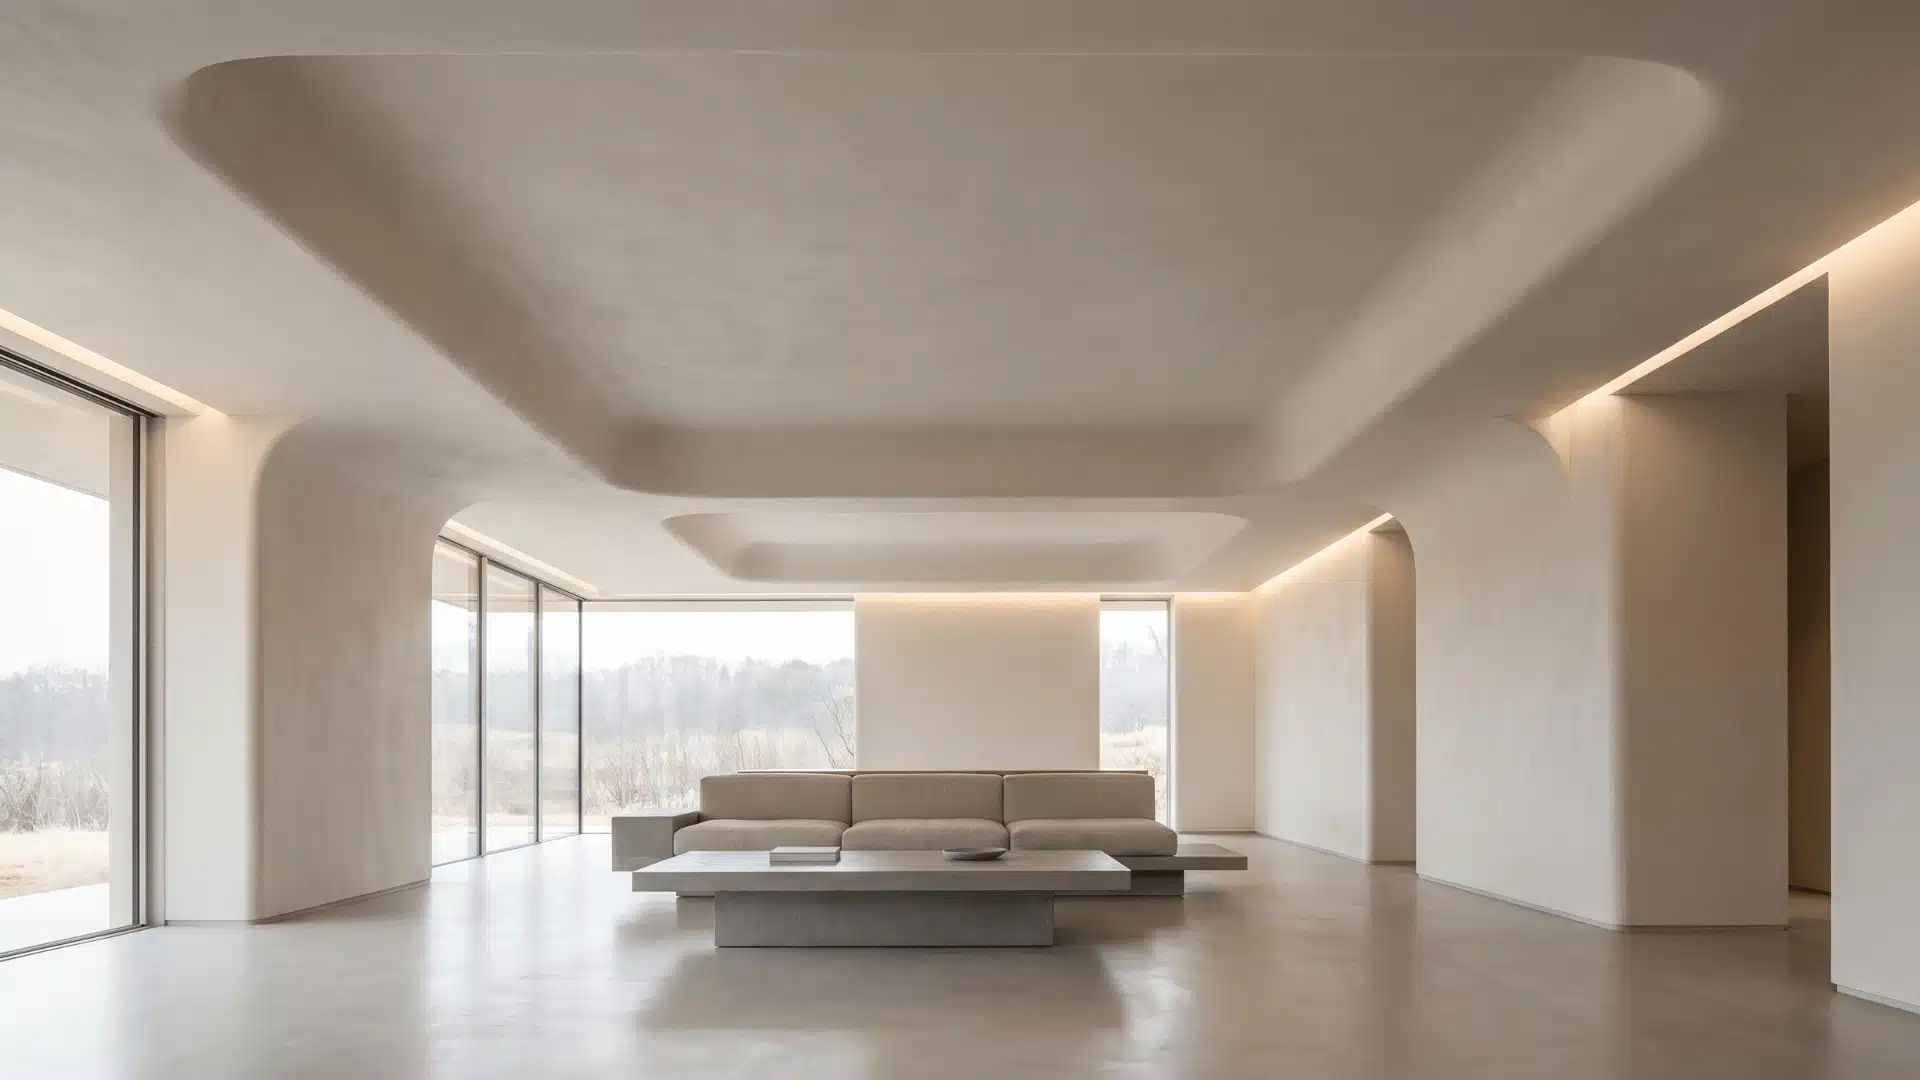
Wall-merge trays visually extend the ceiling recess into upper wall sections, blurring the boundary between vertical and horizontal planes.
This creates a continuous architectural flow that reduces hard separation lines. It works best in minimalist interiors with controlled detailing.
20. Column-Integrated Tray Ceiling
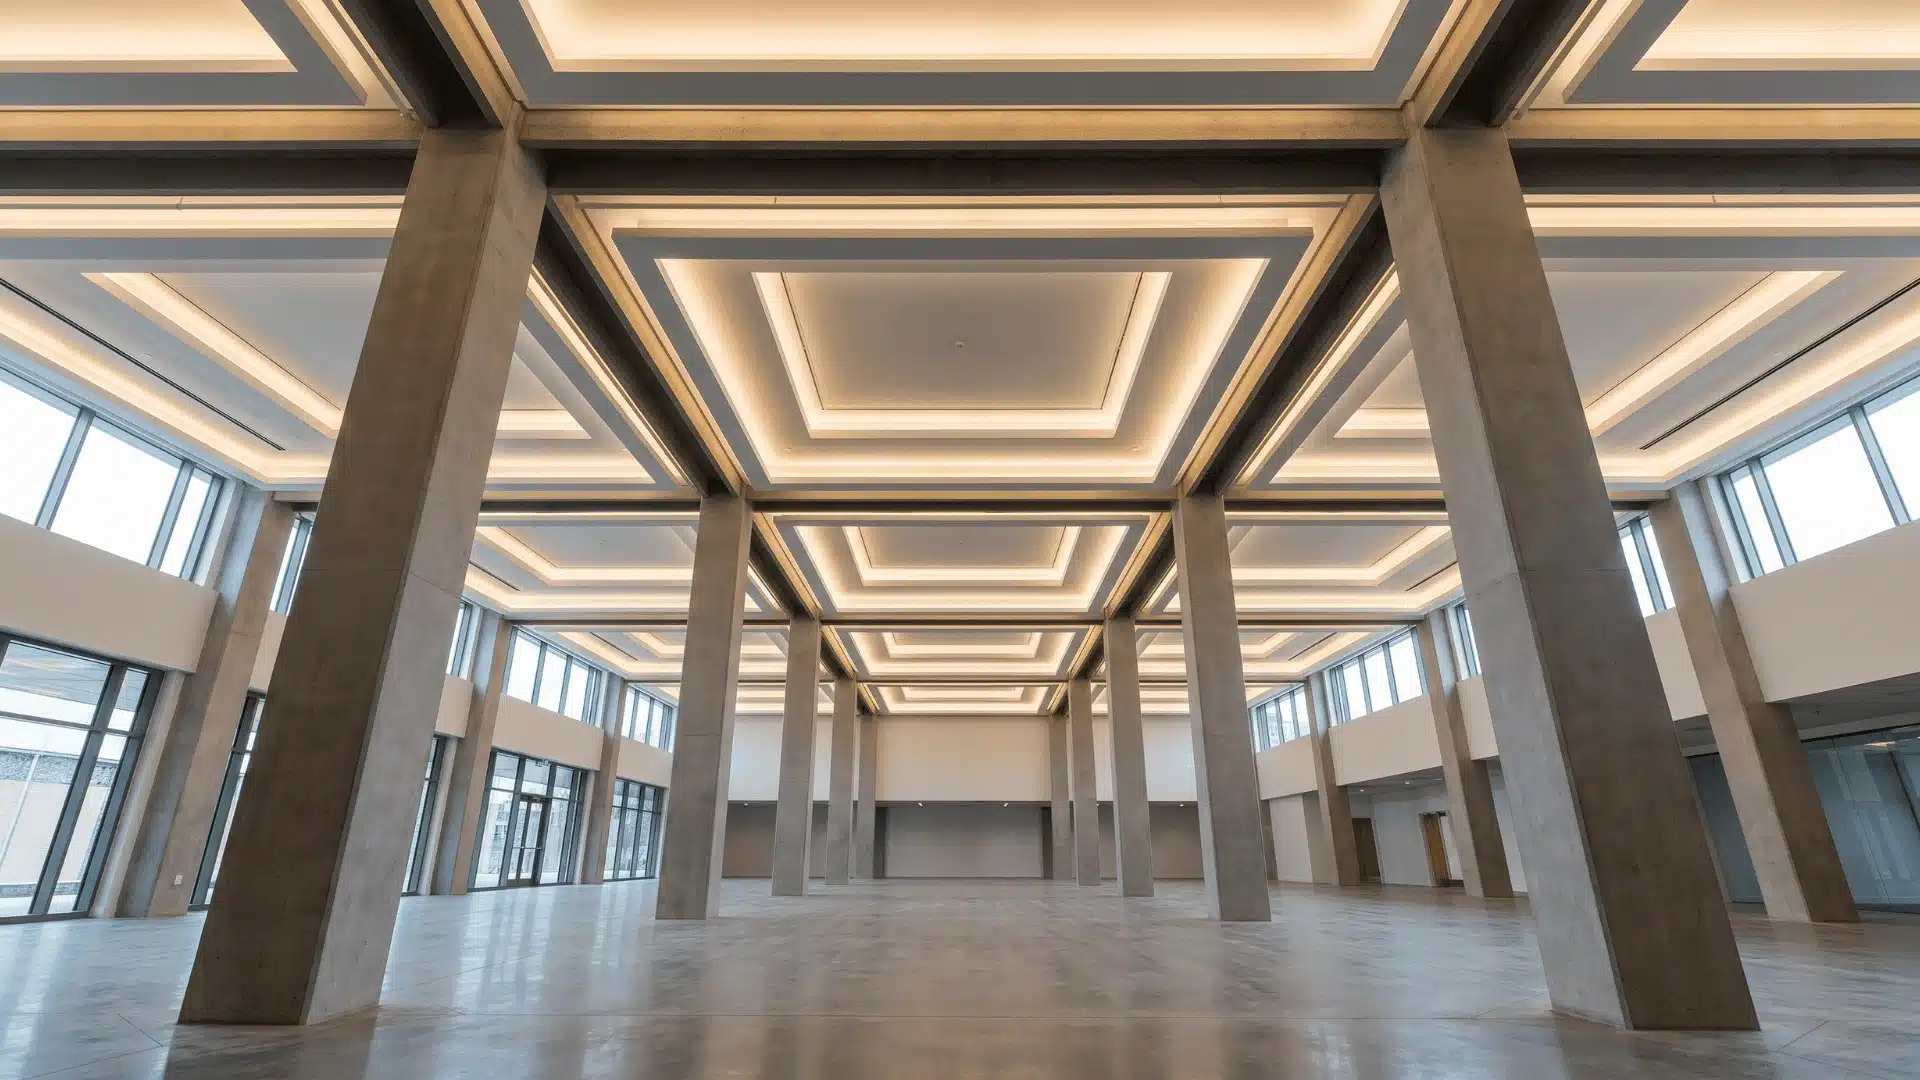
Column-integrated trays connect ceiling recesses directly to vertical structural elements such as columns or pilasters.
This ties overhead design into the room’s structural rhythm. It reinforces alignment and creates a more grounded architectural reading.
Edge-Driven Tray Ceiling Types
These tray ceiling variations focus on how the perimeter is defined. Instead of relying on molding or decoration, the emphasis is on edge precision, spacing, and shadow control to create separation between planes.
21. Frameless Edge Tray Ceiling
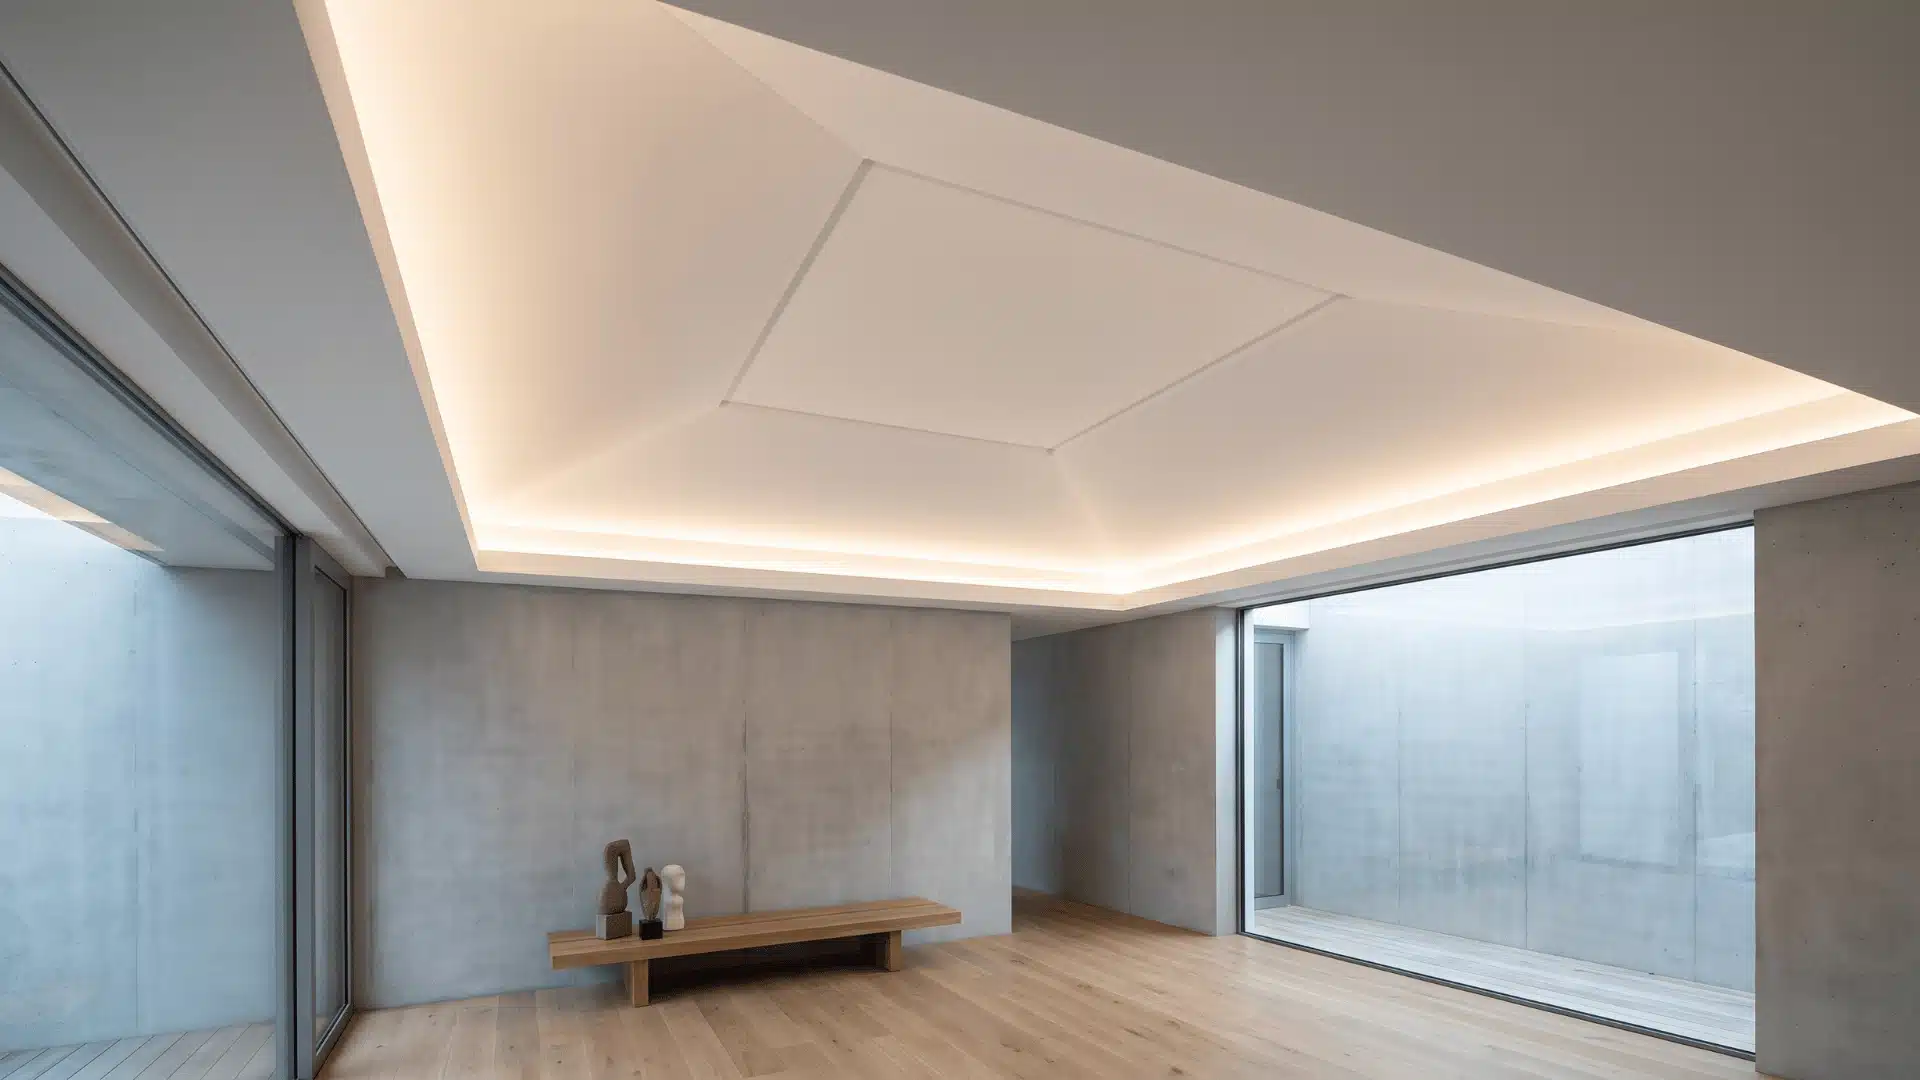
Frameless edge trays remove visible trim entirely, relying on sharp junctions between planes. The result is a clean break that feels almost carved.
It demands precise finishing because any imperfection becomes visible. The absence of molding makes paint alignment and shadow control the primary design tools.
22. Recessed Reveal Edge Tray Ceiling
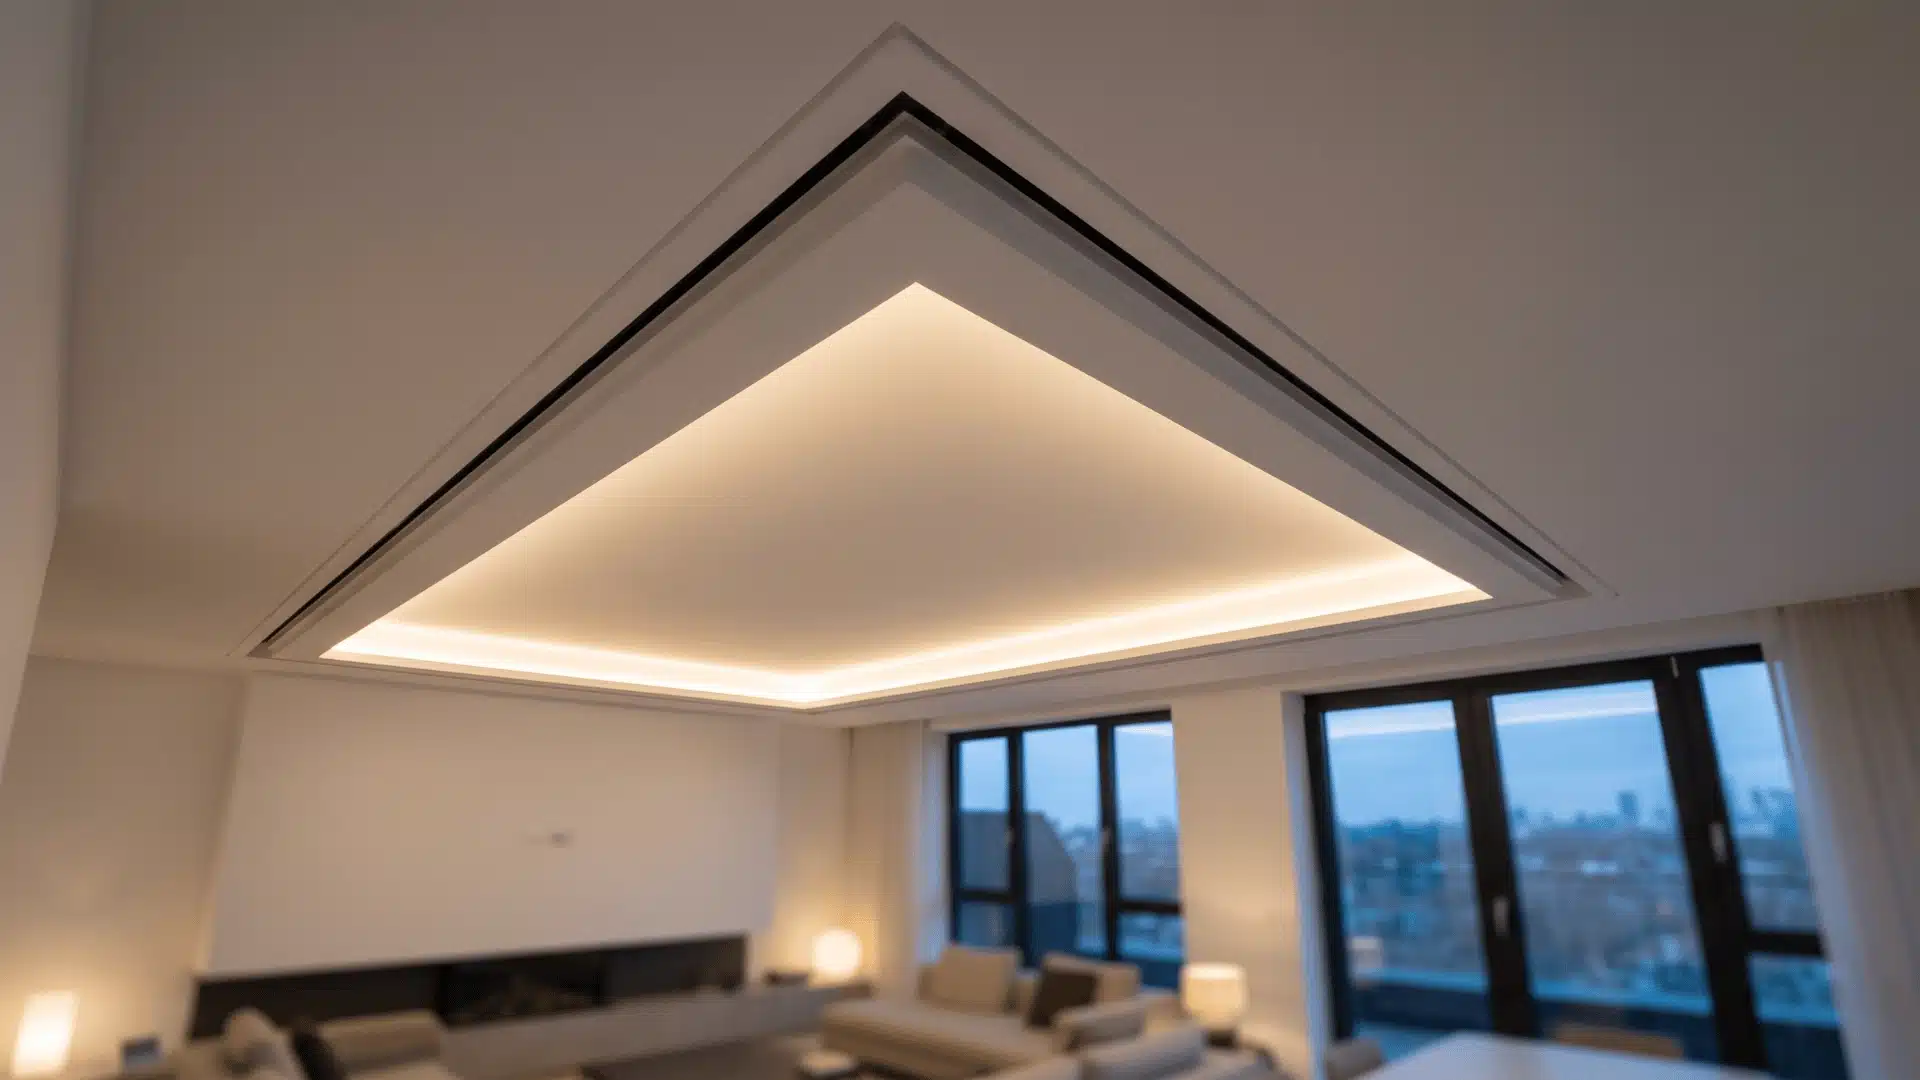
Recessed reveal trays introduce a deliberate gap line between ceiling layers, creating a shadow channel around the perimeter.
This thin reveal becomes the defining feature. It adds separation without physical trim, relying on controlled spacing to maintain a consistent visual outline.
Light Behavior Variants
These tray ceiling types focus on how light moves across the recessed surface rather than where fixtures are placed.
The goal is to control intensity, direction, and edge definition through lighting behavior instead of structural changes.
23. Gradient Illumination Tray Ceiling
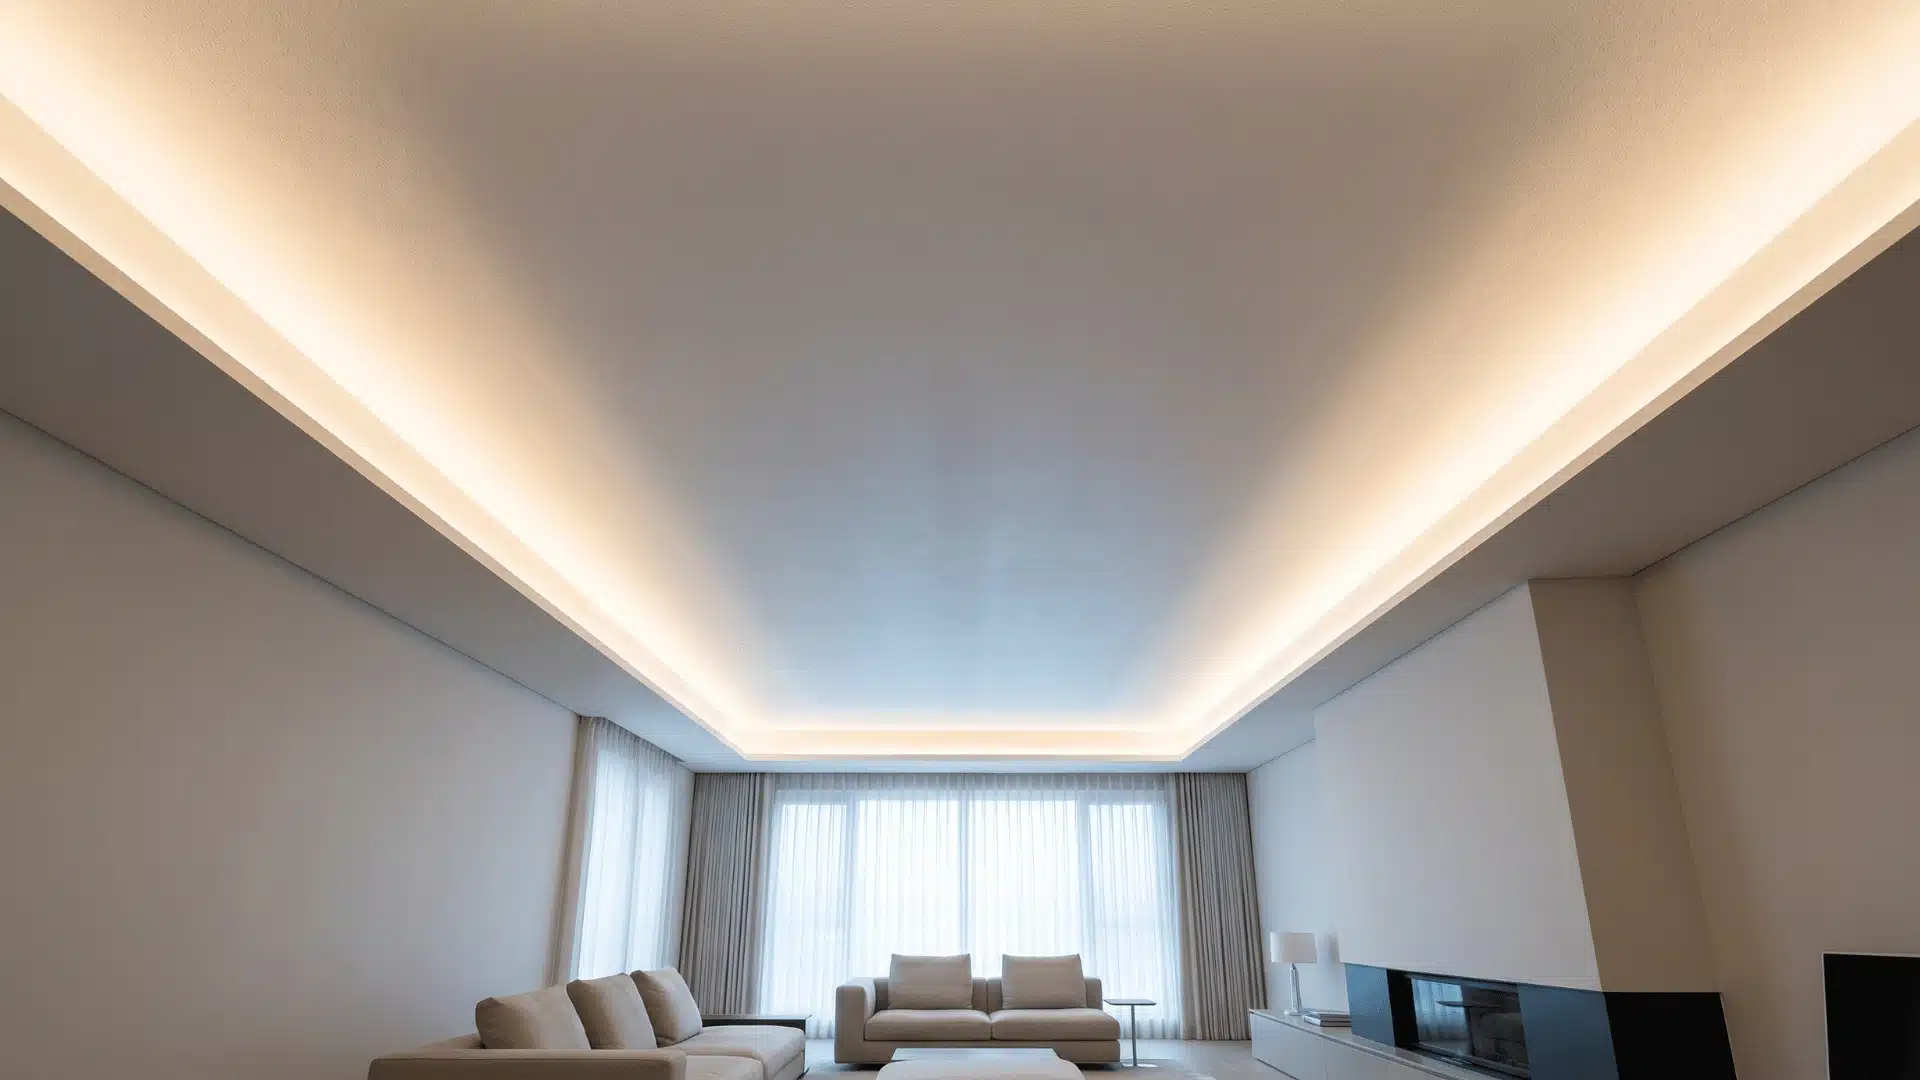
Gradient illumination trays vary light intensity across the recessed field rather than keeping it uniform. The brightness fades across direction or depth.
This creates movement without structural change. It requires calibrated lighting systems to avoid uneven patches or unintended hotspots.
24. Edge Spot Wash Tray Ceiling
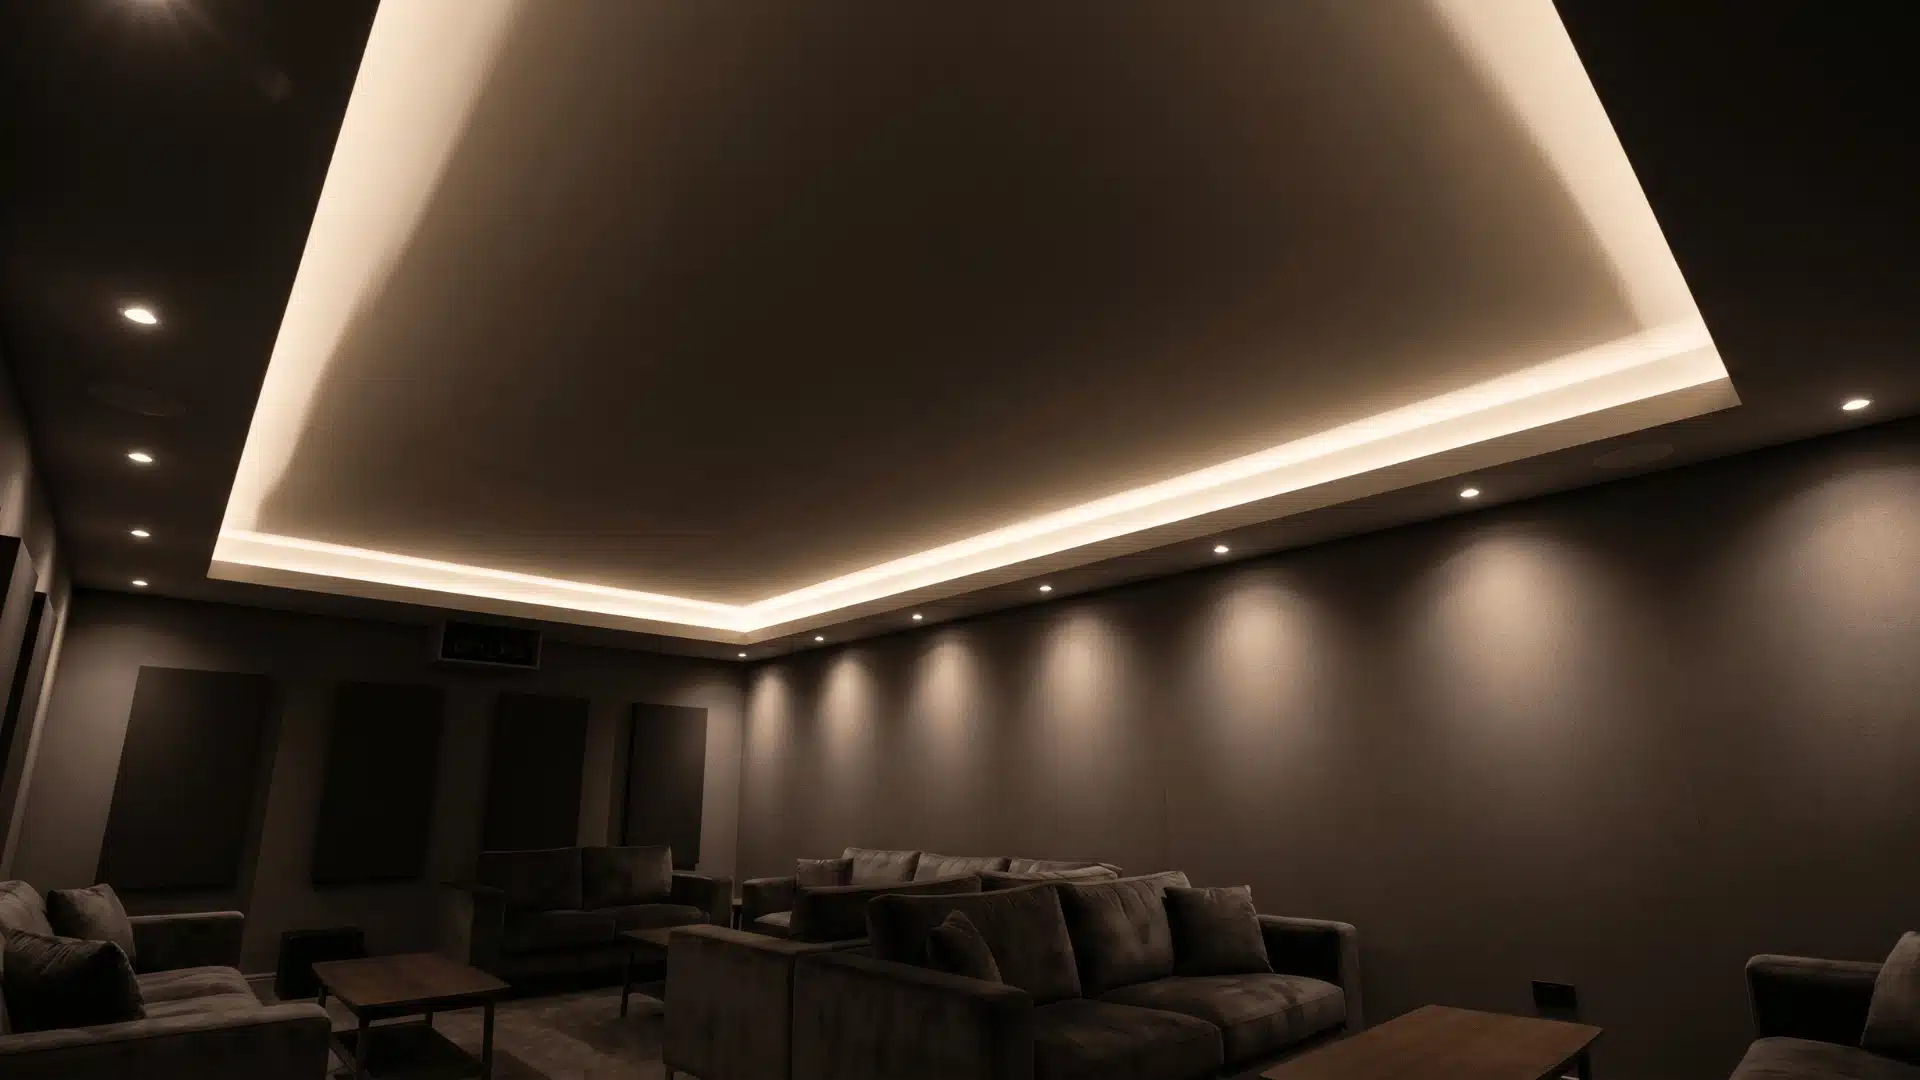
Edge spot wash trays use focused light points along the step face that overlap to form a soft, continuous glow.
Unlike cove lighting, the effect is segmented at the source but blended visually. It adds rhythm to the ceiling edge.
Material Transition Variants
These tray ceiling types focus on changing the surface material within the recess rather than altering the structure. The shift in texture and weight changes how light behaves and how the ceiling is perceived.
25. Stone Inset Tray Ceiling
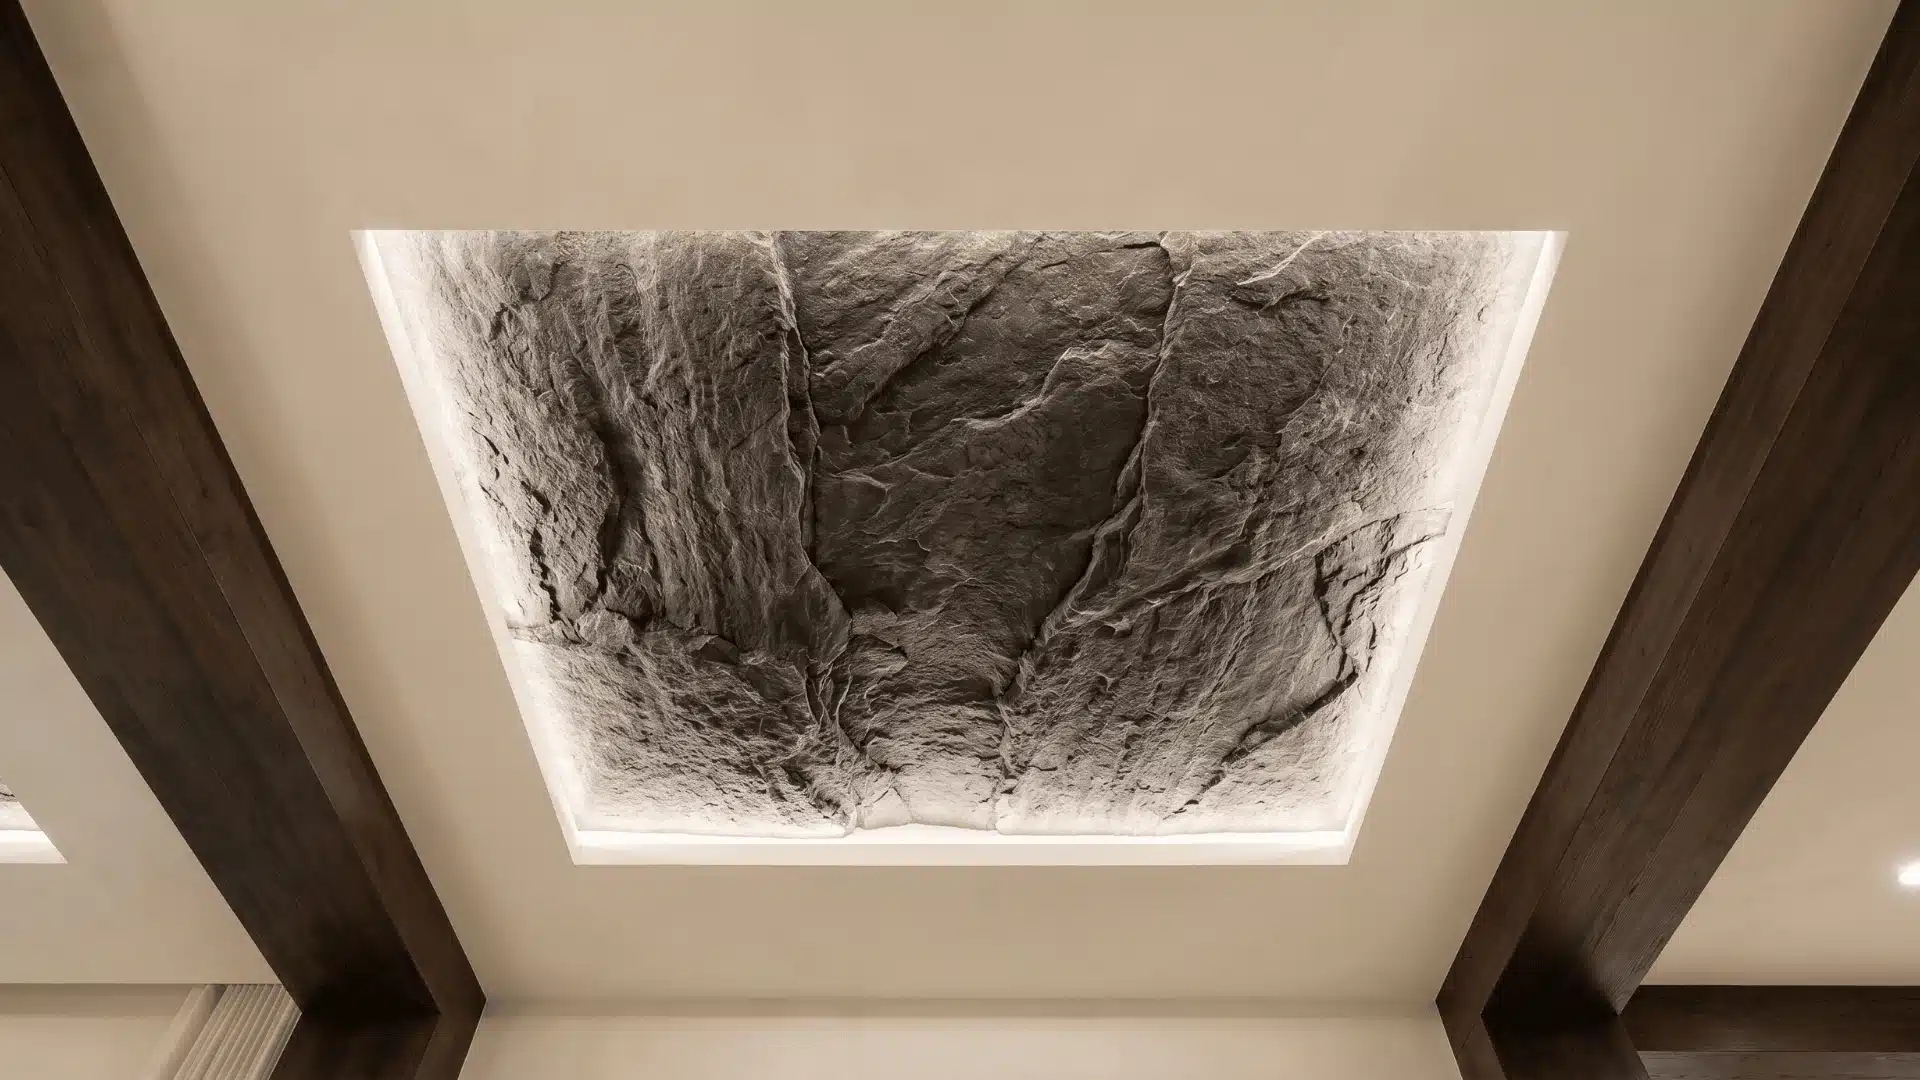
Stone inset trays use natural or engineered stone within the recessed field. The surface reads as denser and more grounded than the painted areas.
Weight and thickness matter here. It works best in high-ceilinged spaces where material heaviness can be visually supported.
26. Fabric-Lined Tray Ceiling
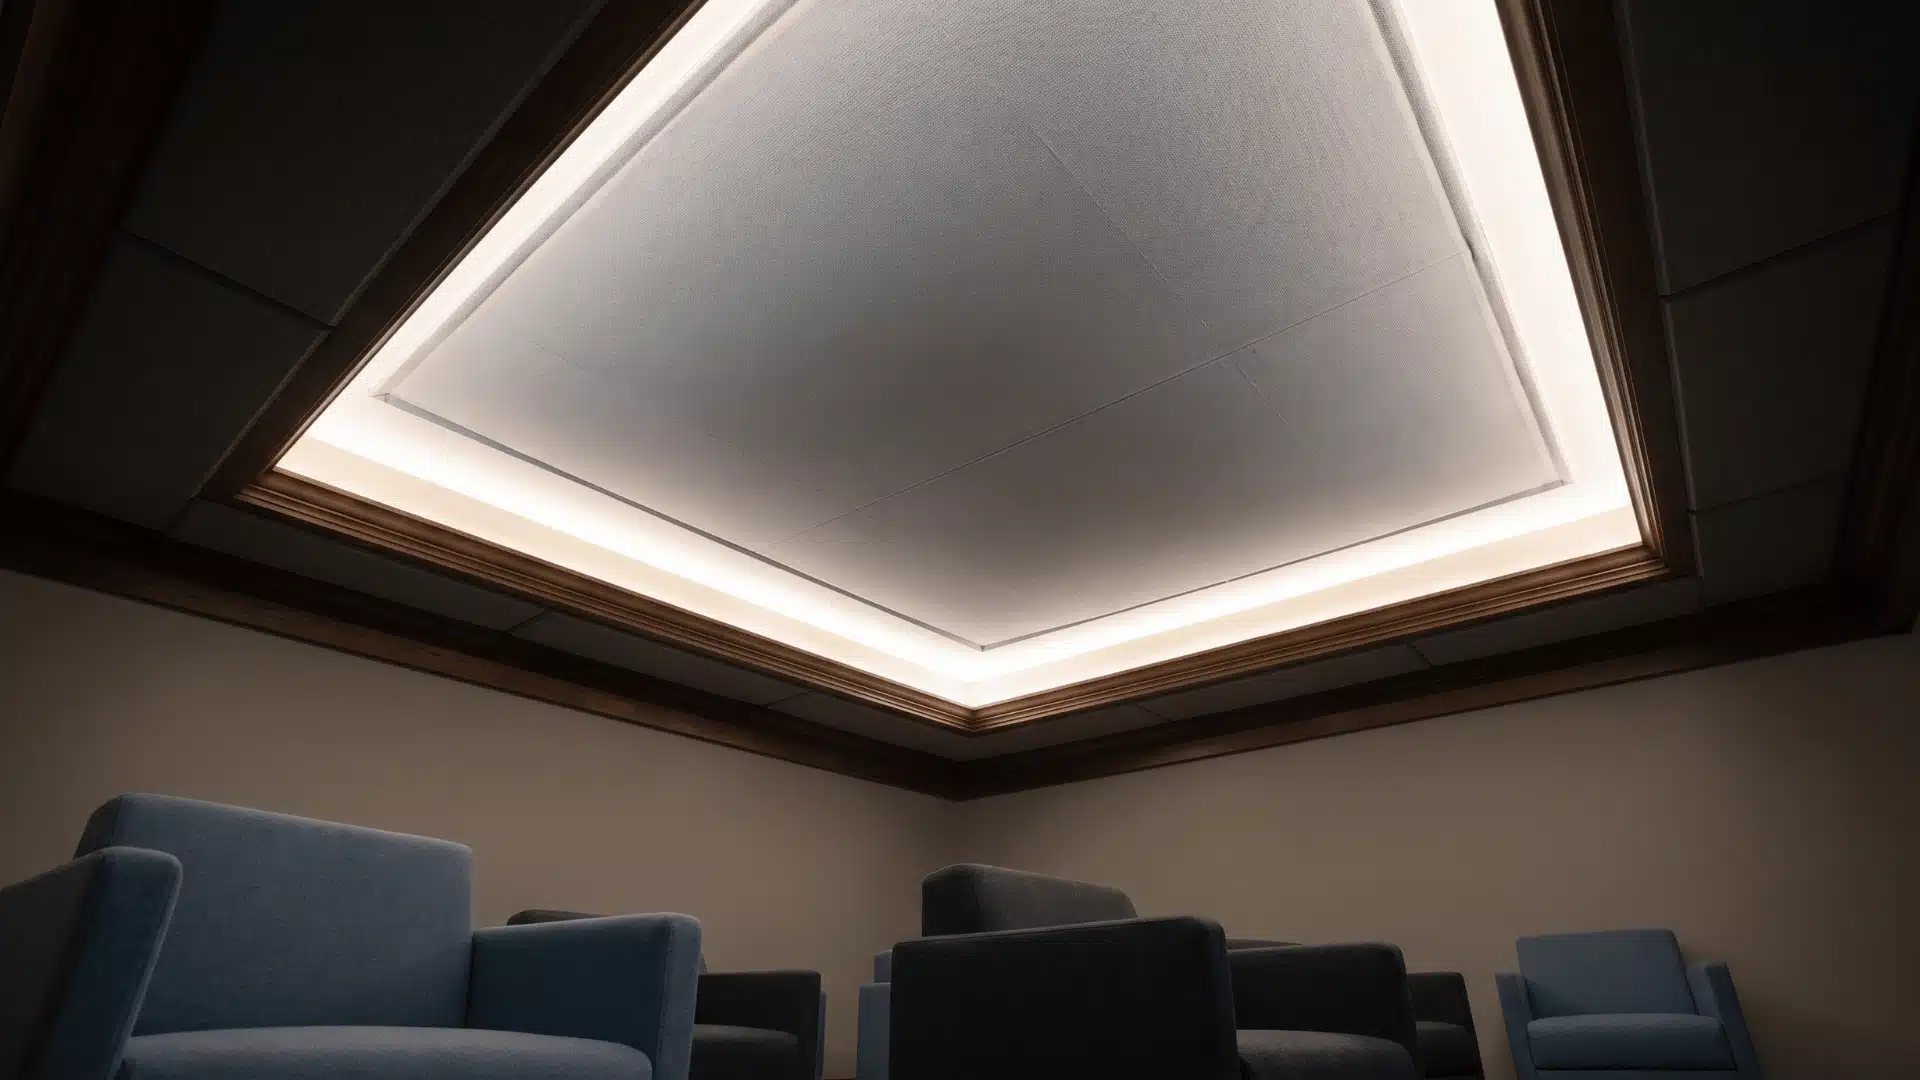
Fabric-lined trays introduce stretched or tensioned fabric across the recessed plane. The surface becomes soft, diffused, and acoustically functional.
This reduces sharp reflections and softens lighting behavior. It needs controlled environments to avoid sagging or uneven tension.
Spatial Manipulation Variants
These tray ceiling types change how space feels by adjusting geometry rather than decoration. They play with depth, direction, and proportion to shift perception of scale and movement.
27. Split-Level Tray Ceiling
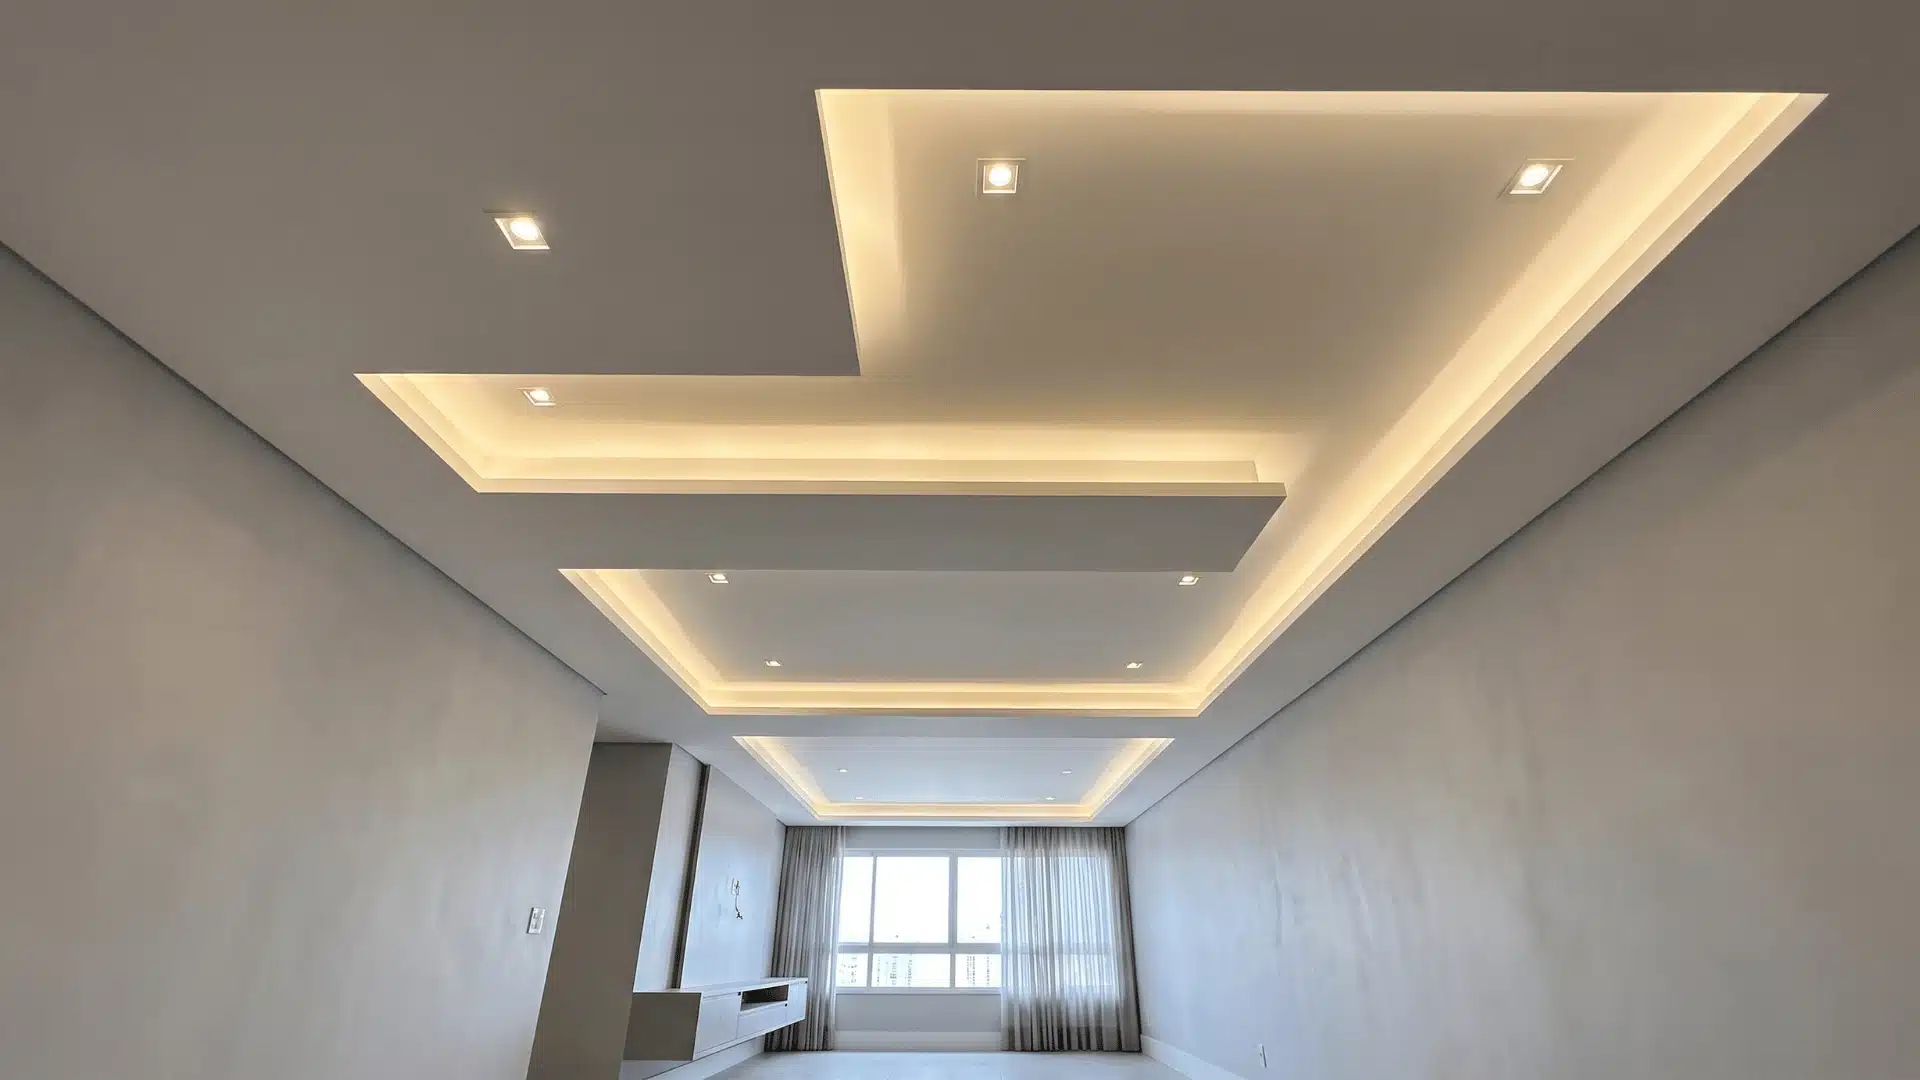
Split-level trays divide the recess into two offset planes at slightly different heights. The result is staggered depth rather than a single drop.
This adds layered perception without significantly increasing the overall ceiling depth. It works well in longer rooms needing directional variation.
28. Perspective-Taper Tray Ceiling
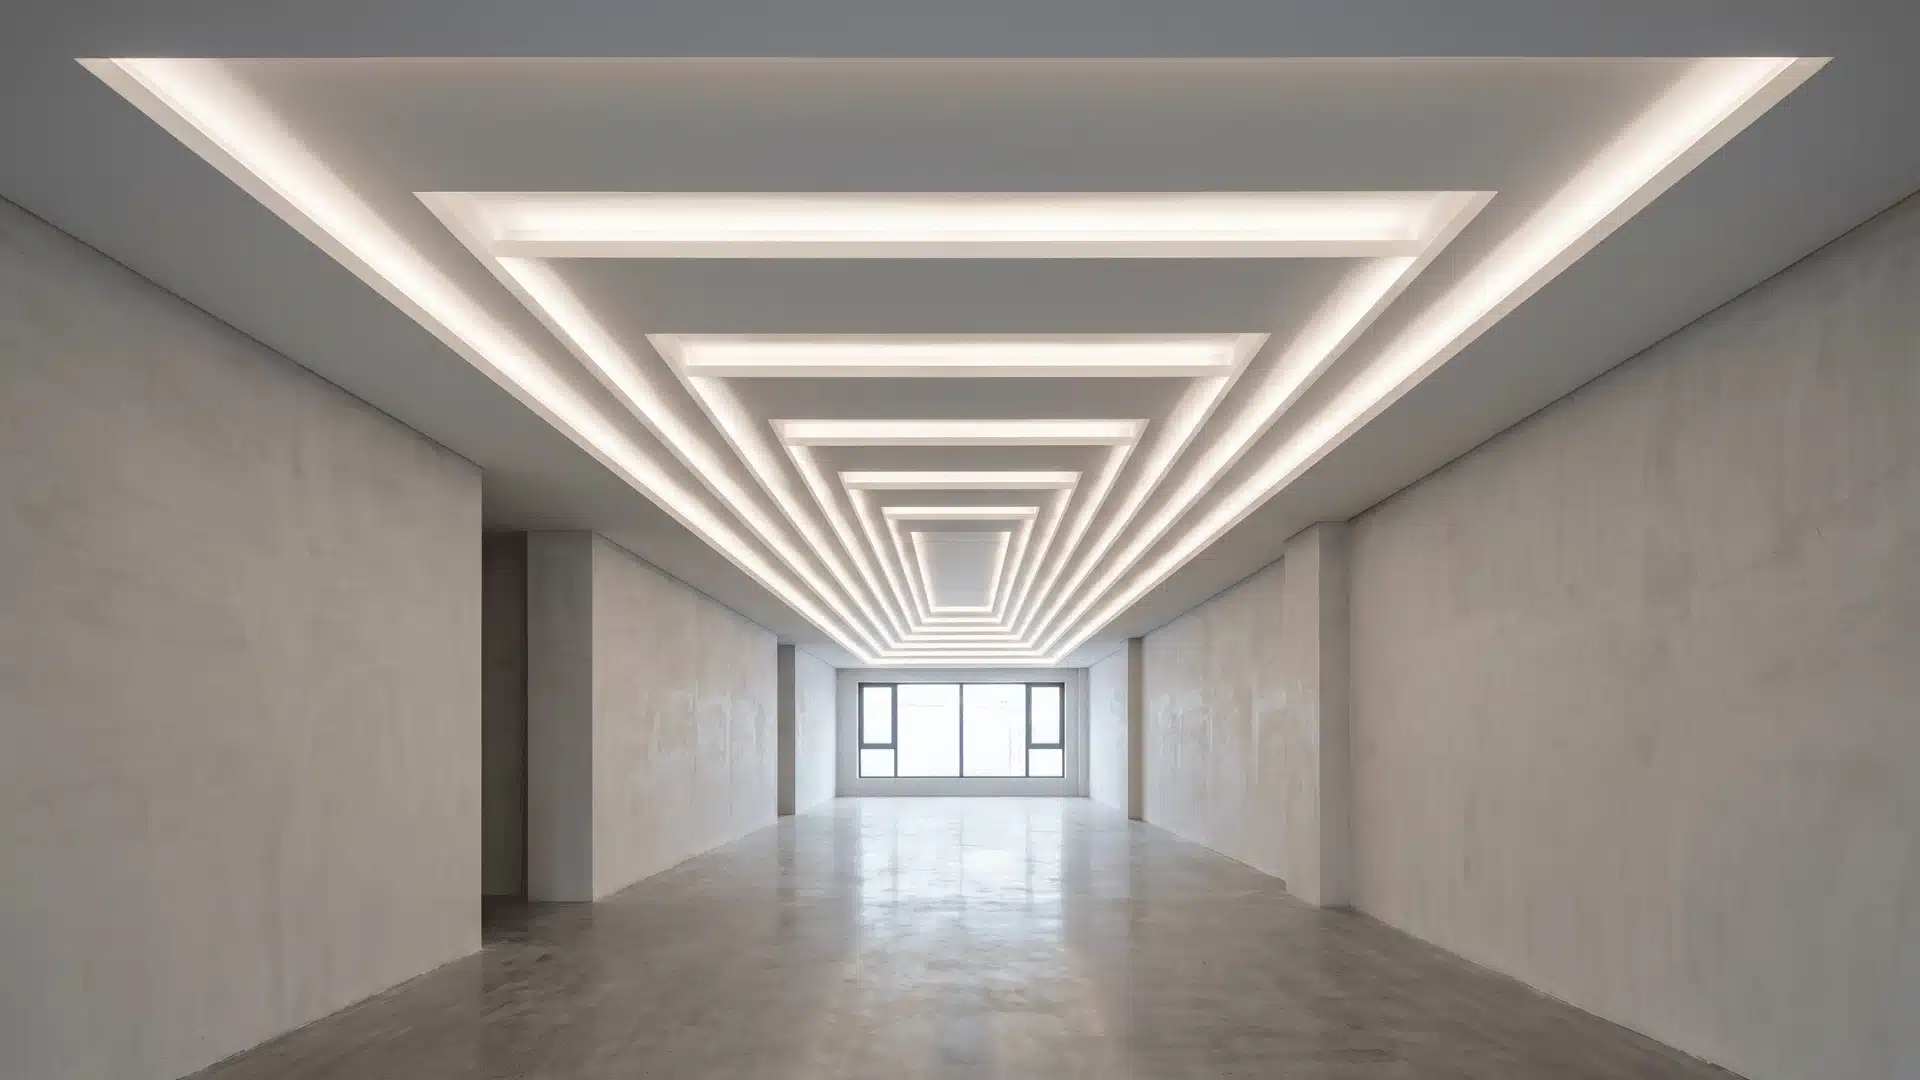
Perspective-taper trays subtly narrow the recessed field toward one direction, creating a forced sense of visual depth.
The geometry changes perceived scale without obvious distortion. It relies heavily on alignment with room layout to feel natural.
These variations focus less on basic tray construction and more on how ceilings interact with light, proportion, and spatial direction. Each one shifts perception differently, giving the same recessed framework a completely different visual outcome.
Quick References for Tray Ceilings
Tray ceilings change the perception of a room through lighting, material, and geometric choices. This table groups key variations to enable quick comparison of design intent, cost, and practical constraints before execution.
| Type Group | Core Idea | Best Use | Budget (USD) | Key Constraint |
|---|---|---|---|---|
| Material-Focused | Uses wood, stone, fabric, and metal inside the recess | Luxury, feature ceilings | $7–$36/sq ft | Can overpower space |
| Lighting-Driven | Lighting defines depth and edges | Modern, ambient rooms | $8–$24/sq ft | Needs proper step depth + LEDs |
| Geometry Variants | Change ceiling angles and levels | Long or modern layouts | $5–$18/sq ft | Must match room layout |
| Edge & Reveal | Shadow gaps instead of trims | Minimal interiors | $4–$11/sq ft | Needs precise finishing |
| Architectural Integration | Links ceiling with walls/columns | Large, formal spaces | $8–$20/sq ft | Must follow structure |
| Visual Illusion | Creates depth through perception tricks | Standard-height rooms | $4–$14/sq ft | Depends on alignment + paint |
Tray ceilings work best when depth, lighting, and material choices align with room scale. Without that balance, even well-designed forms can feel flat, heavy, or visually disconnected from the space.
Finishing Up
By now the pattern is pretty clear. The structure of a tray ceiling doesn’t really change, but the way it feels in a room comes down to finishing decisions.
Depth, lighting, material choices, and alignment are what actually shape the result. When those elements are handled with intent, the ceiling stops feeling like an extra detail and starts reading as part of the architecture itself.
Before you finalize anything, it helps to think through how your ceiling height and lighting plan work with the tray design, since those two decisions tend to set most of the direction early on.
Frequently Asked Questions
What is the minimum ceiling height for a tray ceiling to look good?
Most designers recommend at least 9 feet before the recess. At 8 feet, the step face takes up too much vertical space. The recessed field ends up feeling lower than the surrounding ceiling rather than elevated above it.
What is the most common mistake people make with tray ceilings?
Treating all three planes identically. Leaving the recessed field, step face, and outer border the same flat white erases the architectural feature. That’s the combination that produces the builder-grade result most people are trying to avoid.
Can you add a tray ceiling to a room that doesn’t have one?
Yes, but it’s a structural project. A contractor builds a lowered perimeter frame to create the step, which means the outer border sits below the original ceiling line. It’s not a finished job; it involves framing.
What colors work best in the recessed field of a tray ceiling?
It depends on the ceiling height. Higher ceilings handle darker, saturated colors well. Standard 9-foot ceilings work better with a lighter field or soft white, ideally paired with lighting to add depth without visually lowering the room.