

A door lock that sticks or refuses to turn can turn a five-second task into a frustrating standoff every time you leave the house.
The good news is that learning how to replace a door lock does not require a locksmith, special training, or a toolbox full of gear. Most swaps come down to two numbers and a handful of screws.
Get those measurements right, and the rest of the job follows a clear, repeatable order that any homeowner can finish in an afternoon.
Before you pick up a screwdriver, though, it helps to know when doing it yourself actually makes sense.
DIY vs. Locksmith: What to Consider First
Most people can swap a standard doorknob without professional help. It takes under 30 minutes with just a Phillips head screwdriver, and no special skills are required.
The parts cost you the same either way. What you save by doing it yourself is the labor charge, which is often more than the cost of the lock itself. There are exceptions.
If your door has a mortise lock, a bore hole that does not match standard door dimensions, or damage around the latch plate, the job gets more involved.
Those situations may be worth calling a locksmith.
For a standard residential lockset or deadbolt, though, this is one of the more straightforward home repairs you can do.
How to Replace a Door Lock Step-By-Step?
With the right replacement lock in hand, the installation follows a straightforward sequence. Work through each step in order, and the job stays simple.
Step 0(a): What to Check Before You Buy
Two measurements decide whether a replacement lock fits your door: backset and bore diameter.
- Backset: The distance from the door edge to the center of the hole. Measure it with a tape, from the edge to the hole’s center.
- Bore diameter: The size of the circular hole in your door, part of the door lock’s basic anatomy. Standard size is 2-1/8 inches, so measure across the widest point.
Write both numbers down before heading to the store. If you are replacing both the knob and the deadbolt, check each hole separately, since older doors can differ slightly from one to the next.
Step 0(b): Materials Required Before You Begin
Gather these before you start, so you are not stopping mid-job to run back to the store:
- Phillips-head screwdriver
- Drill (optional)
- Wood chisel or flat-head screwdriver
- New lockset (handle or knob set)
- New deadbolt kit
- Latch assemblies (spring latch and deadbolt latch)
- Strike plates and screws
- Collar or spacer piece (if included)
Step 1: Remove Existing Lock Hardware
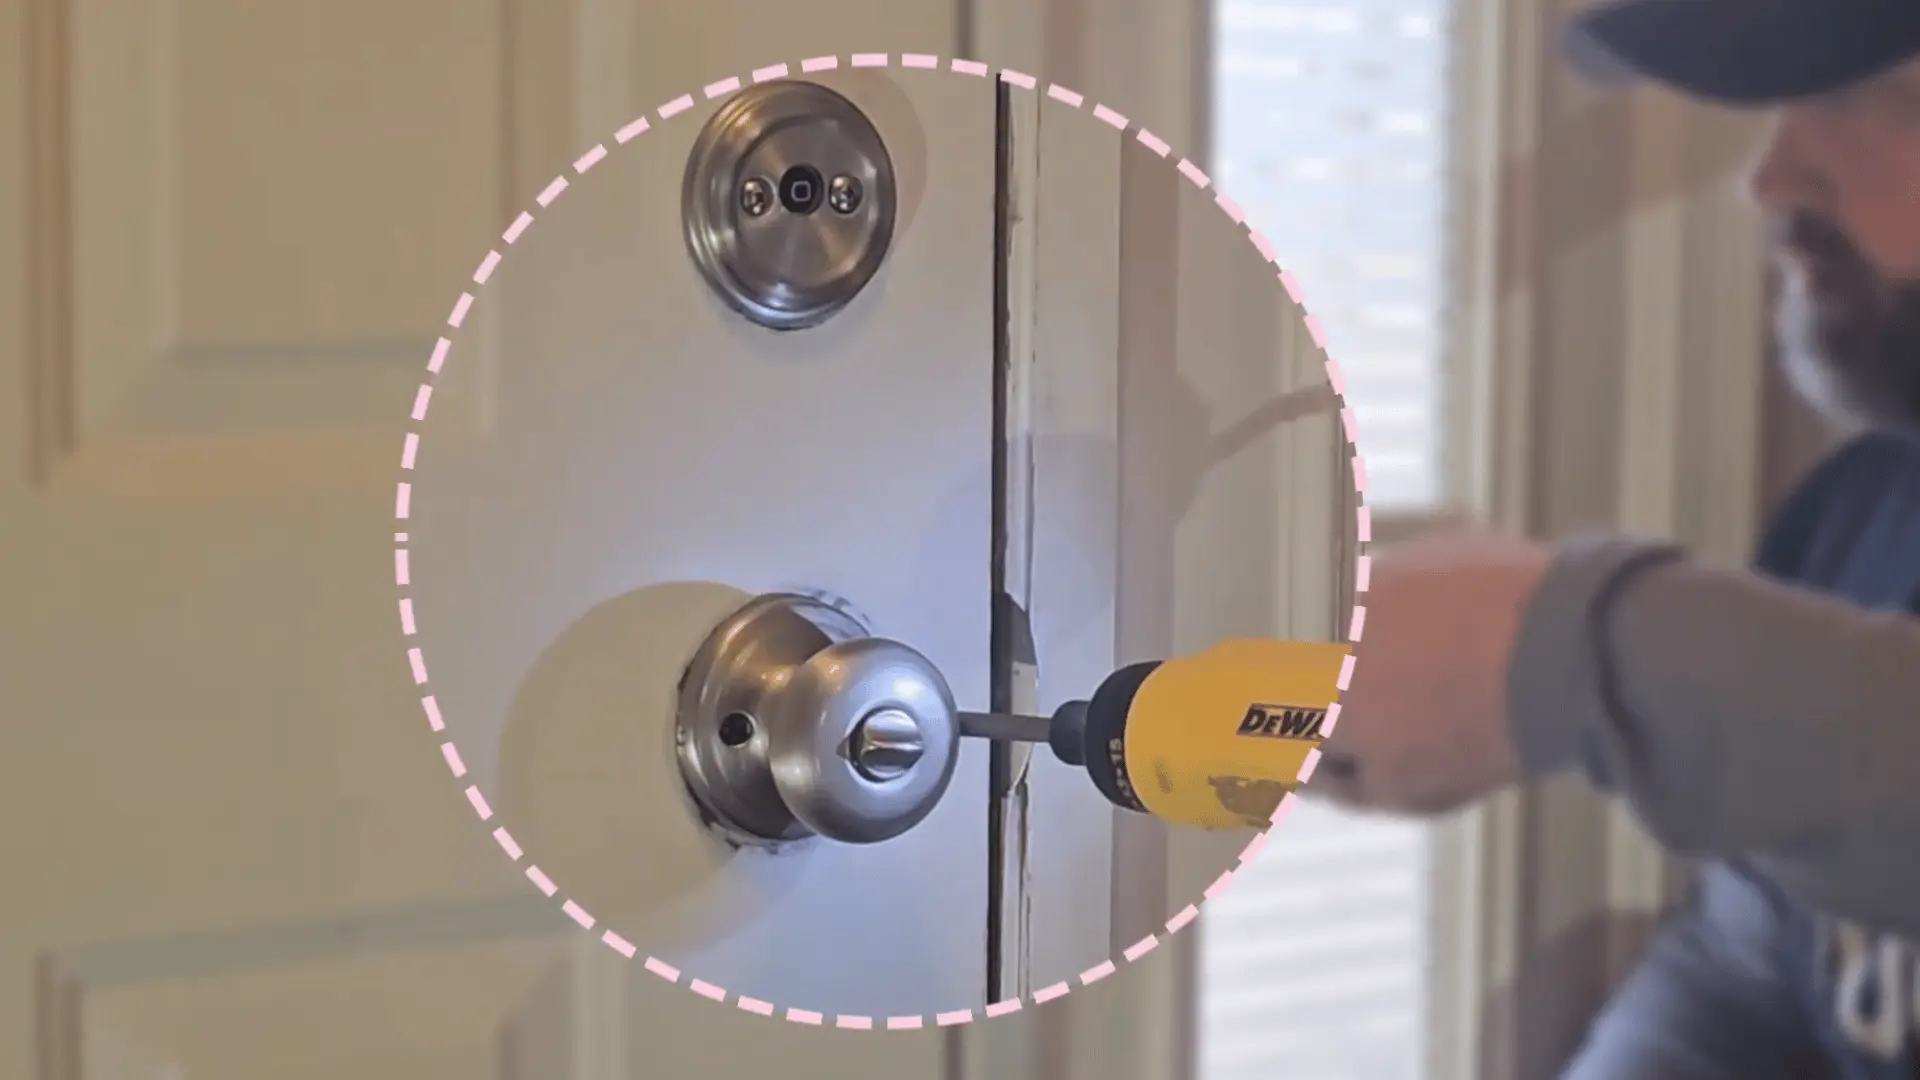
Start by opening the door so both sides are easy to access. Use a Phillips screwdriver to remove interior screws from the knob or handle assembly, then gently pull both sides apart.
Move to the door edge and unscrew the latch plate, then slide the latch out.
Repeat the same process for the deadbolt by removing screws, separating both sides, and pulling the bolt mechanism out.
Step 2: Prepare and Adjust the New Latch Assembly
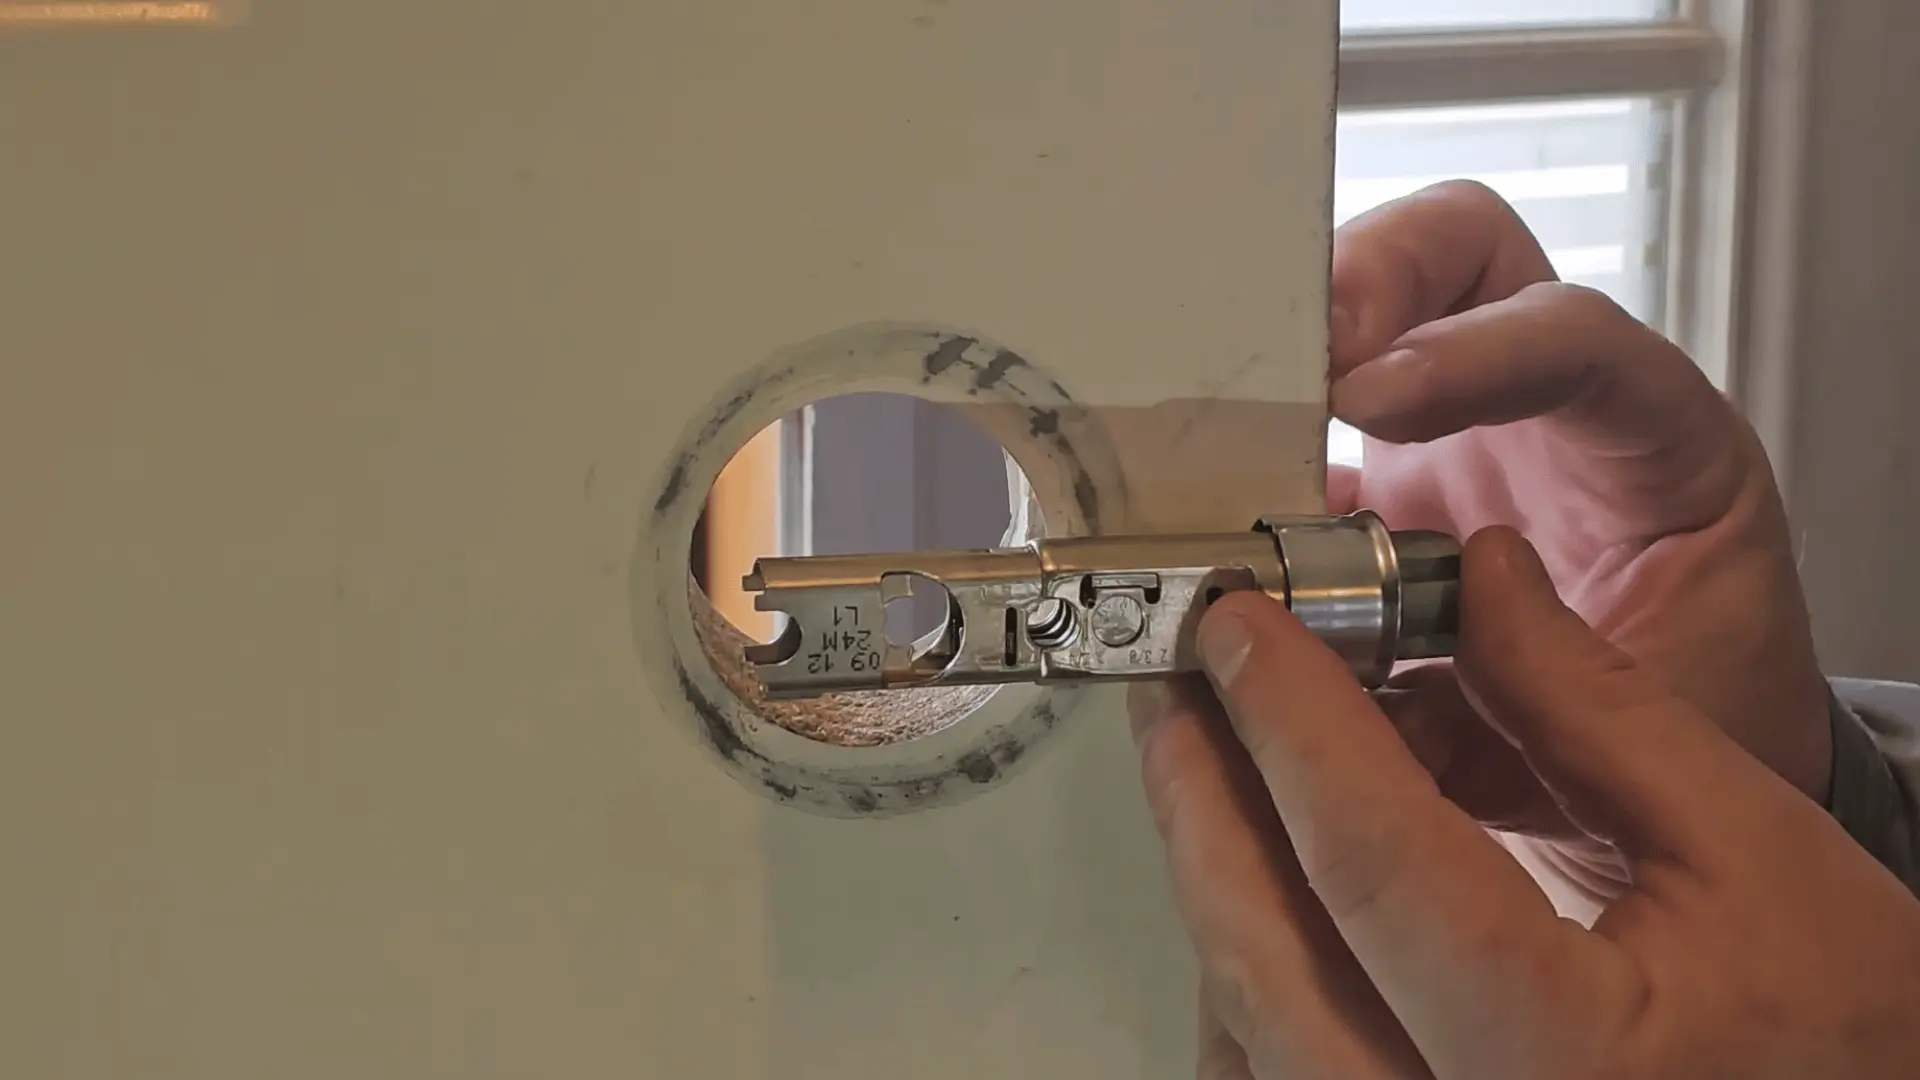
Take the new latch and check its orientation before installation. Make sure the beveled side faces the strike direction so the door closes smoothly every time.
Adjust the latch to match the door’s backset by twisting or sliding the mechanism.
Use a screwdriver if needed, then attach the collar or spacer and lock it in place.
Step 3: Install the Latch and Lockset Handle
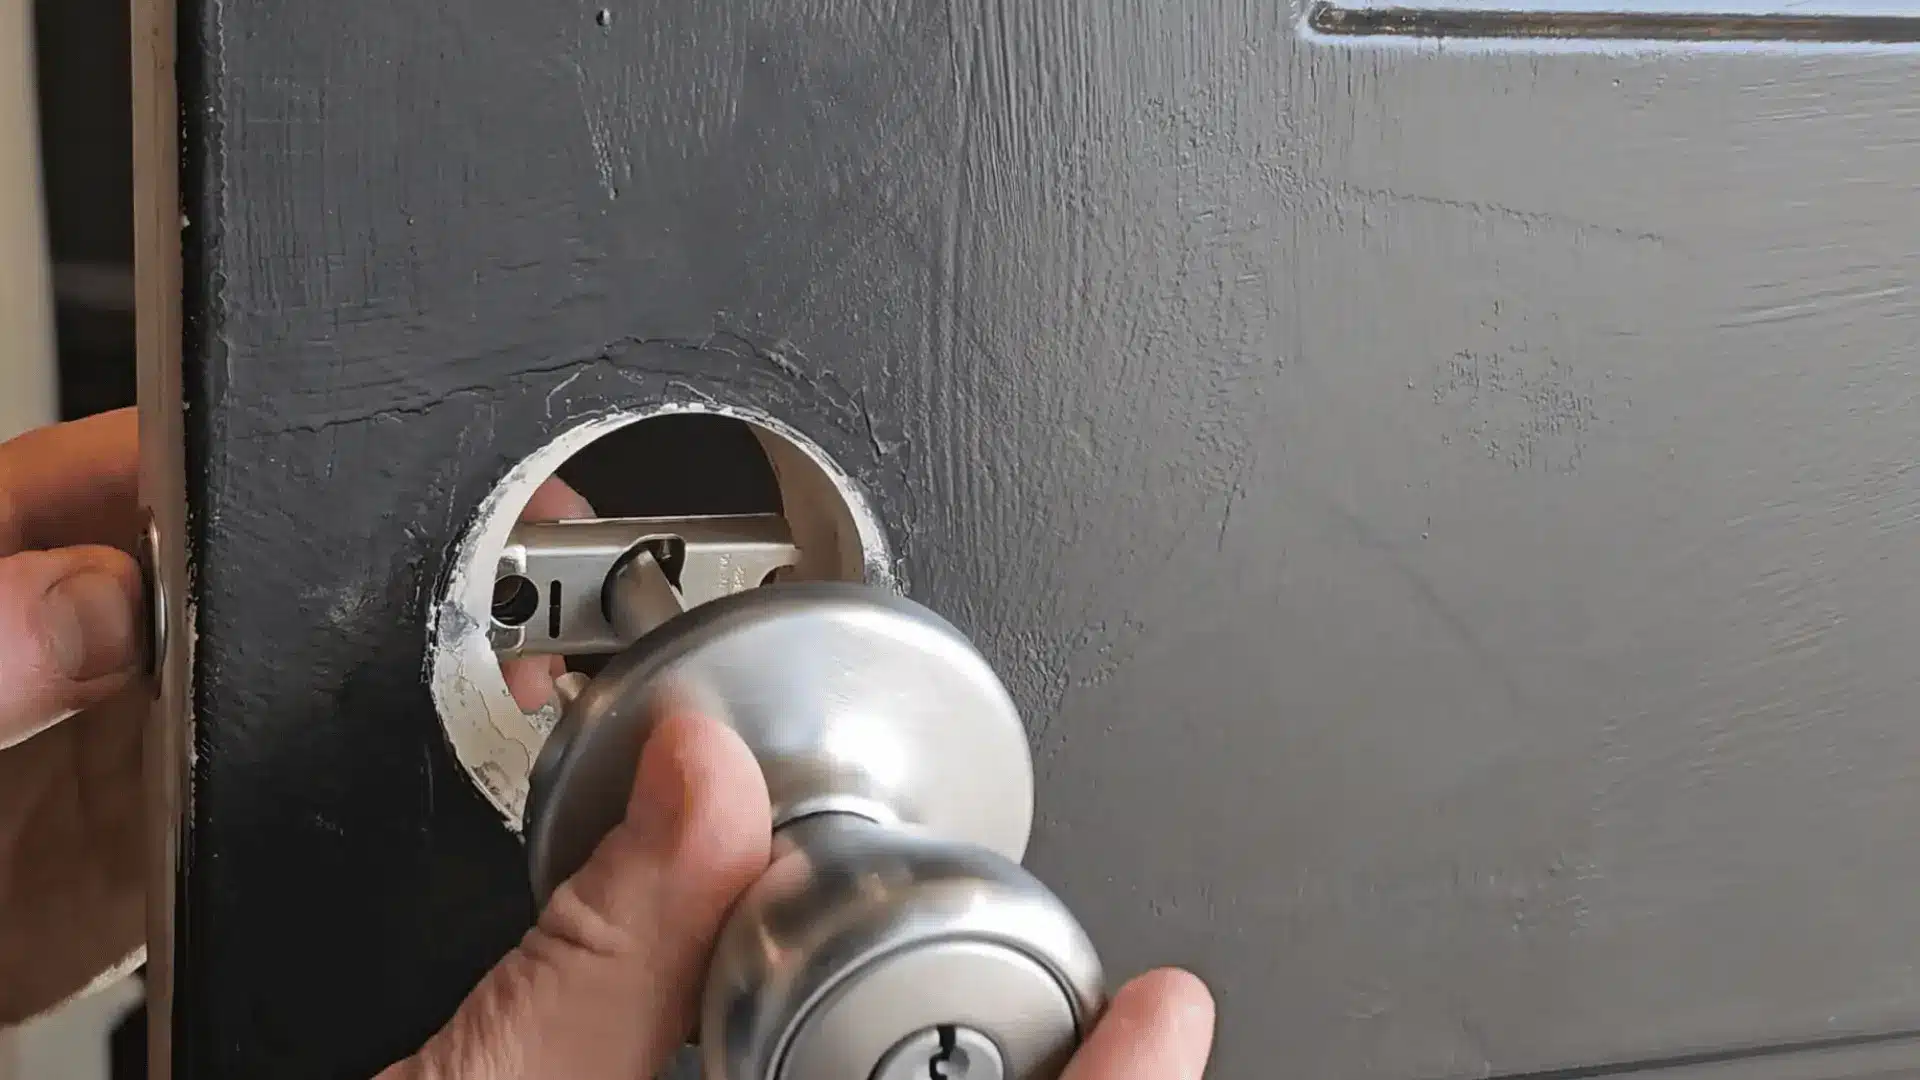
Slide the latch into the door edge first, then secure the latch plate using a Phillips screwdriver.
Insert the exterior handle through the opening from the outside and position it correctly. Align the interior handle on the inside and press both sides together.
Insert screws through the interior plate, tighten lightly, then test smooth turning before fully tightening everything.
Step 4: Install and Adjust the Deadbolt
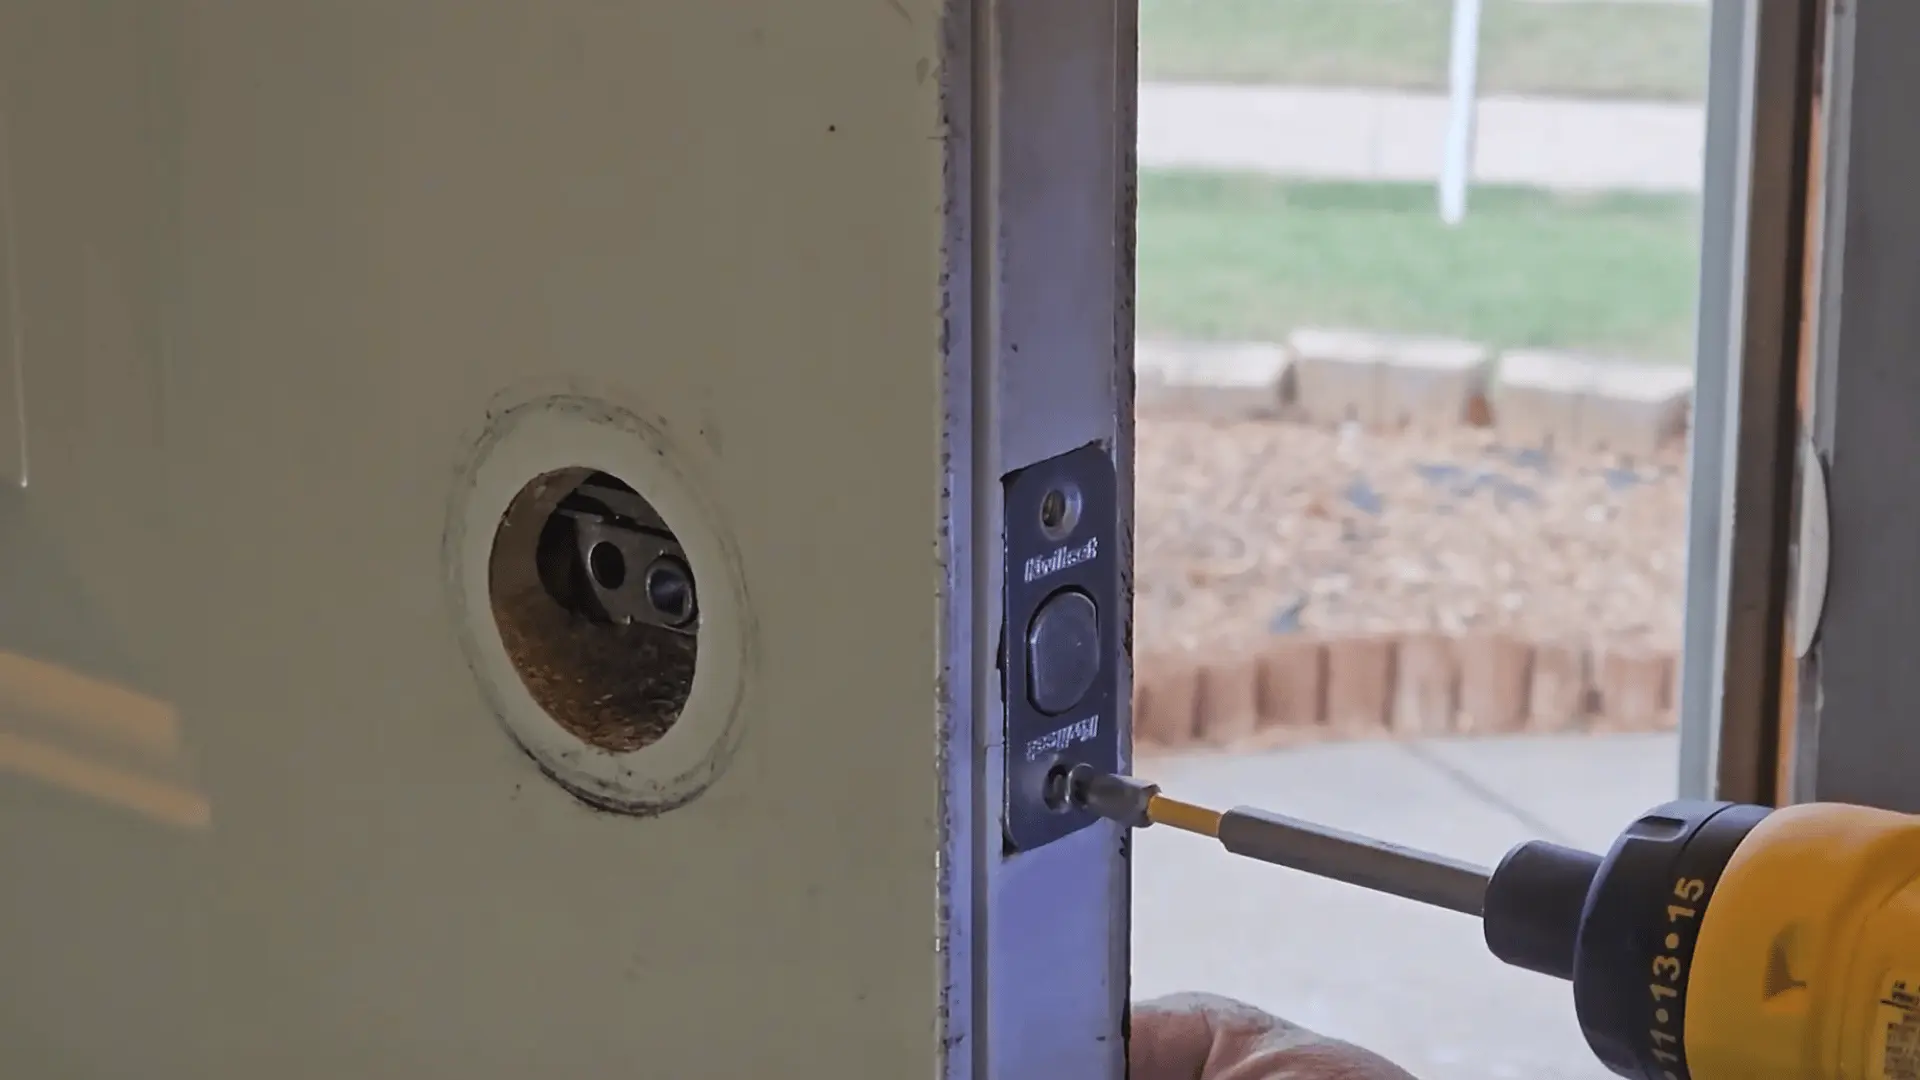
Insert the deadbolt latch into the door edge and secure it with screws using a screwdriver. Place the exterior cylinder from the outside and align the interior thumb-turn properly.
If the hole feels tight, carefully adjust it with a small drill bit.
Use a chisel or a flat screwdriver to remove small pieces of wood to ensure a proper fit and smooth alignment.
Step 5: Align Strike Plates on the Door Frame
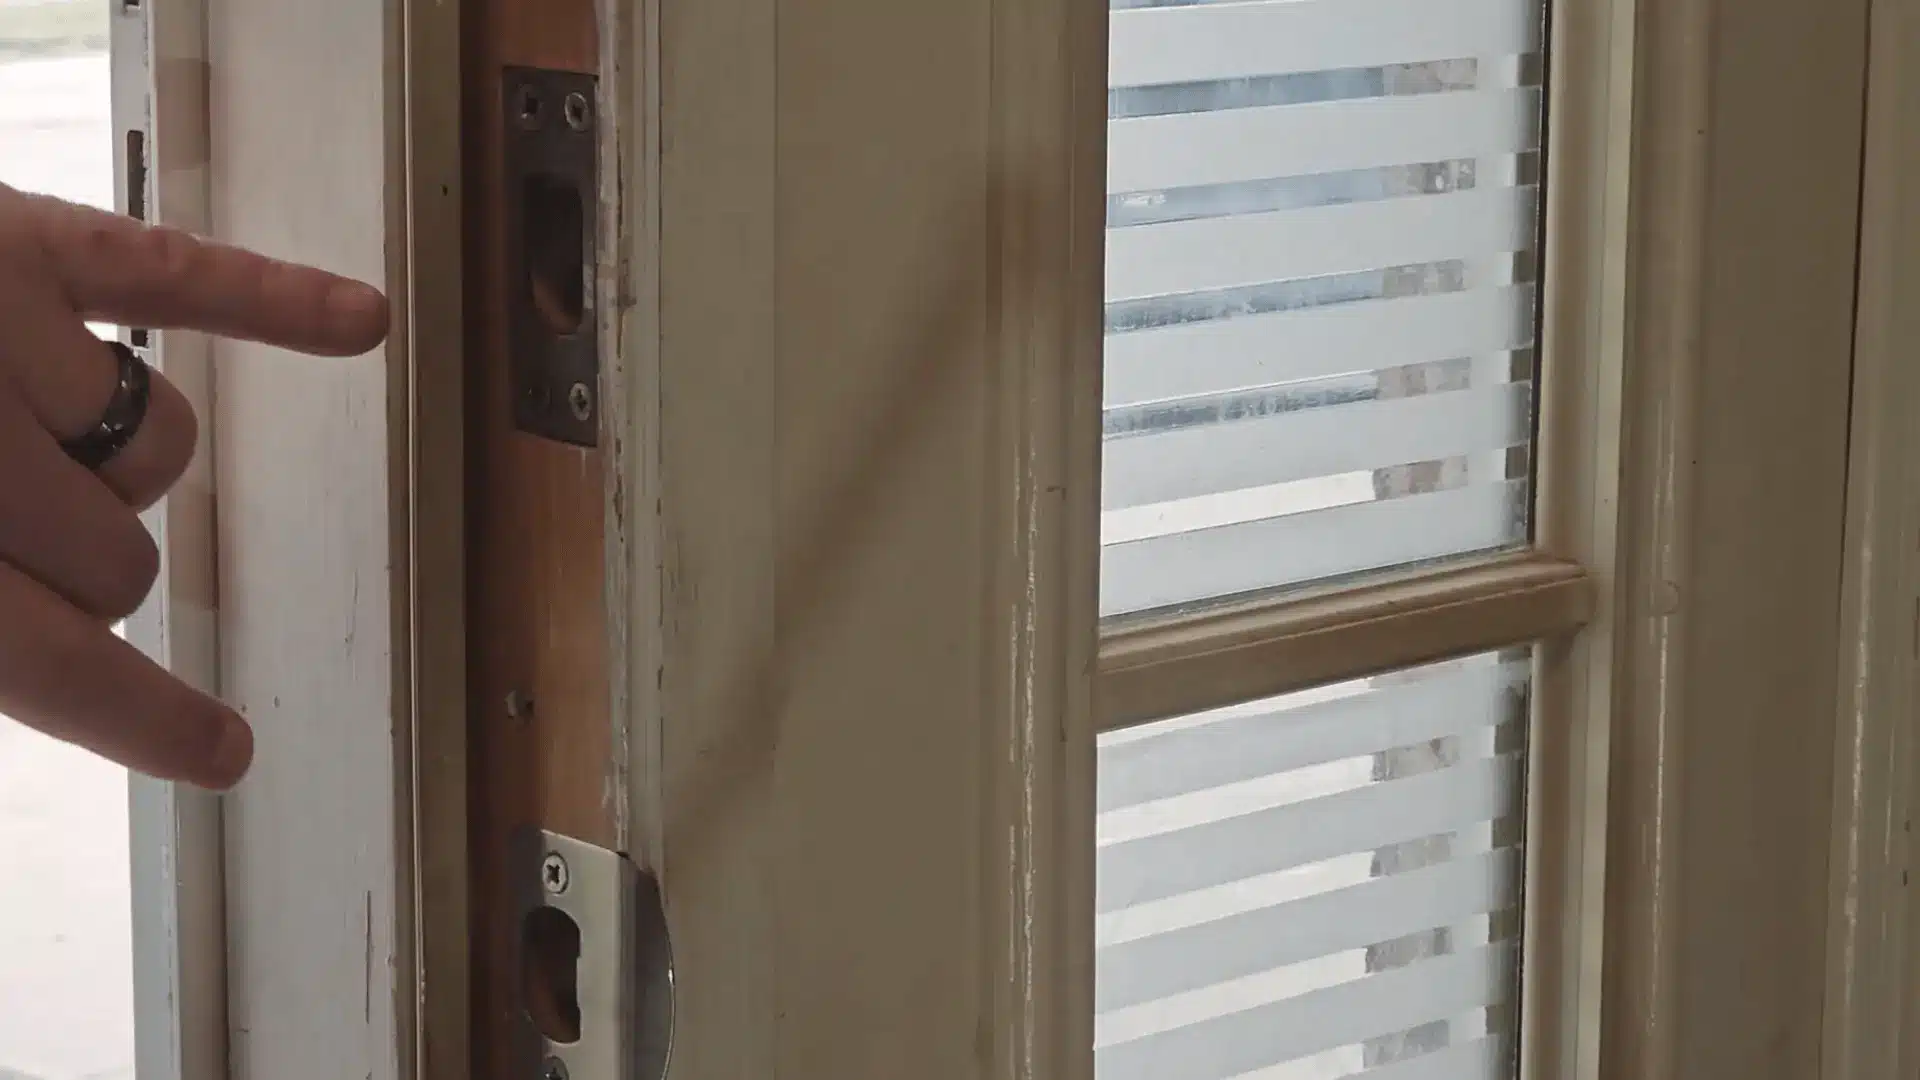
Strike plate alignment is a common issue at this stage.
Close the door slowly and check how the latch and deadbolt meet the strike plates for clean entry.
If the latch does not enter properly, loosen the strike plate screws and adjust the strike plate’s position slightly with a screwdriver until it lines up and works smoothly.
Step 6: Test, Adjust, and Final Tightening
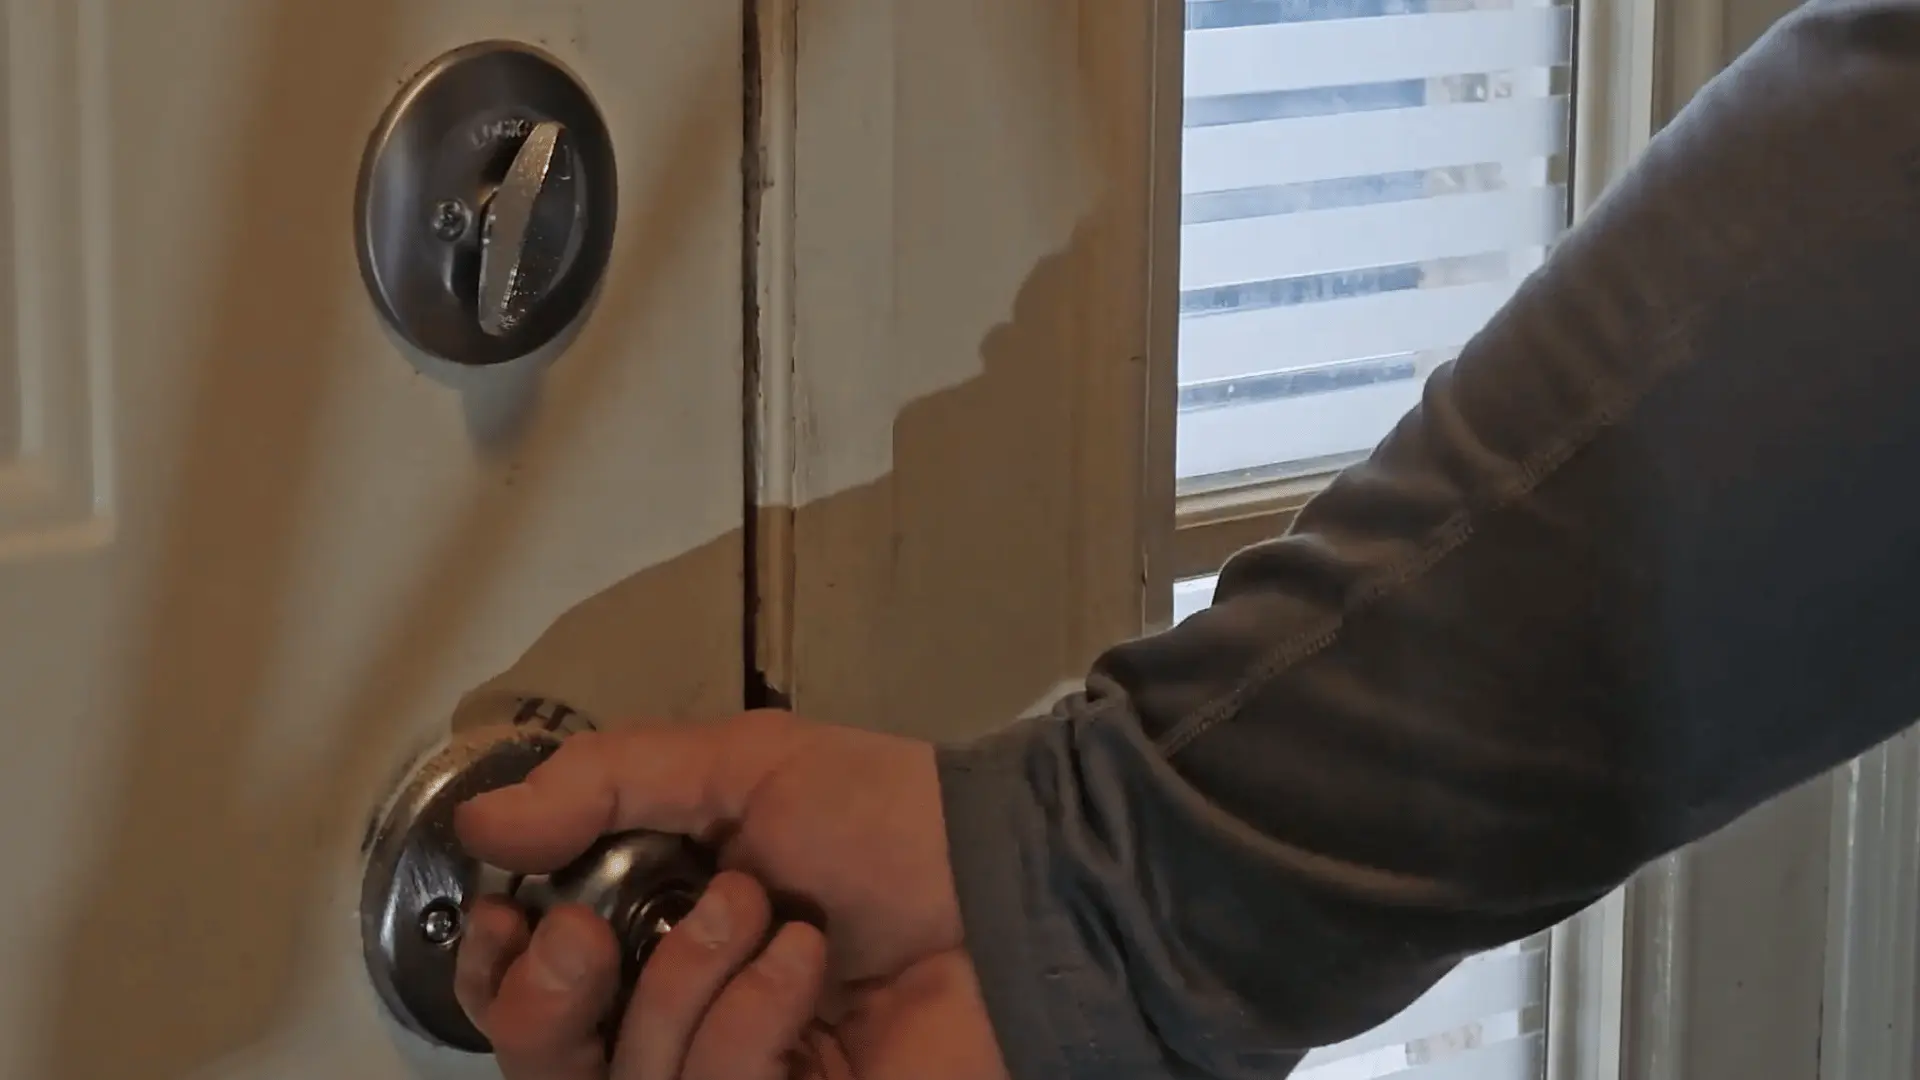
With the door open, test the handle latch and deadbolt several times. They should move smoothly without stiffness, and a Phillips screwdriver is used to tighten all screws properly.
Close the door and test locking from both sides.
If anything feels loose, retighten the handle or strike plate screws. Small adjustments now prevent sticking or misalignment later.
For a more detailed view of the entire process, check out the video below.
How to Replace a Doorknob Easily?
Replacing a doorknob on its own is a quicker job. It only needs a few basic tools and these steps:
Step 1: Remove the old doorknob: Use a Phillips-head screwdriver or drill to remove the knob screws, then unscrew the latch plate and pull out the old latch assembly.
Step 2: Install the new latch: Insert the new latch with the curved side facing the door frame, then secure the latch plate using a Phillips-head screwdriver.
Step 3: Position the new knob: Check the locking side, feed the exterior knob through the door, and align both sides of the handle correctly.
Step 4: Secure the doorknob: Line up the screw posts, insert the screws, and tighten them with a Phillips-head screwdriver or drill until the knob feels secure.
Step 5: Adjust the latch if needed: Use a flat screwdriver to remove or replace the latch collar if the new latch does not fit the existing door opening.
Step 6: Test the new doorknob: Turn the handle several times, check the latch movement, and test the lock to make sure everything works smoothly.
Once the new doorknob is installed and tested, the job is complete.
Taking a few extra minutes to check the latch alignment and screw tightness helps prevent loose handles or sticking doors later.
For a complete walkthrough of the process, check out the video tutorial below.
What to Do When Something Doesn’t Line Up?
Most lock issues after installation come from alignment problems, loose screws, or strike plate positioning. A few of those have been considered here:
1. The Latch Hits the Strike Plate Instead of Entering the Hole
- How to identify it: Close the door slowly and watch where the latch meets the strike plate. If it scrapes the metal edge instead of sliding into the opening, the alignment is off.
- Why it happens: The strike plate may be slightly misaligned, or the opening may be too narrow.
- How to fix it: Loosen the strike plate screws and shift the plate slightly until the latch lines up. if it still catches, widen the opening slightly with a file or chisel.
2. The Deadbolt Binds or Won’t Fully Throw
- How to identify it: Turn the deadbolt and check if it feels stuck or stops before reaching the locked position.
- Why it happens: The strike plate box may not line up with the bolt depth.
- How to fix it: Loosen the strike plate screws, adjust its position, tighten everything again, and test the lock.
3. The Screws Won’t Tighten, or The Handle Feels Loose
- How to identify it: The handle still wiggles even after tightening the screws.
- Why it happens: The screw holes in the wood door may be stripped and no longer gripping properly.
- How to fix it: Insert 2–3 wooden toothpicks with wood glue into the hole, let them set briefly, then drive the screw back in.
4. Final Check After Adjustments
After each fix, close and open the door several times. The latch should move smoothly, the deadbolt should extend fully, and the handle should feel secure without forcing anything.
Conclusion
Knowing how to replace a door lock makes this repair feel much less intimidating.
Most standard knobs and deadbolts come down to the right measurements, a screwdriver, and careful alignment.
Check the backset and bore diameter before buying, remove the old hardware in order, then test the latch and deadbolt before fully tightening everything.
If the door sticks, the handle feels loose, or the bolt does not slide cleanly, small strike plate adjustments usually solve the problem.
A new lock should feel secure, smooth, and easy to use from both sides.
Have you replaced a door lock yourself before? Share what part gave you the most trouble in the comments.
Frequently Asked Questions
Can I Replace a Door Lock Myself?
Yes, in most cases. Standard doorknobs and deadbolts are held in place with two or three screws, and they come apart with nothing more than a Phillips head screwdriver. The swap usually takes under thirty minutes once you have the right size lock. Mortise locks or an oddly shaped bore hole are the main exceptions, better left to a locksmith.
What is the Average Price to Change a Door Lock?
Cost depends mostly on the lock you choose and whether you hire help. A basic knob or deadbolt costs modestly at most hardware stores, while smart locks and premium finishes run higher. Doing the swap yourself means paying only for the hardware. A locksmith adds a labor charge on top, which often doubles the total cost.
Do I Need to Rekey or Fully Replace the Lock?
Rekeying changes the internal pins so old keys stop working, but it keeps your existing knob or deadbolt in place and costs less than a full swap. Full replacement means installing a new mechanism, which makes sense when the hardware is worn, or you want a different style. If your lock still turns smoothly, rekeying is usually the faster fix.
How Long Does It Take to Replace a Door Lock?
A single doorknob or deadbolt swap takes most people ten to thirty minutes with just a screwdriver, based on the timing shown across DIY tutorials. Replacing both a knob and a deadbolt on one door roughly doubles that. Add extra time if the strike plate needs adjusting, since filing the frame for a proper fit takes a few more minutes.