

Setting a table feels straightforward until you’re standing there second-guessing every placement. Most people default to guesswork, and it shows.
A correct place setting layout follows a logical system, one that scales from a weeknight dinner to a formal multi-course event without changing its core rules.
Every item on the table has a position tied to its function, not just tradition. Get the logic right once, and every setting after becomes effortless.
Here you’ll find placement breakdowns for basic, casual, and formal settings, plus the one rule that makes every layout self-derivable.
What is a Place Setting Layout?
A place setting layout is the arrangement of dinnerware, flatware, glassware, and linens for one diner at the standard height of a dining table. It does not include centerpieces or décor.
Think of it as each guest’s personal zone. Every item has a specific spot, and that placement follows a system, not guesswork.
Even a simple everyday setting follows this logic. Getting it right signals care, whether you’re feeding family on a Tuesday or hosting a formal dinner.
Not sure where to start? Three quick questions will point you to the right setting before you touch a single plate.
Step 1: What’s the Occasion?
Your event type is the fastest way to narrow down which layout fits.
- Weeknight dinner, family lunch, everyday meal: Basic Setting
- Dinner party, birthday dinner, casual hosting: Casual Setting
- Holiday dinner, hosting a wedding, multi-course meal: Formal Setting
Once you’ve matched your occasion, move to Step 2 to confirm.
Step 2: How Many Courses Are You Serving?
The number of courses determines how much flatware and glassware are actually needed on the table.
- 1 course → Basic
- 2–3 courses → Casual
- 4+ courses → Formal
If your course count points to a different tier than Step 1, keep reading.
Step 3: How Many Guests?
Guest count affects how structured your layout needs to be.
- Under 4 guests, no assigned seats → Basic or Casual
- 6+ guests with assigned seats → Casual at minimum; Formal if the event calls for it
If two steps land on different tiers, go with the higher one. It’s always better to be slightly over-prepared than underdressed at the table.
Basic Place Setting Layout
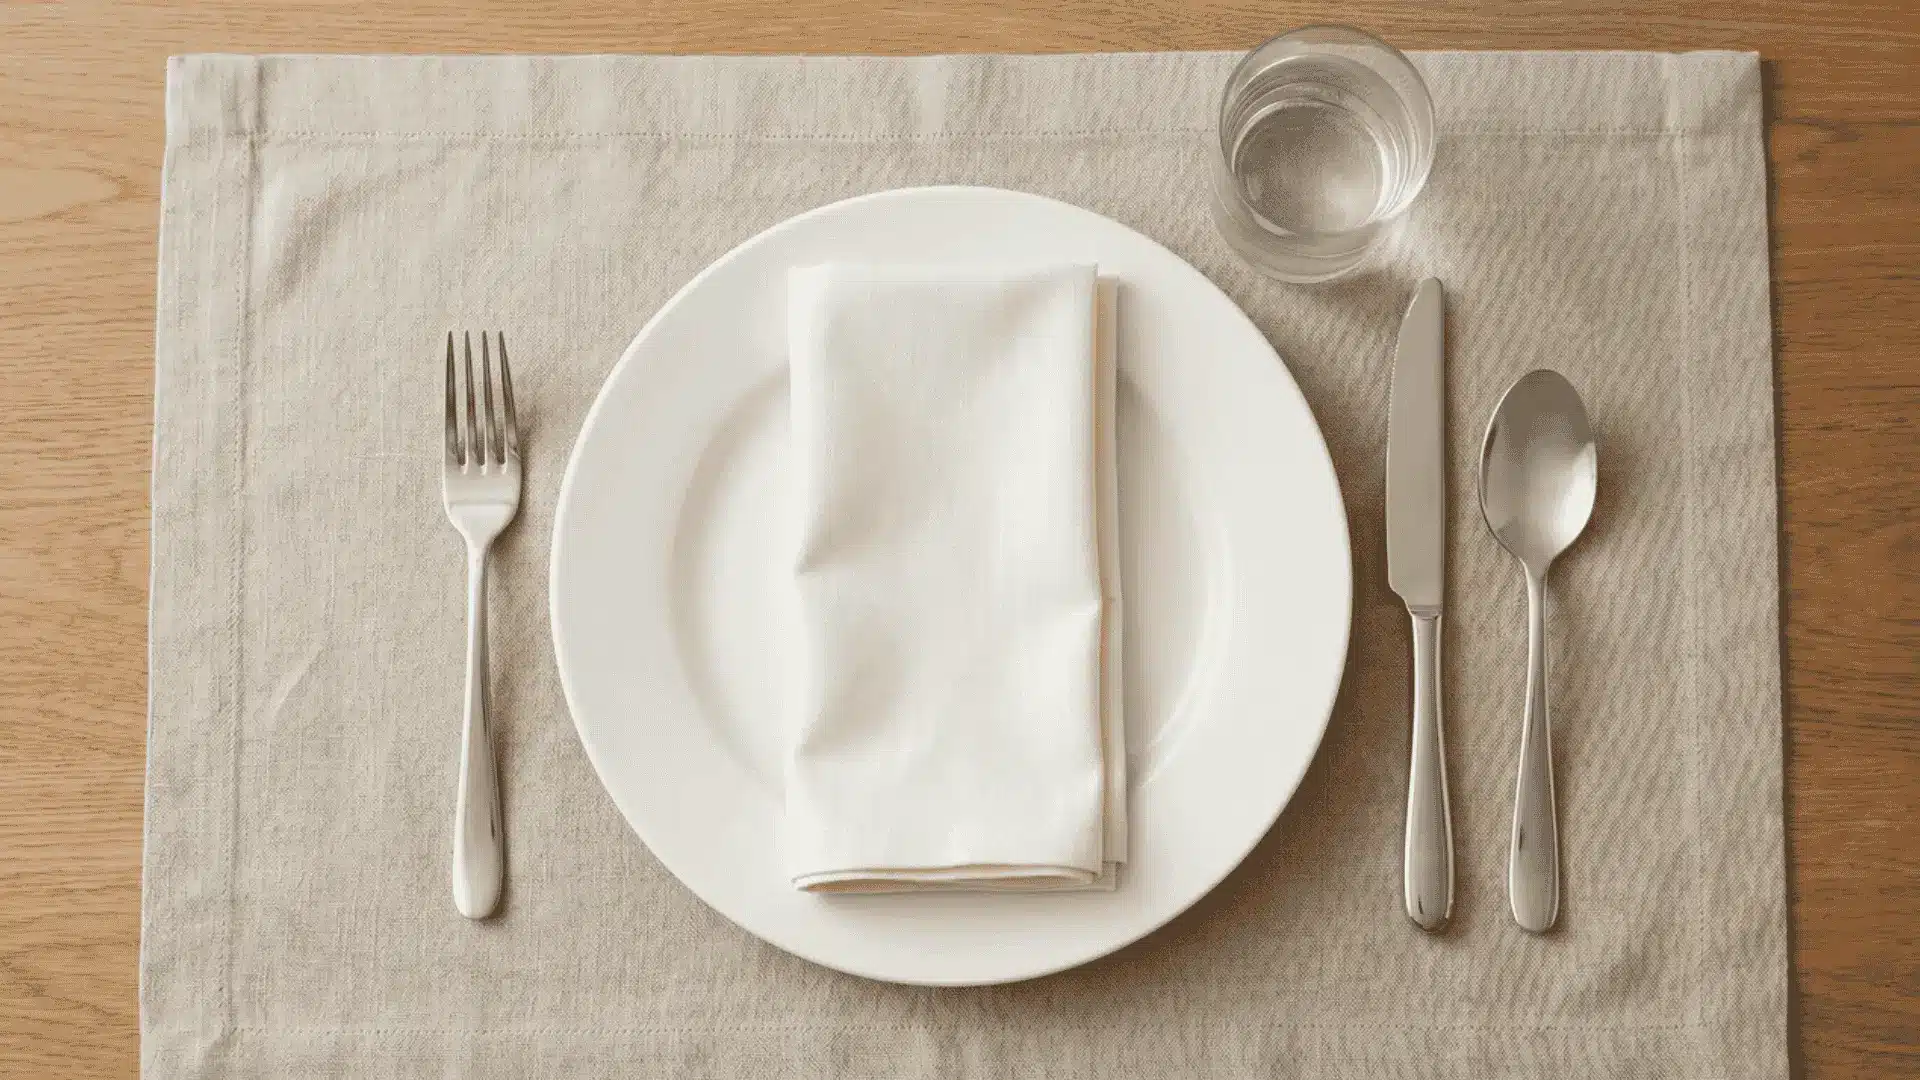
Place the dinner plate in the center. Fork goes to the left, knife to the right, with the blade facing in; spoon to the right of the knife; and water glass above the knife.
That’s the foundation every other setting builds from. Before you place a single item, there’s one rule worth understanding, because once it clicks, you’ll never need to second-guess a layout again.
The Outside-In Rule Explained
Every utensil on the table tells you when it gets used. The one farthest from the plate is used first.
Here’s how it works in practice. You place the first-course utensil on the outside. The guest picks it up, uses it, and it gets cleared. Now the next utensil is the outermost one, and that’s the one for the next course.
The table is essentially a flat timeline. Work from the outside in, and the sequence takes care of itself. You’re not memorizing positions; you’re mapping courses.
This is why a basic single-course setting only needs one fork, one knife, and one spoon. One course, one utensil per side.
Where Does Each Item Go?
Here’s the full placement for a basic setting, left to right:
- Placemat: Lay this down first. It defines each guest’s zone. Every item stays within its boundary.
- Dinner Plate: Center of the placemat. This is the anchor point around which everything else is positioned.
- Fork: Directly to the left of the plate. Handle pointing down toward the table edge.
- Dinner Knife: Directly to the right of the plate. Blade faces inward toward the plate; this is a table etiquette convention and has been standard practice for centuries.
- Spoon: To the right of the knife. Handle pointing down, same as the fork.
- Water Glass: Above the knife, slightly to the right. This keeps glassware in the upper right zone and out of the left-side flatware area.
- Napkin: To the left of the fork, or folded on the plate. Either placement is correct; pick one and keep it consistent across the table.
That covers everything a basic setting needs. One plate, three pieces of flatware, one glass, one napkin, and a layout logic that applies to every tier above this one.
Casual Place Setting Layout
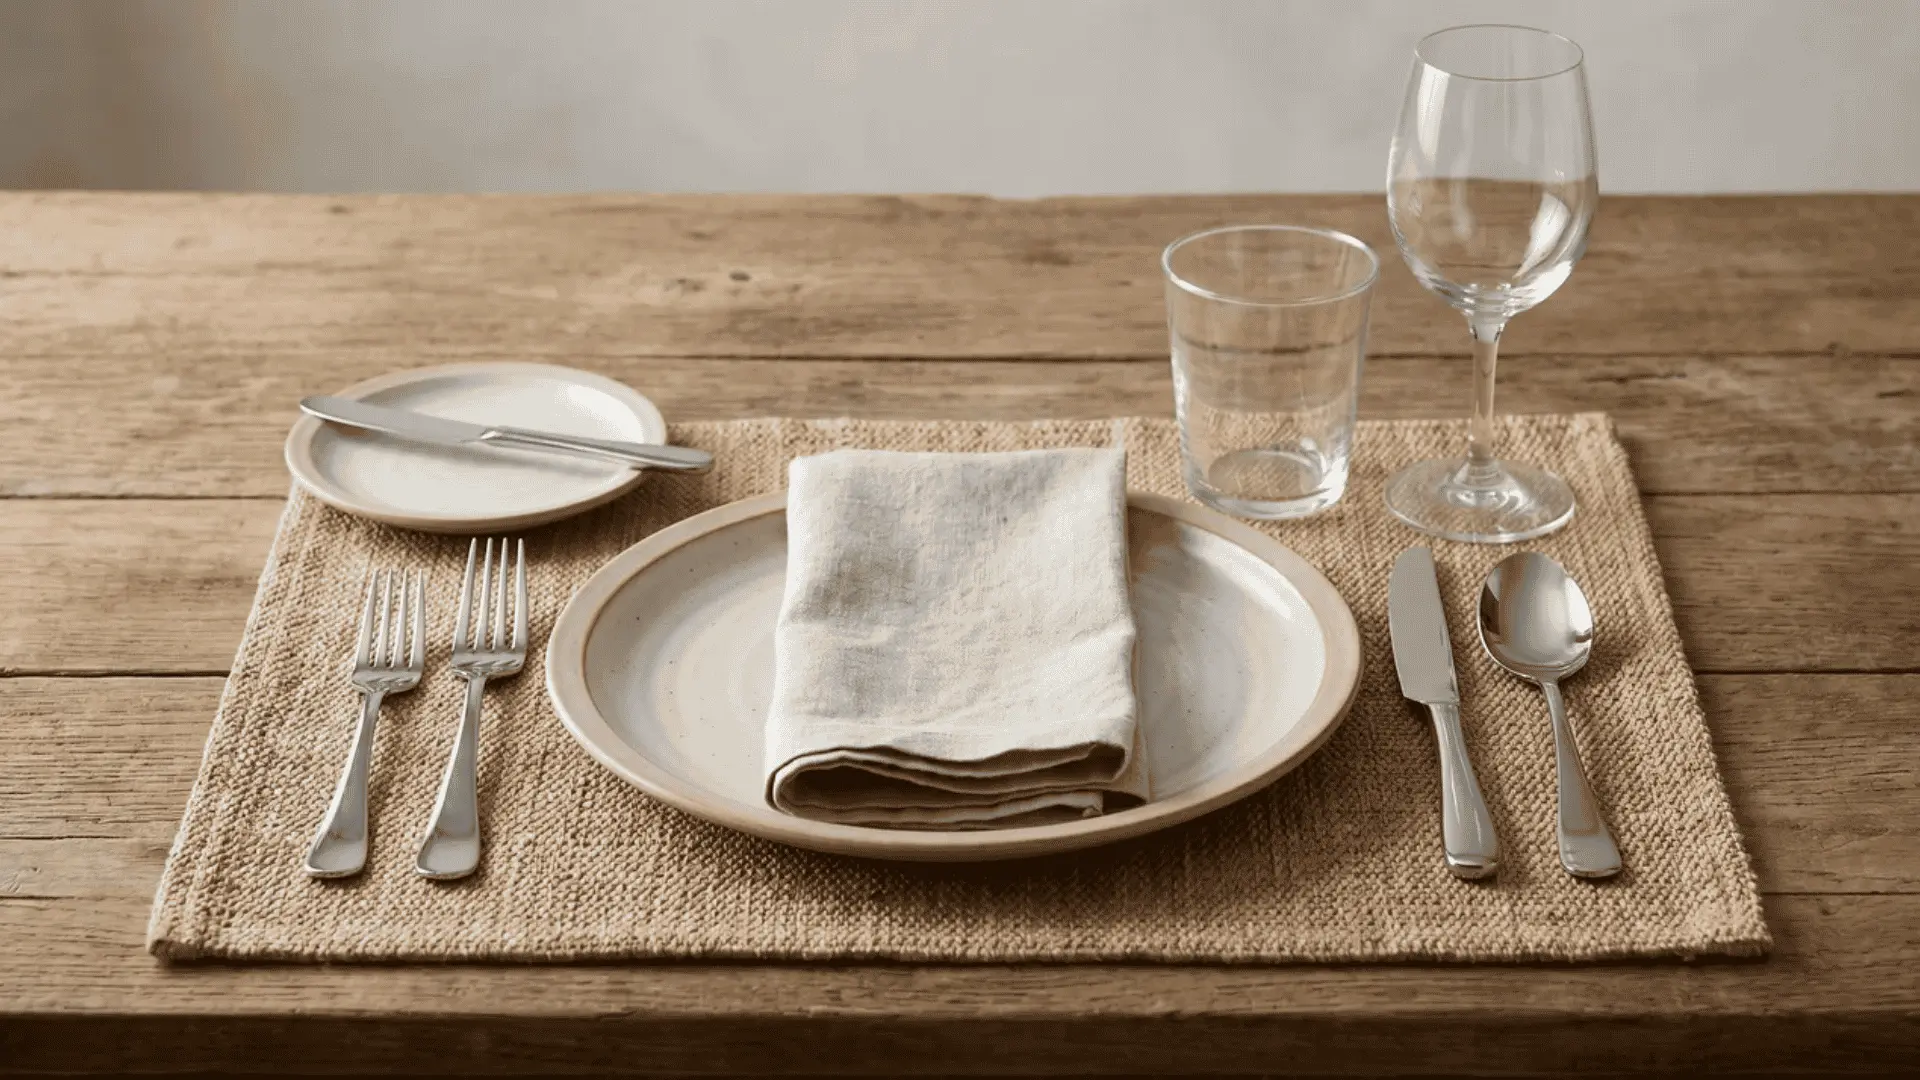
A casual setting adds specific items for each extra course you’re serving; it’s not just a more dressed-up version of basic.
Every addition has a purpose. If a course isn’t on the menu, its item doesn’t go on the table. That’s the key difference between casual and basic. Basic covers one course. Casual covers two or three, and the table reflects exactly that.
Before placing anything, remember this: BMW: Bread left, Meal center, Water right.
That one anchor tells you where everything on the left side lives. Bread plate upper left, dinner plate center, water glass upper right. Get BMW right, and the rest falls into place.
Start with your basic setting, then add these:
- Salad Fork: Place it to the left of the dinner fork, farther from the plate. Salad comes before the main, so, following the outside-in rule, it sits at the outermost position on the left.
- Bread Plate + Butter Knife: Upper left of the setting, above the forks. Rest the butter knife horizontally across the top of the bread plate with the blade facing down.
- Soup Spoon: Rightmost piece of flatware, further right than the dinner knife. Soup is usually the first course, so it goes on the outside, rightmost.
- Wine Glass: To the right of the water glass. Only set it if wine is being served. One glass per guest, matched to what’s on the menu.
- Napkin: folded neatly beside the fork or tucked into the water glass for a simple presentation effect. Both are appropriate for a casual occasion.
Each item on the table corresponds to something being served. Skip the soup spoon if there’s no soup. Skip the bread plate if there’s no bread course. The menu builds the table, not the other way around.
Formal Place Setting Layout
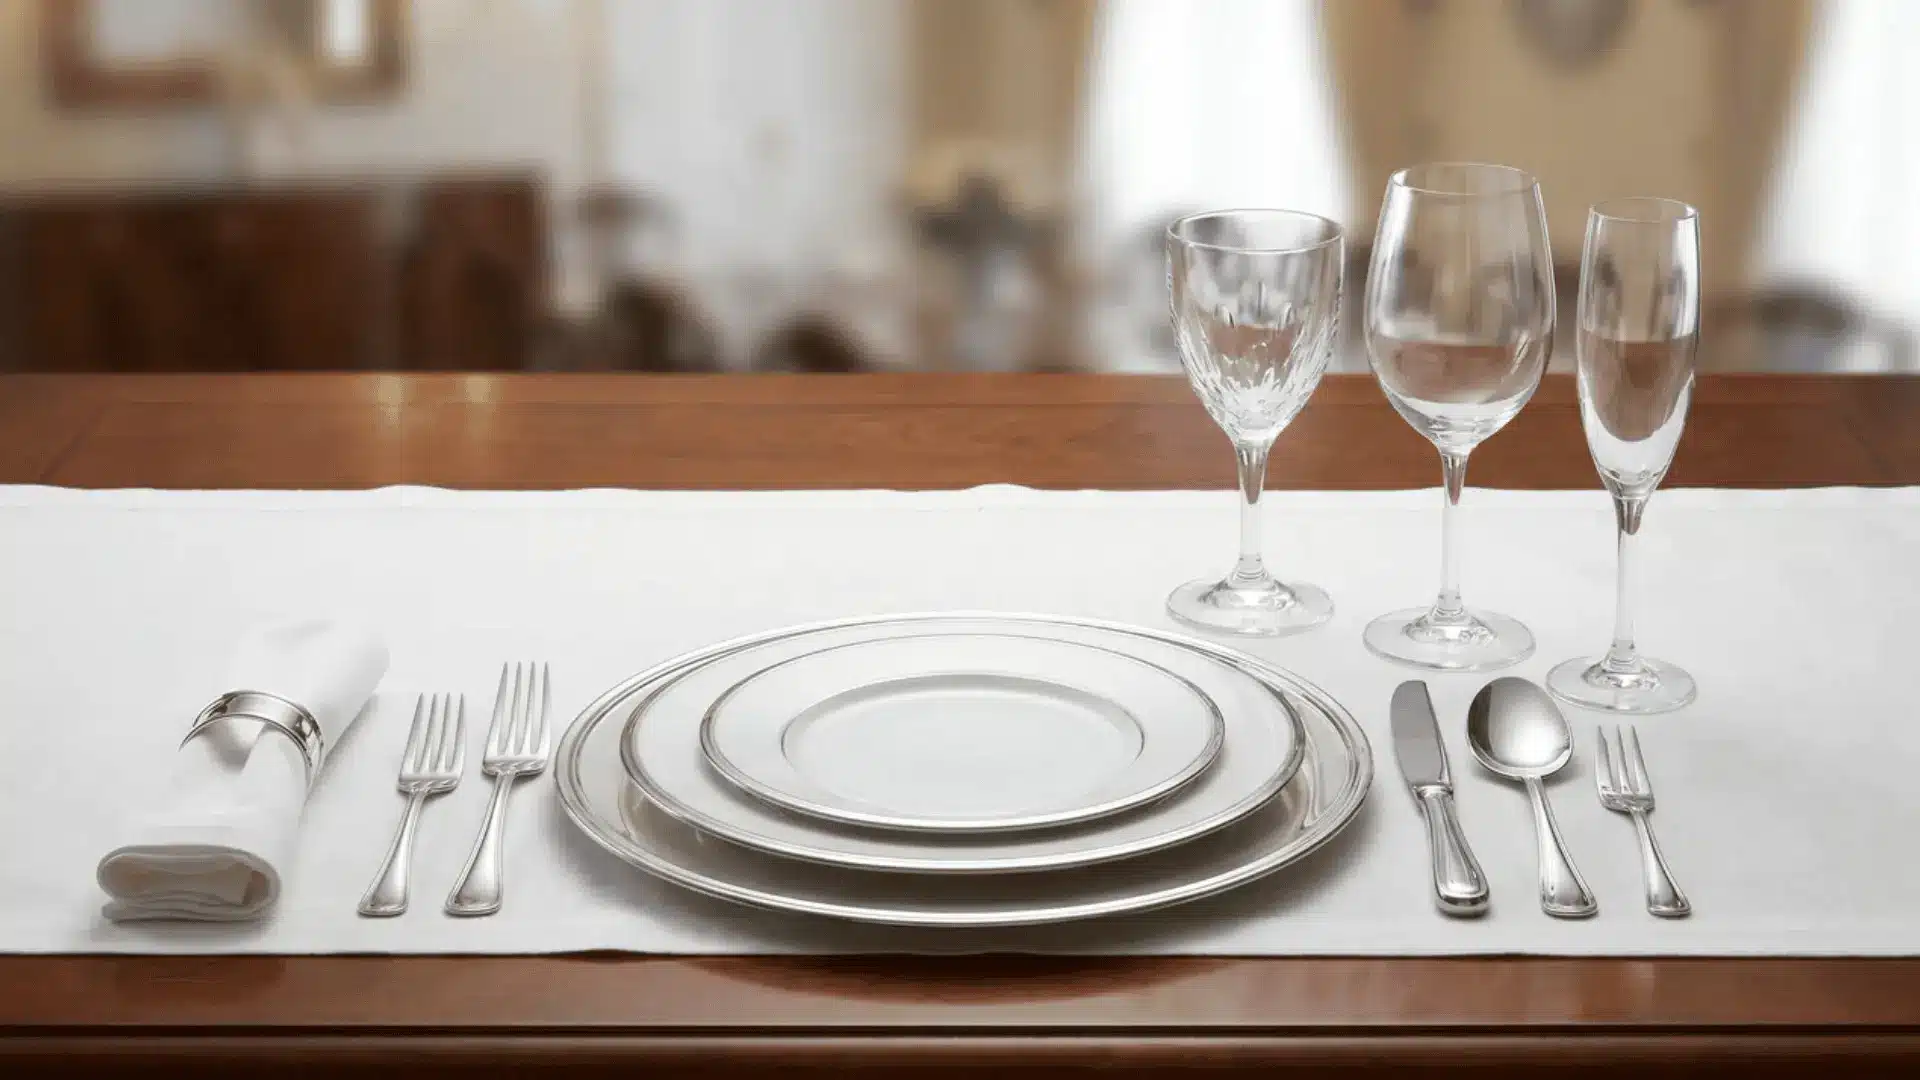
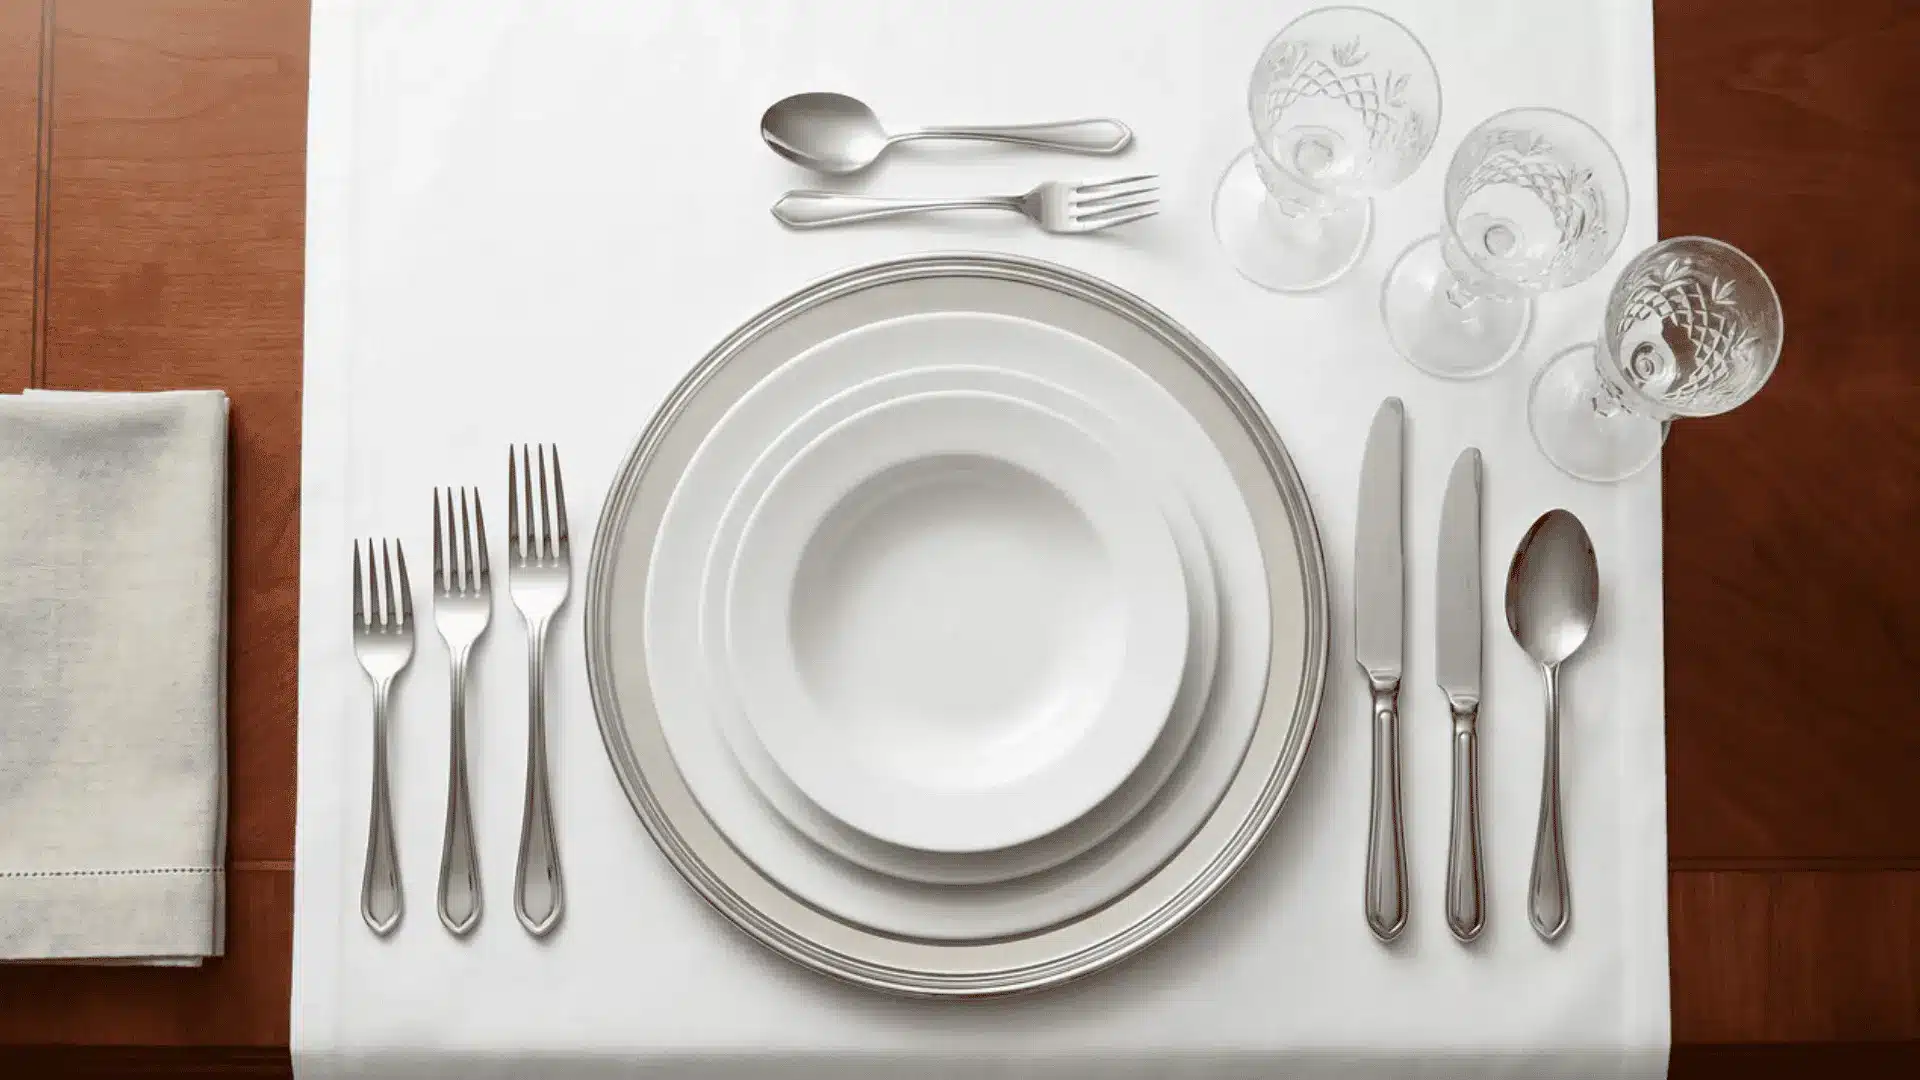
A formal place setting diagram maps every item to a course being served. Precision matters here, not the number of items you set out. The outside-in rule still runs everything.
Flatware Placement
Start with the charger plate in the center. It’s a decorative base; guests never eat from it, and it’s removed with the first course.
Build flatware outward from the charger on both sides. Each utensil position maps directly to a course. No course, no utensil.
If a course isn’t on the menu, its utensil stays off the table. An unused fork is a setting mistake, not extra polish.
Left side:
- Salad fork: outermost, used first
- Dinner fork: closest to the charger, used for the main
Right side:
- Dinner knife: closest to the charger, blade facing inward
- Soup spoon: next out from the knife
- Seafood fork: rightmost, only if seafood is on the menu
When in doubt, match every utensil to a course before it touches the table.
Glassware Placement
Line up glassware in the upper right, starting above the knife and moving right. Set only what the menu calls for.
An unused glass reads as a mistake at a formal table. Match glassware to courses exactly the same way you match flatware.
Three glasses with one sitting unused is an error, not an abundance. Every glass on the table should be used before the meal ends.
- Water glass: directly above the dinner knife
- Wine glass: right of the water glass, matched to what’s being poured
- Champagne flute: rightmost, only if champagne is being served
If it’s not being poured, it doesn’t belong on the table.
Above-the-Plate Items
Three things sit above the charger and stay in place through the entire meal. They come into use last.
- Dessert cutlery: It is placed horizontally above the charger, with the spoon on top, the handle to the right, and the fork below, the handle to the left. Both stay untouched until dessert.
- Place cards: They go above the dessert cutlery or on the napkin fold. Use them for 8 or more guests. Keep them readable from standing height.
- Napkins: They are formally folded on the charger or to the left of the forks.
That’s the complete formal layout. Charger center; flatware outside-in on both sides; glassware upper right; dessert cutlery above the plate; every item tied to a course.
Common Place Setting Mistakes and How to Fix Them
Most setting errors don’t come from ignoring the rules. Small misplacements quietly throw everything around them off.
1. Over-Setting: Utensils on the table for courses that aren’t being served confuse guests and clutter the layout.
Fix: Match flatware to the menu only. No course, no utensil.
2. Knife Blade Facing Outward: A blade facing away from the plate is one of the most noticeable table etiquette errors there is.
Fix: Blade always faces the plate. No exceptions.
3. Glassware Placed to the Left: Glassware on the left crowds the bread plate zone, forcing a chain shift: the bread plate moves, forks follow, and the entire left side misaligns.
Fix: All glassware stays in the upper right. Water glass above the knife, everything else moving right.
4. Napkin Under the Fork: The napkin traps the fork underneath. Guests disturb the entire setting before the meal even starts.
Fix: Napkin beside the fork or folded on the plate. Never under flatware.
5. Dessert Cutlery With Main Flatware: Dessert cutlery on the sides is picked up too early or mistaken for main-course flatware.
Fix: Dessert spoon and fork go above the plate only. Horizontal handles opposite directions.
Precision beats abundance every time. Every item in the right position, matched to the menu, is all a correct setting needs.
Wrapping Up
A place setting layout isn’t about memorizing positions; it’s about understanding why each item sits where it does.
Once the outside-in rule clicks, upgrading the rest of your space follows naturally. Basic, casual, or formal, the same logic runs all three.
You have understood exactly what goes where, why it goes there, and what happens when one item lands in the wrong spot.
Pick your occasion, follow the matching layout, and set the table with confidence, no second-guessing, no resetting halfway through.
Frequently Asked Questions
Can you mix casual and formal place setting elements at the same table?
Mixing tiers creates visual inconsistency and confuses guests about which courses are coming. Stick to one setting type per table, matched to your menu.
Does the placemat change depending on the setting type?
Placemats are standard for basic and casual settings. Formal settings typically use a full tablecloth instead, with the charger plate defining each guest’s zone.
How far apart should place settings be on the table?
Each place setting needs roughly 24 inches of table space per guest. This allows comfortable elbow room without items from adjacent settings overlapping.
Should cutlery handles be aligned with the table edge?
Yes, handles should sit approximately 1 inch from the table edge, consistently aligned across all settings. This keeps the layout clean and intentional.