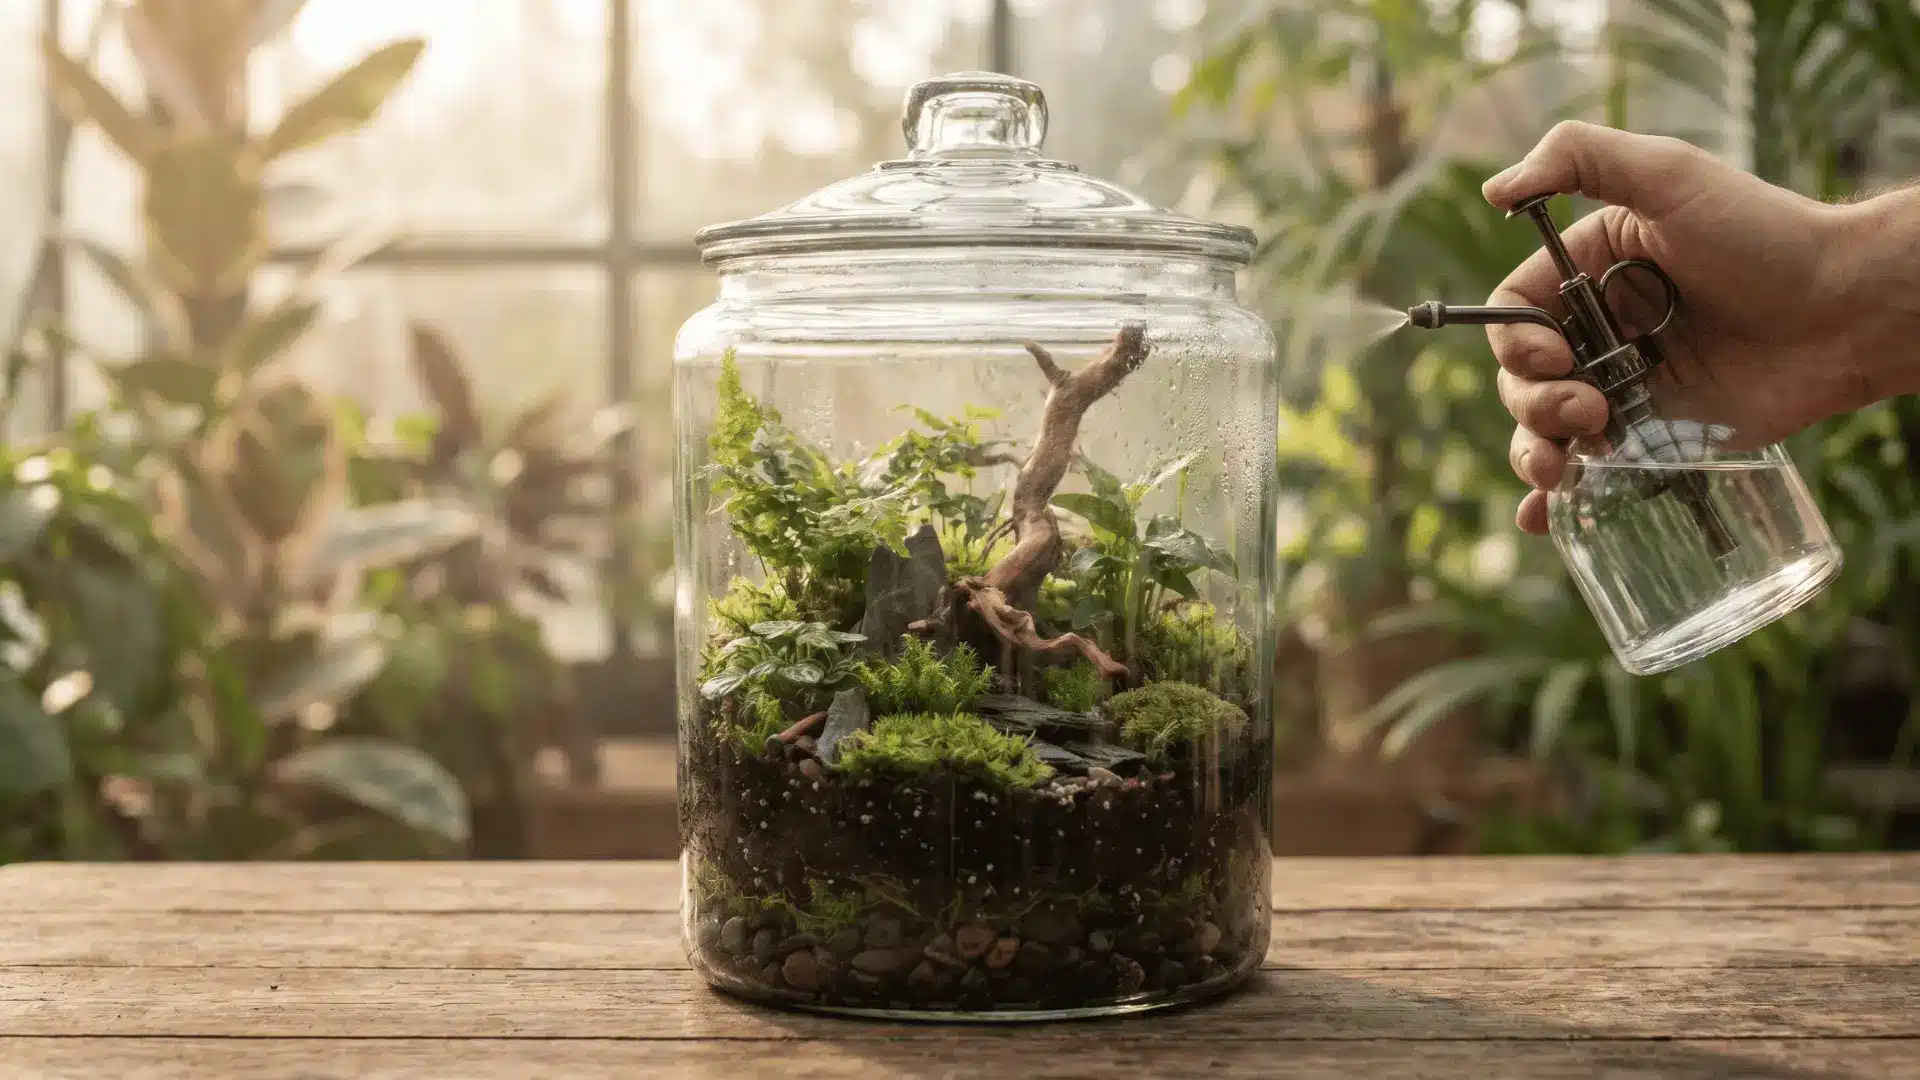



A closed terrarium is more than a decorative jar; it’s a living system that regulates its own moisture, light, and growth without constant attention.
Most beginner attempts fail not because of wrong plants but because of skipped layers that quietly break the water cycle within months.
Learning how to make a terrarium that actually stabilizes comes down to understanding why each component exists before placing anything inside the glass.
Everything needed, from materials to step-by-step assembly to reading the warning signs, is laid out clearly below, in build order.
Closed or Open Terrarium: Decide Before Anything Else
Before starting with a terrarium DIY, the first step is choosing between a closed and an open one. This choice decides plants, soil layers, watering needs, and the full setup direction.
A closed terrarium has a sealed lid, so moisture cycles. Water evaporates, condenses on glass, and returns to the soil. It suits humidity-loving plants.
An open terrarium has no lid, so air moves freely. Moisture dries out faster, meaning regular watering is needed. It suits succulents and cacti.
Here, the focus stays on closed terrariums. For open builds, skip charcoal, use cactus soil mix, and keep the container unsealed to support airflow and drainage.
Step-By-Step Guide on How to Make a Terrarium
A practical step-by-step guide to building a closed terrarium from scratch, covering container setup, drainage, soil layering, planting, and long-term care to create a stable self-sustaining ecosystem.
Tools and Materials Used
| Material / Tool | Purpose |
|---|---|
| Glass jar or cookie jar with lid | The main container needs a tight seal and an opening wide enough for your hand |
| Pea gravel or LECA | The drainage layer keeps excess water away from the roots |
| Window screen mesh or weed blocker fabric | Barrier between drainage and soil |
| Coconut coir (coco fiber brick) | Base soil component rehydrates before use; one brick expands significantly |
| Sphagnum moss | Added to substrate for moisture retention; also used as surface cover |
| Orchid bark | Keeps the substrate loose and aerated |
| Activated charcoal | Controls odor and keeps the water cycle clean |
| Worm castings | Slow-release nutrients mixed into the substrate |
| Cushion moss | Ground cover and humidity stabilizer |
| Spiderwood or driftwood | Hardscape anchor for visual structure |
| Slate stones or decorative rocks | Secondary hardscape for height and texture |
| Fittonia | Humidity-loving foliage plant; slow-growing |
| Peperomia | Compact tropical; handles low airflow well |
| Hydrocotyle | Fast-growing ground cover, trim regularly |
| Springtails | Cleanup crew; controls mold and organic waste |
| Long tweezers | For placing moss and plants inside the jar |
| Scissors | For cutting mesh, trimming moss, and prepping cuttings |
| Small cup or measuring container | For mixing and portioning the substrate |
| Misting bottle | For initial watering at setup |
If you’re building an open terrarium instead, skip the charcoal, swap coco fiber for a fast-draining cactus mix, and leave the container unsealed.
Step 1: Choose and Prepare the Container
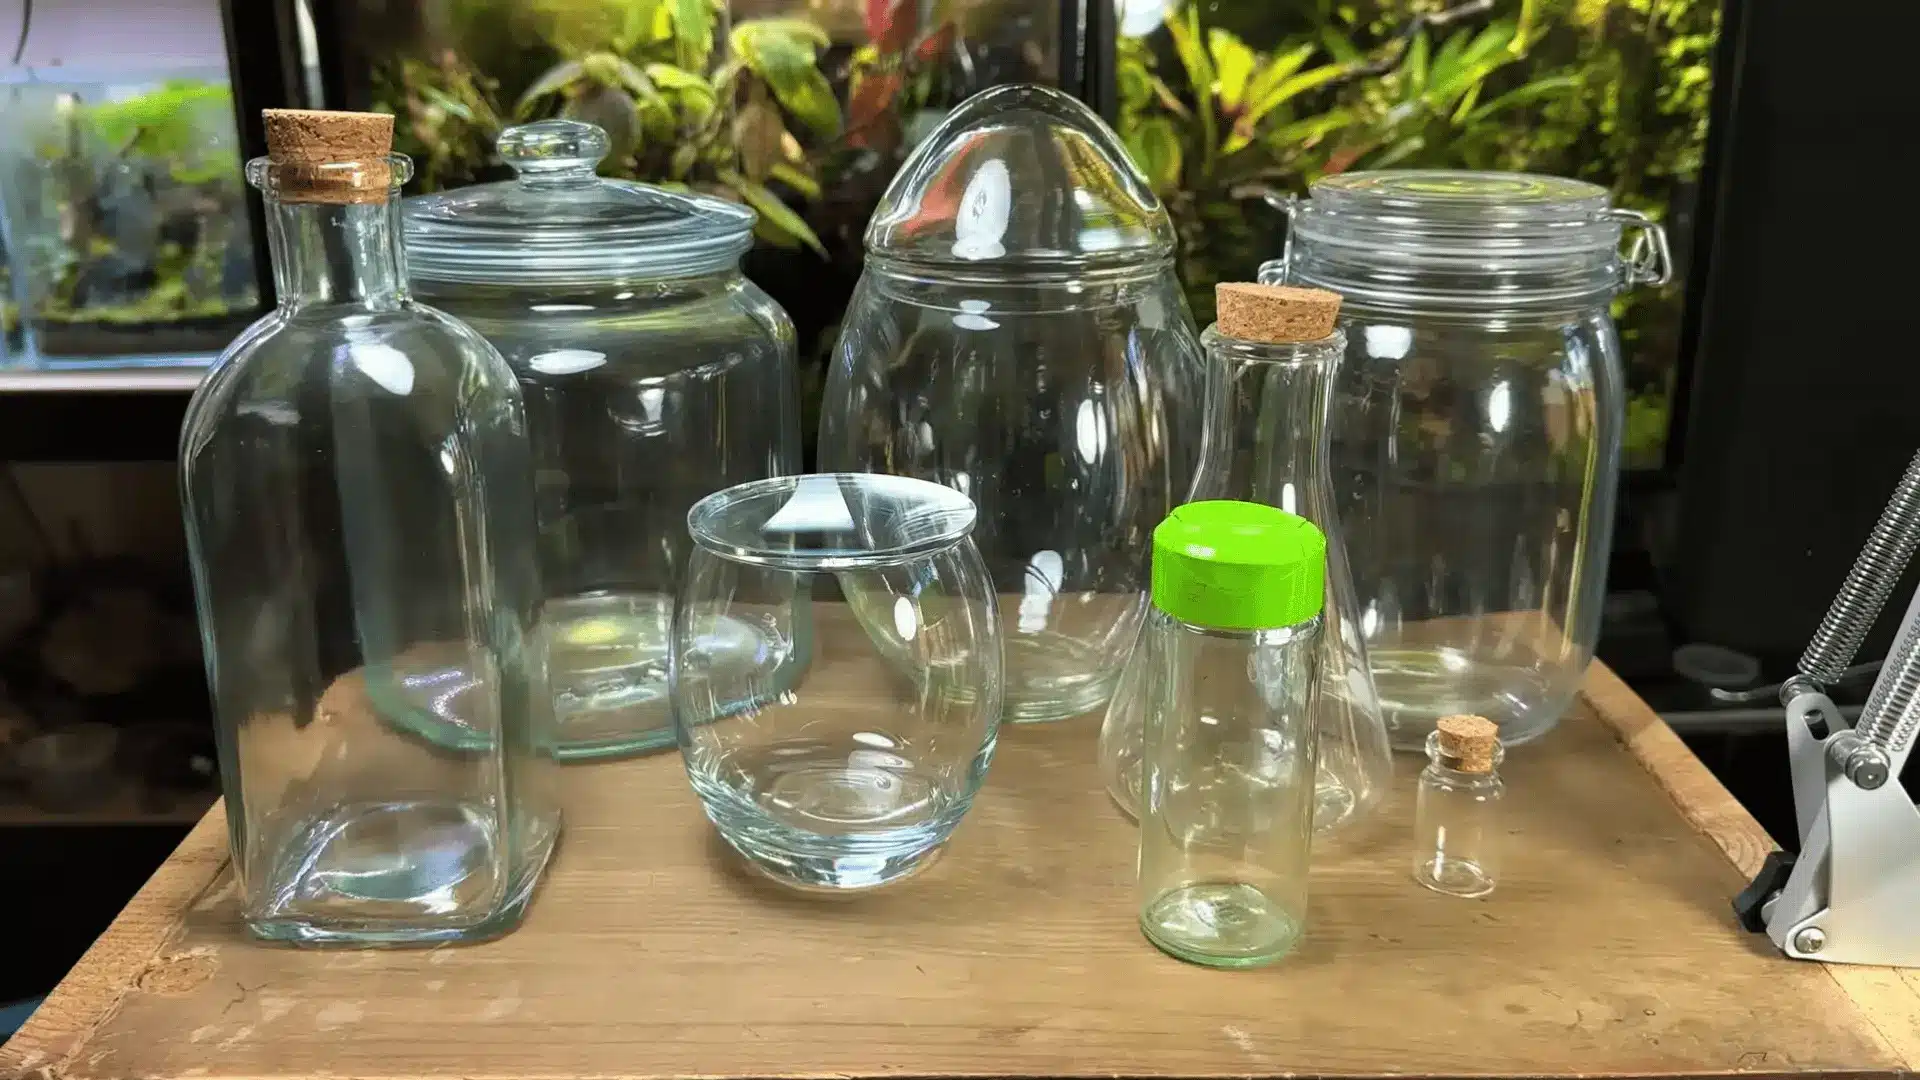
Tools used: None at this stage, just the container.
Pick a clear glass container with a lid, like a cookie jar. A sealed lid helps keep a steady, humid environment inside for plant growth.
Avoid containers with very narrow openings, as they make planting and layering more difficult. Set it on a stable surface first so layers stay even while building.
Step 2: Build the Drainage Layer
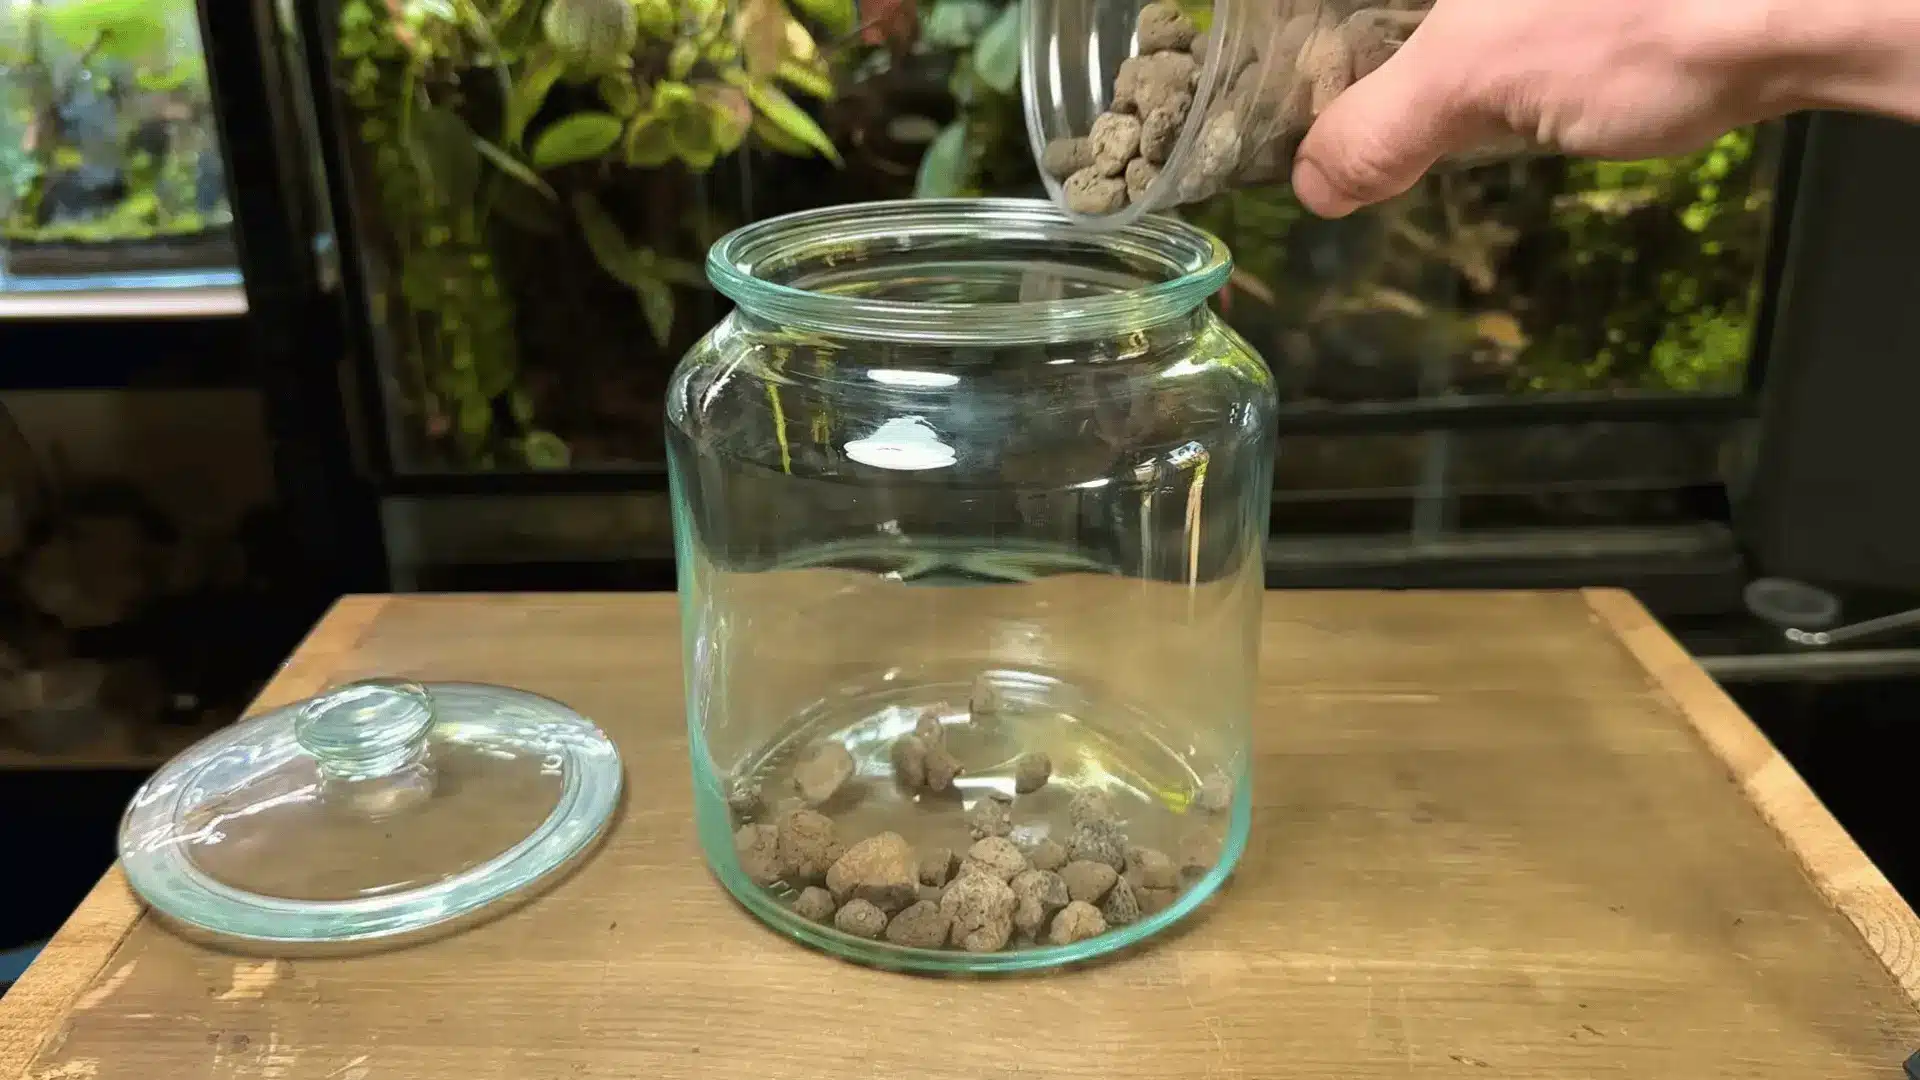
Tools used: Small scoop/cup for pouring materials.
Add a 3-cm layer of LECA or small stones to the bottom of the jar. It drains excess water and keeps roots safe from rot and long-term damage.
Pour it evenly and lightly tap the container so it settles flat. Make sure the layer stays level before adding soil above it. Carefully do so.
Step 3: Add Substrate Barrier and Soil Mix
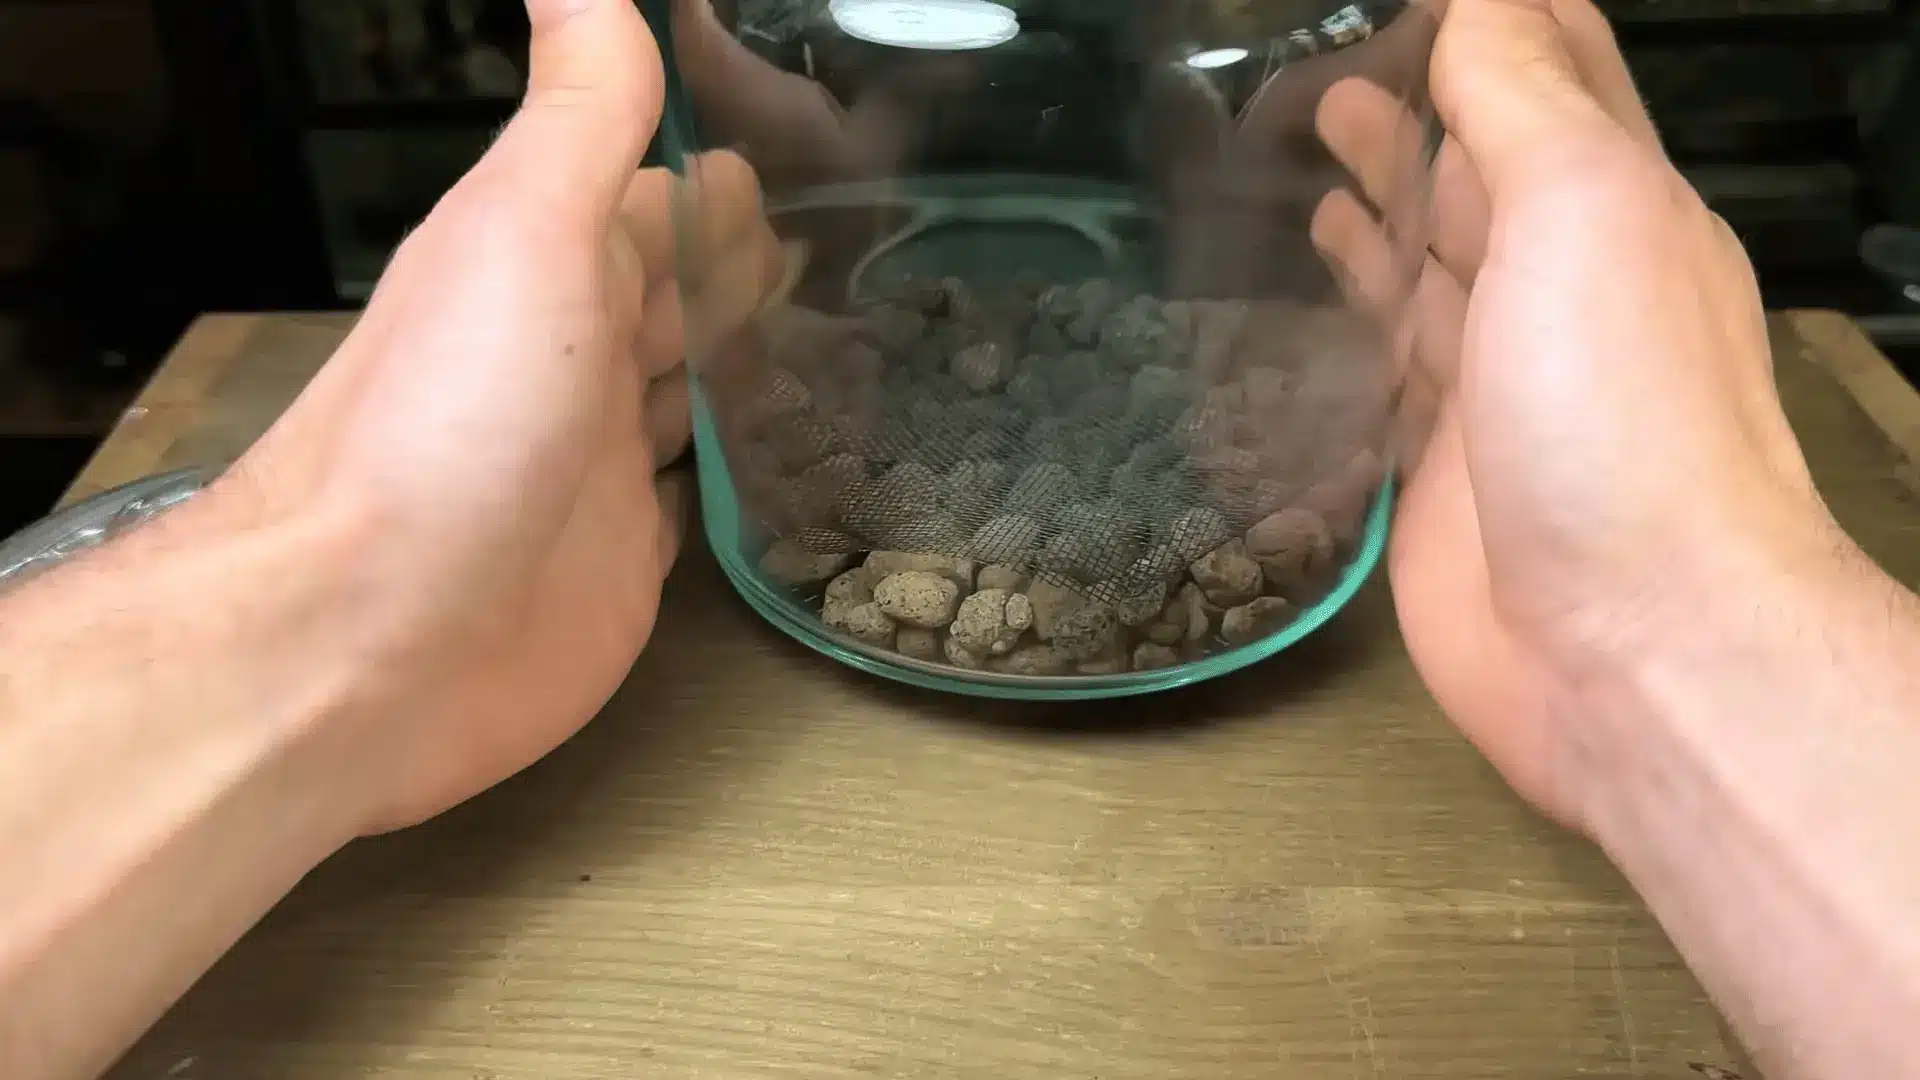
Tools used: Scissors for mesh cutting, measuring cup for mixing
Cut the window screen mesh with scissors and shape it to fit over the drainage layer. It prevents soil from slipping into gravel and mixing over time.
Without this barrier, soil gradually fills the drainage space, reducing drainage efficiency within months. Prepare substrate separately using coco fiber, sphagnum moss, orchid bark, charcoal, and worm castings instead of garden soil.
Step 4: Arrange Hardscape and Moss Base
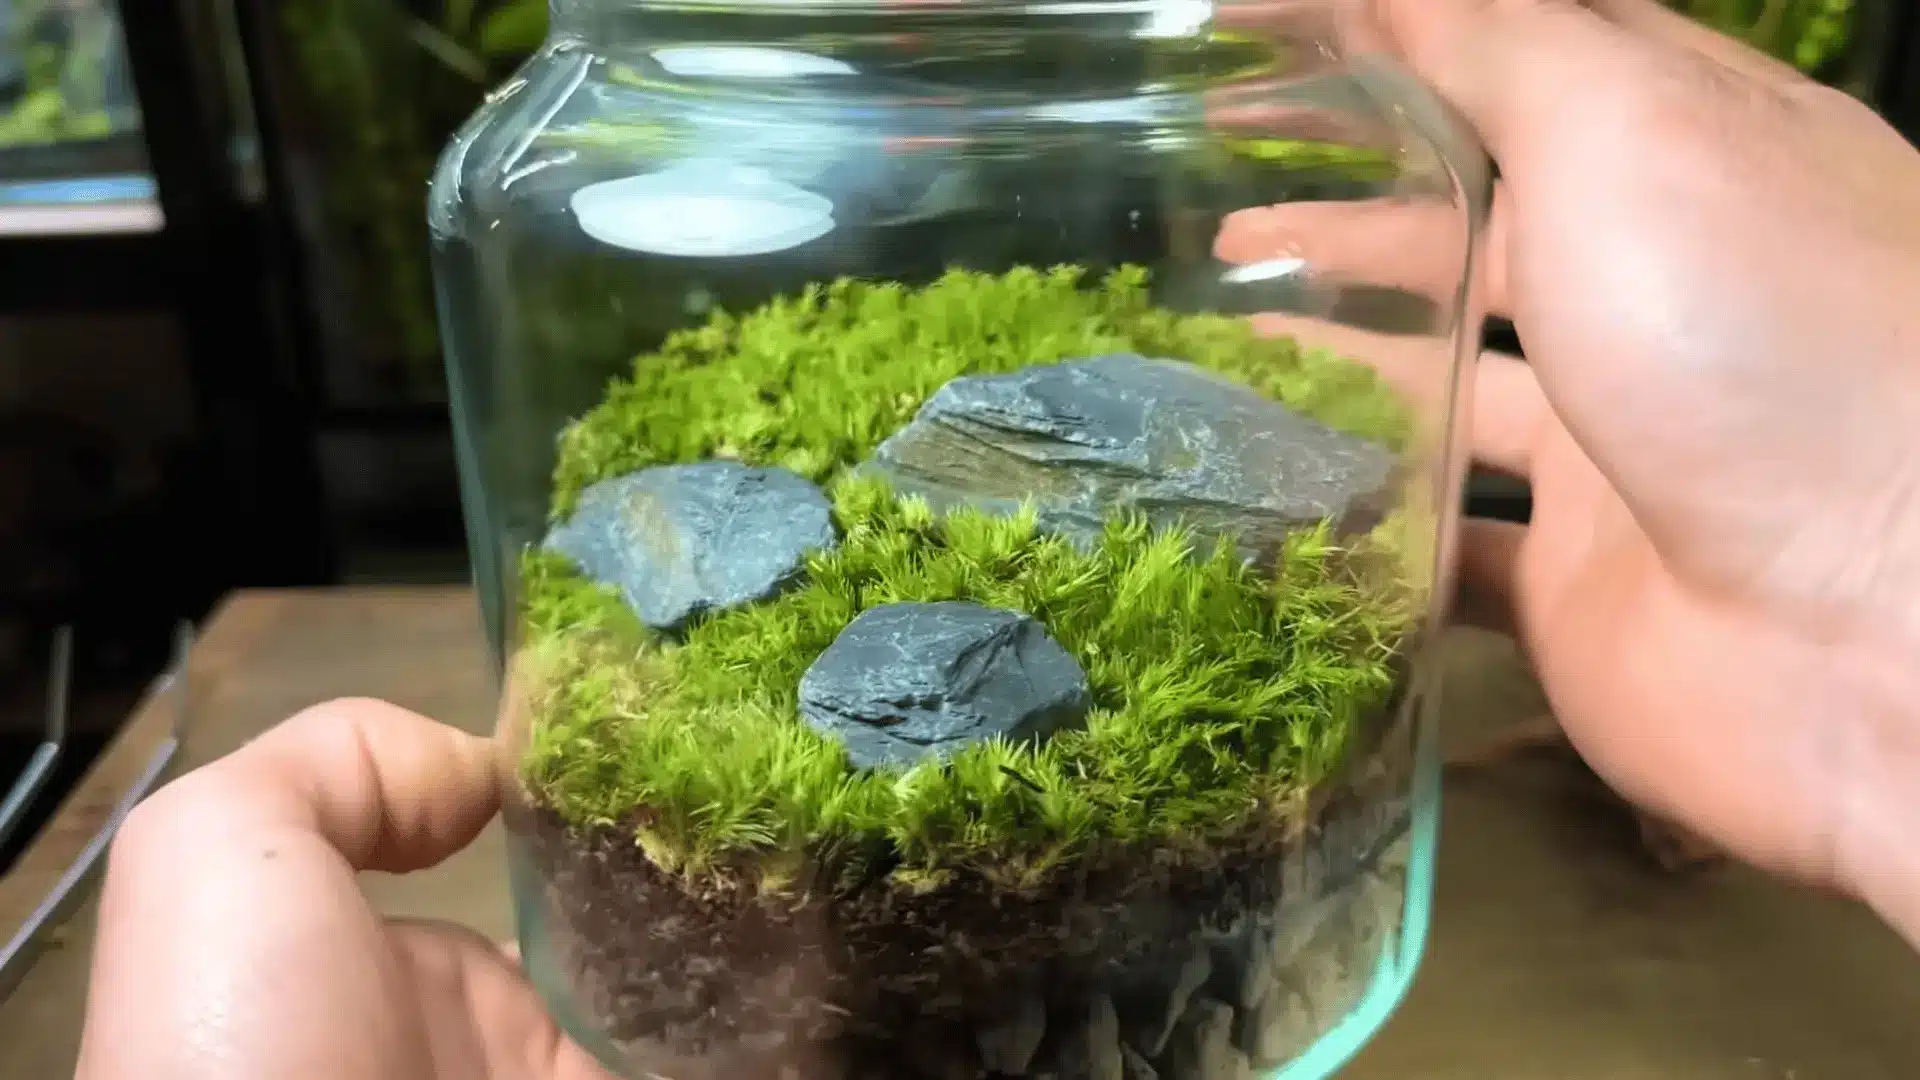
Tools used: Tweezers for placement, scissors for trimming moss
Place spiderwood and slate stones into the substrate, adjusting their positions until the layout feels balanced. Take time to shift them around since this forms the main structure of the setup.
Next, clean and break the cushion moss into smaller pieces, then trim the base so it sits flat. Use long tweezers to place it around the hardscape, then press it lightly so it connects with the soil.
Step 5: Add Plants and Springtails
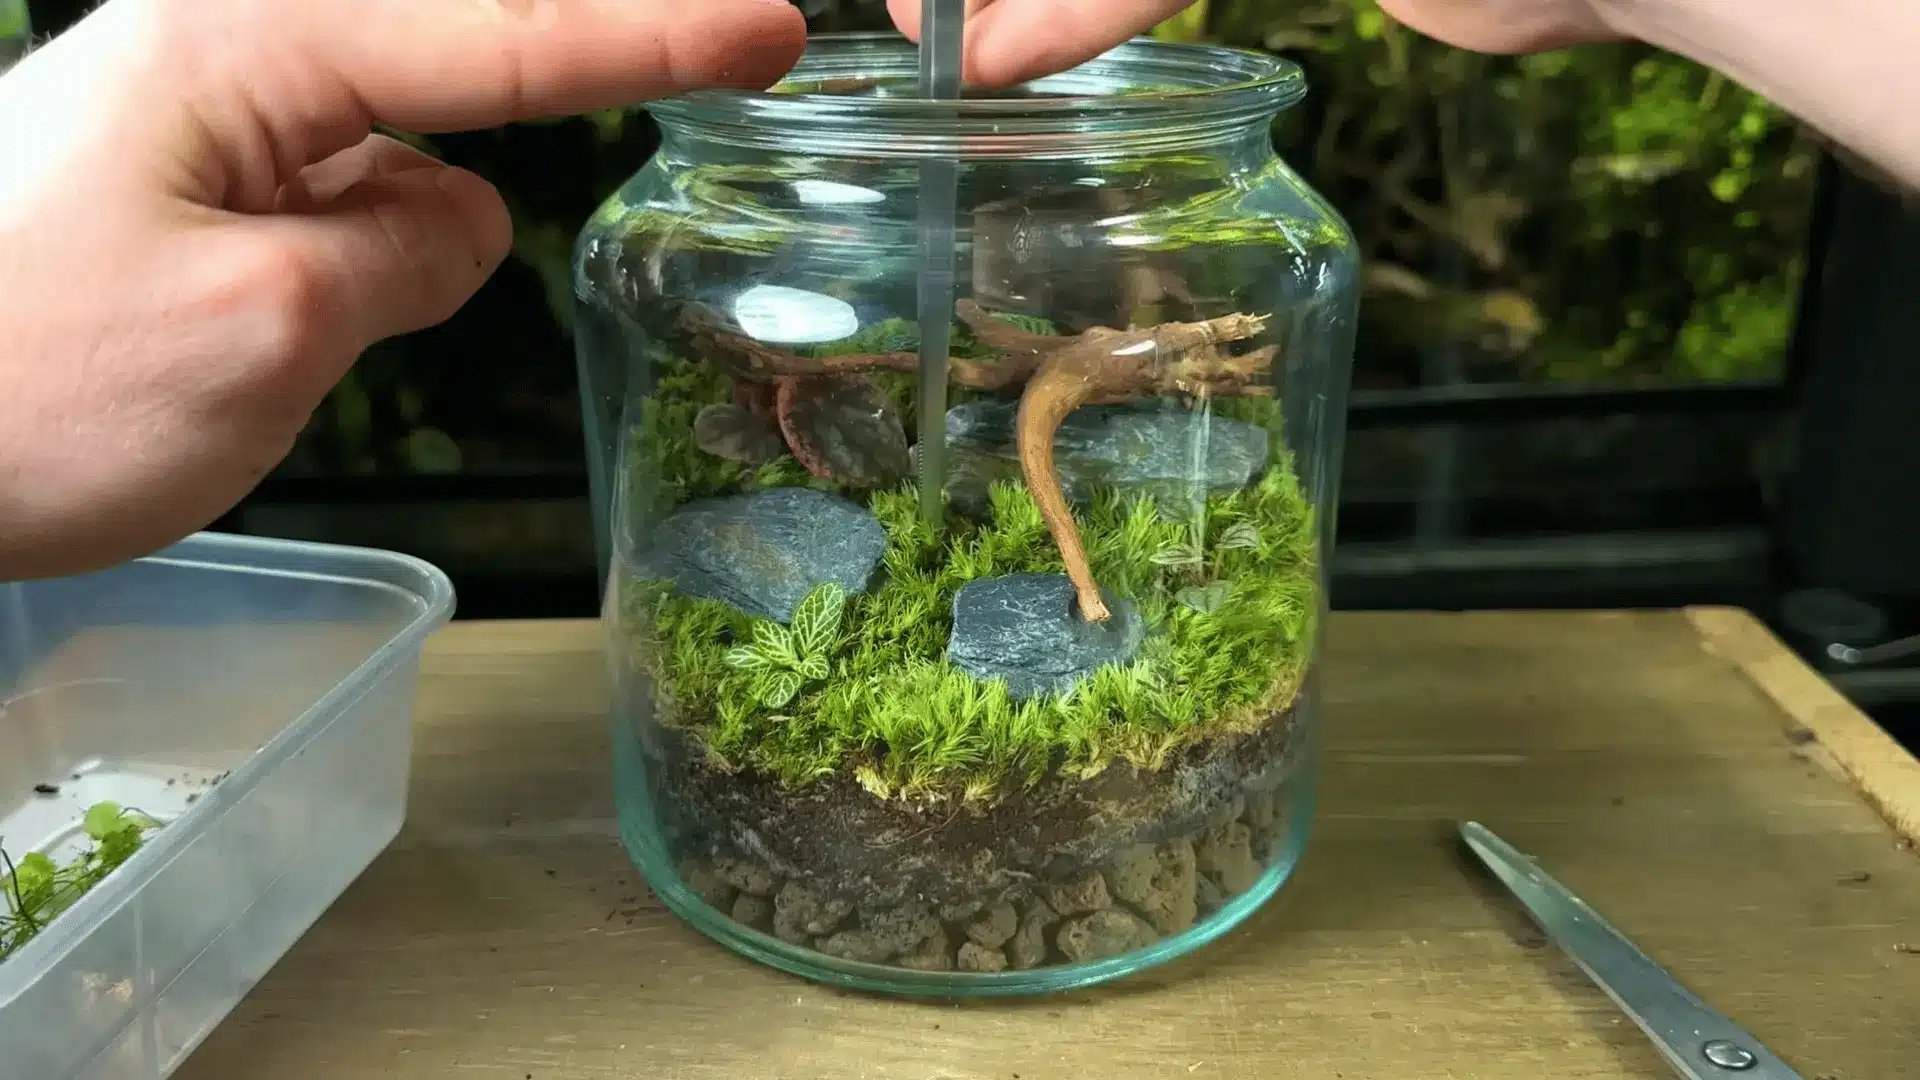
Tools used: Tweezers for planting and making holes.
Use tweezers or fingers to make small holes in moss and soil. Plant Fittonia, Peperomia, and Hydrocotyle in separate spots for balanced color and texture.
Hydrocotyle grows faster, so place it in a corner rather than the center. Keep taller plants at the back, smaller ones in gaps, then add springtails to control mold.
Step 6: Water and Set up Lighting Care
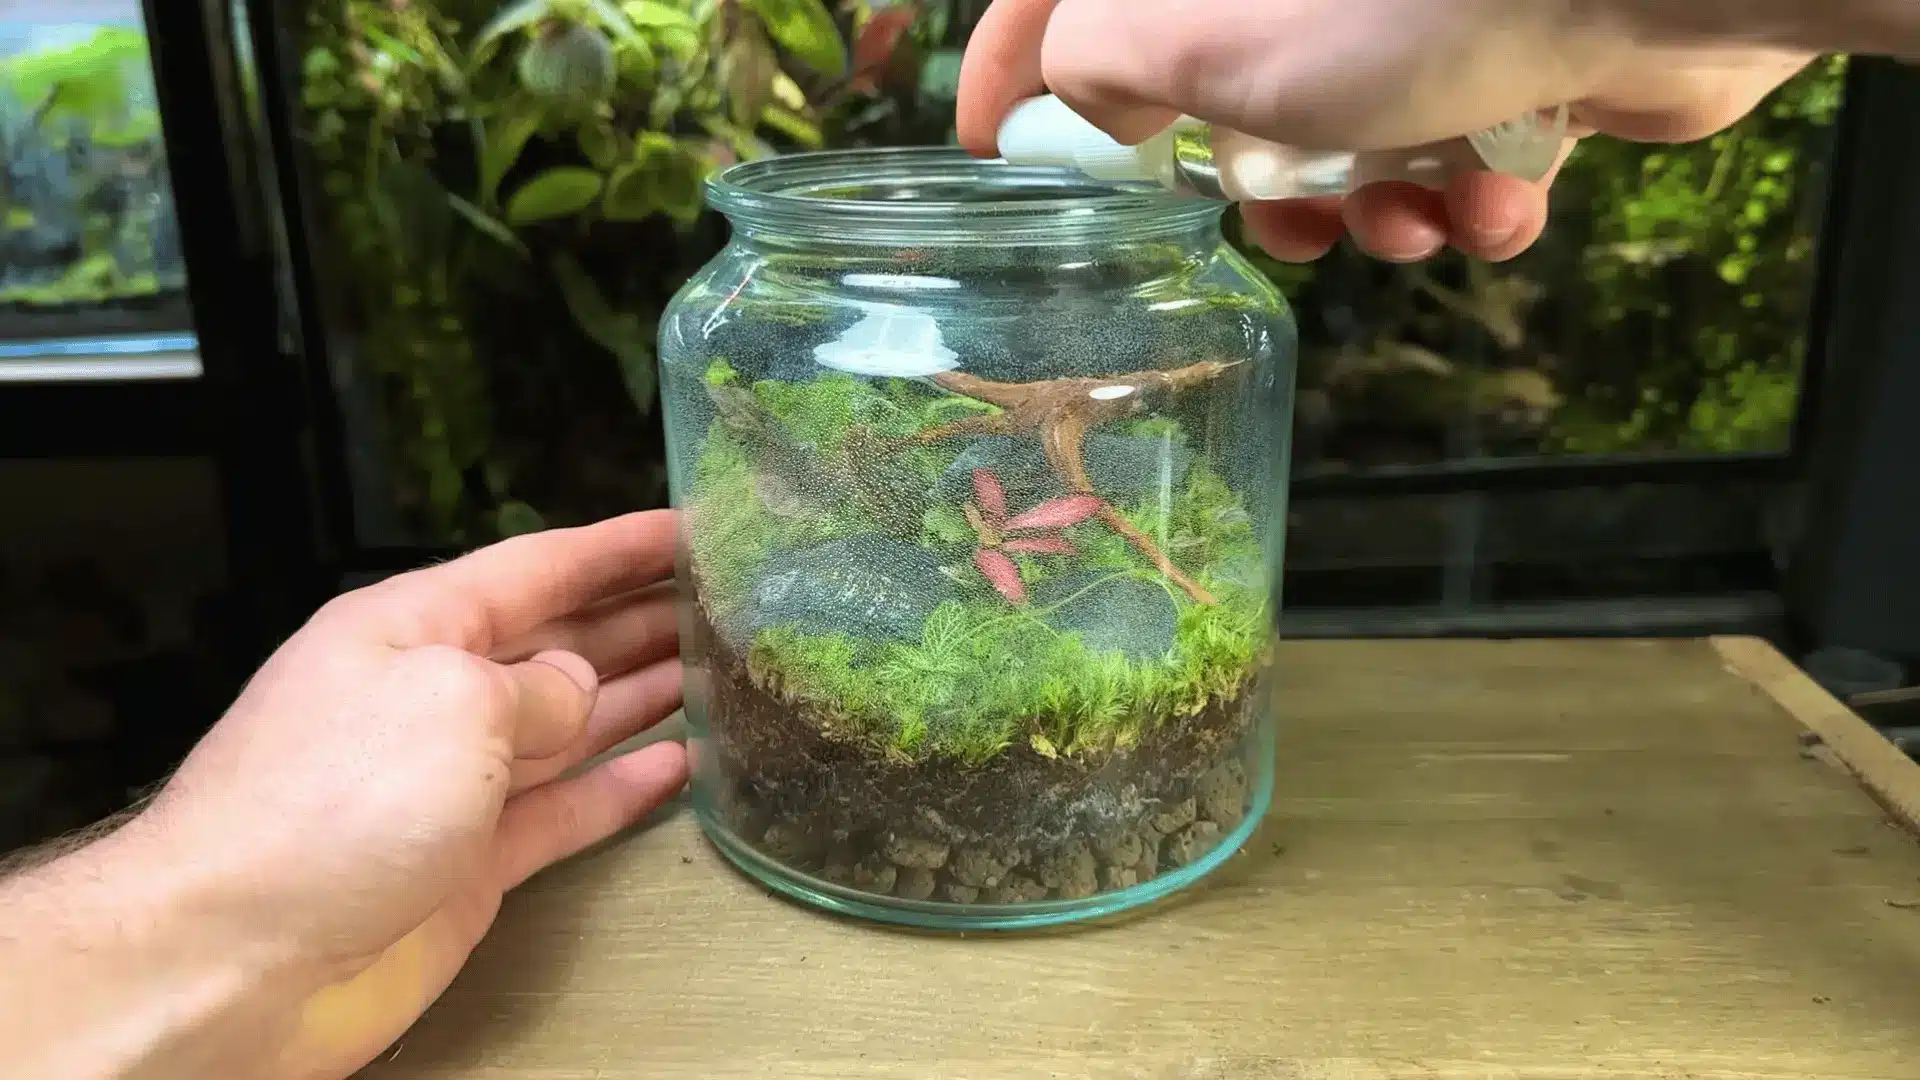
Tools used: Misting bottle for watering.
Lightly mist the terrarium using a spray bottle. Keep the soil damp, not soaked, since excess water can become trapped in sealed setups for long periods.
Place it in indirect sunlight or under an LED grow light for about 12 hours daily. Open the lid every 1–2 weeks for fresh air and to check the plant.
For an in-depth walkthrough of the whole process, check out the complete terrarium DIY video tutorial below:
How a Closed Terrarium Sustains Itself? (And What to Watch)
A closed terrarium runs on a self-contained moisture cycle where small visual changes on the glass tell you exactly how the system is behaving.
| Condition | What It Means | What’s Happening Inside | What To Do |
|---|---|---|---|
| Light condensation on glass | Healthy balance | Water evaporates from soil and plants, then condenses and returns to the soil. | Leave it alone and keep observing |
| Condensation mainly on one side | Normal thermal balance | The cooler glass side collects more moisture droplets | No action needed, this is expected |
| Heavy fog covers the glass and plants | Too much moisture | Excess water vapor trapped in the system, limited airflow balance | Crack the lid for a few hours, let the moisture reduce, then reseal |
| No condensation visible | System imbalance or dryness | Either insufficient initial water or a poor seal prevents the cycle | Check the seal first, then add a small amount of water and monitor |
| Frequent urge to open the lid | Human interference risk | External disturbance breaks the stable moisture cycle | Avoid unnecessary opening once the balance is established |
Once the moisture loop stabilizes, the terrarium largely regulates itself, and success comes from observation rather than intervention.
Ongoing Care and Troubleshooting
A closed terrarium is fairly low effort once it settles. The setup does most of the work, and you mainly just observe it over time.
Core Requirements
A closed terrarium works on a natural moisture cycle. Once it stabilizes, it mostly looks after itself with very little day-to-day care needed.
- Indirect light: Keep it in soft light, so plants stay healthy without overheating. Avoid direct sun since glass can trap heat quickly and stress plants.
- Occasional pruning: Trim only when plants touch the glass. Keep a small 1–2 cm gap, so airflow and moisture on the walls stay balanced.
- Rare watering: Only add water if things clearly look off. In most cases, the system retains its moisture for long periods without external help.
When these basics are followed, care becomes simple watching rather than active work, and the terrarium stays stable on its own.
What to Watch for When Making a DIY Terrarium?
A terrarium shows clear signs when something is off, mostly through mold on the soil or changes in leaf color over time.
White or grey mold in the first 1–2 weeks is usually harmless. It happens as soil settles. Remove it, air out briefly, then close again.
Mold after two weeks usually means too much moisture. Open the lid for a day or two, let it dry slightly, then seal again carefully.
If mold returns, one plant may not be suited to the humidity. Replace it with a better-suited species for sealed, moist environments like this setup.
Yellow leaves usually point to poor light. Move the terrarium closer to indirect light, then wait a week before making any further adjustments.
Once stable, care becomes simple observation. Just watch light, growth limits, and soil changes instead of doing frequent active maintenance work.
Conclusion
A terrarium that works isn’t maintained; it’s observed. The moisture cycle, the layering, and the plant selection all determine stability long before the lid goes on.
What keeps most builds from lasting isn’t neglect; it’s skipped steps at the start that create problems no amount of adjustment can reliably fix.
Knowing how to make a terrarium correctly means the setup becomes the effort, and everything after that becomes watching something sustain itself.
Gather the materials, follow the layers in order, and leave it sealed for 48 hours. The condensation on the glass will tell you the rest.
Frequently Asked Questions
How often does a closed terrarium need to be watered?
A properly sealed closed terrarium rarely needs additional water. After the initial misting at setup, the internal water cycle, transpiration, condensation, and return to soil, recycles moisture continuously. Most sealed terrariums go months or longer without any added water. The only trigger for rewatering is the absence of visible condensation on the glass after the terrarium has been sealed for several days.
What plants are best for a beginner terrarium?
Fittonia, cushion moss, small ferns (such as maidenhair or button fern), creeping fig, and Peperomia are the most reliable choices. They share two key traits: tolerance for high humidity and a slow growth rate that keeps them from pressing against the glass too quickly. Avoid succulents and cacti entirely, they require low humidity and will rot in a sealed container.
Why does a terrarium need activated charcoal?
Activated charcoal adsorbs dissolved organic compounds and gases that accumulate in the recycled water over time. Without it, the water cycle degrades the substrate, develops anaerobic conditions, and an odor even if drainage is intact. It does not need to be replaced. A thin layer is applied once during setup functions and remains inside a sealed container indefinitely.
What is the difference between an open and a closed terrarium?
A closed terrarium has a sealed lid that traps moisture, creating a self-sustaining water cycle suited to tropical, humidity-loving plants. An open terrarium has no lid or a wide opening, allowing moisture to evaporate. It requires regular watering and suits drought-tolerant plants like succulents, cacti, and air plants.