


Store-bought gifts are easy, but they rarely feel personal. DIY gift ideas solve that problem without asking for hours of extra work or advanced craft skills.
A candle poured in an evening, a mug painted at the kitchen table, or a jar filled with handwritten notes can say more than something pulled off a shelf.
What makes a homemade gift land well has less to do with difficulty and more to do with fit.
The right project matches the person, the moment, and the time you actually have to give. Here is where to start when picking one.
How to Choose the Right DIY Gift?
A great DIY gift starts with the person receiving it. Think about their hobbies, daily habits, favorite colors, and the things they already use or enjoy.
The best handmade gifts usually solve a small need, preserve a memory, or add a personal detail that store-bought options cannot offer.
A simple item with the right customization can feel more meaningful than an expensive present. I have watched plenty of gift givers overthink this step.
The projects that land best are almost never the fanciest ones; they are the ones that show you paid attention to what someone actually likes.
Whether you are making something for a birthday, holiday, friend, family member, or last-minute occasion, picking a gift that matches the recipient will make the final result feel more thoughtful.
Homemade gifts have also become more common as budgets tighten.
A recent Deloitte gift survey found that 45 percent of holiday shoppers planned to give DIY gifts, a sign that handmade presents are now a mainstream choice, not a fallback.
Easy DIY Gift Ideas
You do not need advanced craft skills to make something thoughtful.
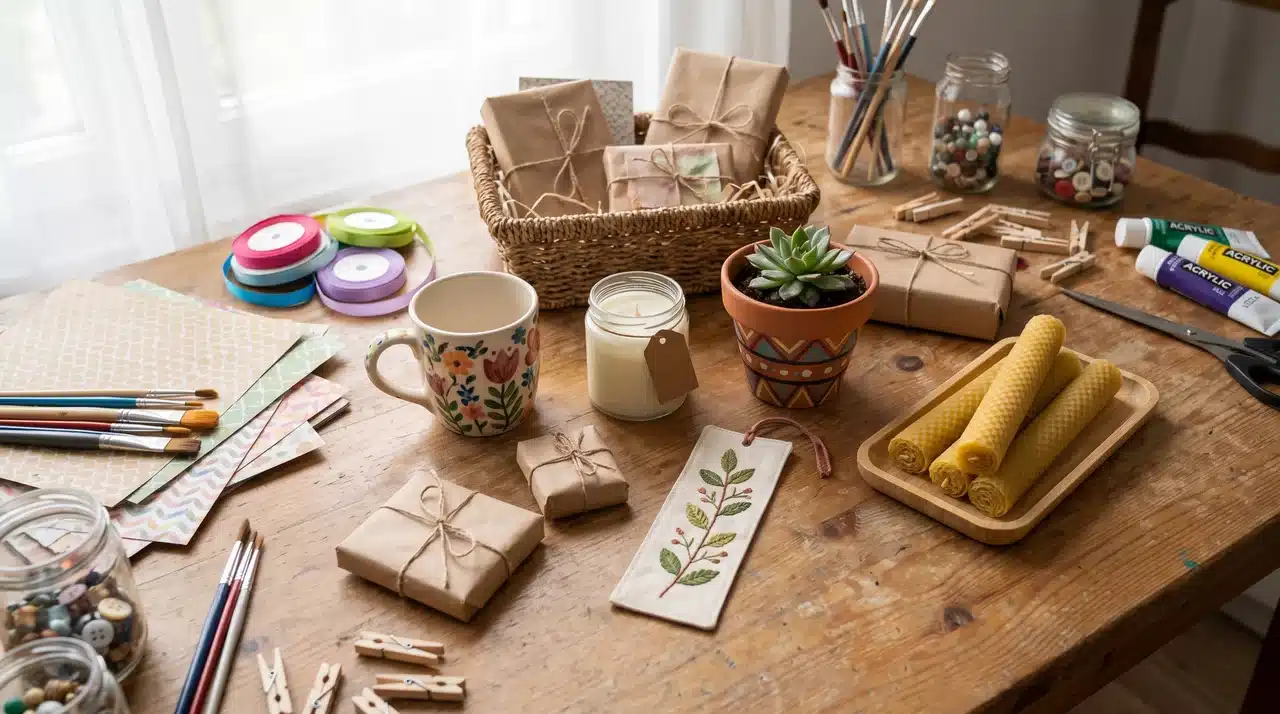
These simple DIY gift ideas use basic materials, easy techniques, and just a few tools, which makes them good starting points for beginners.
1. Personalized Mug
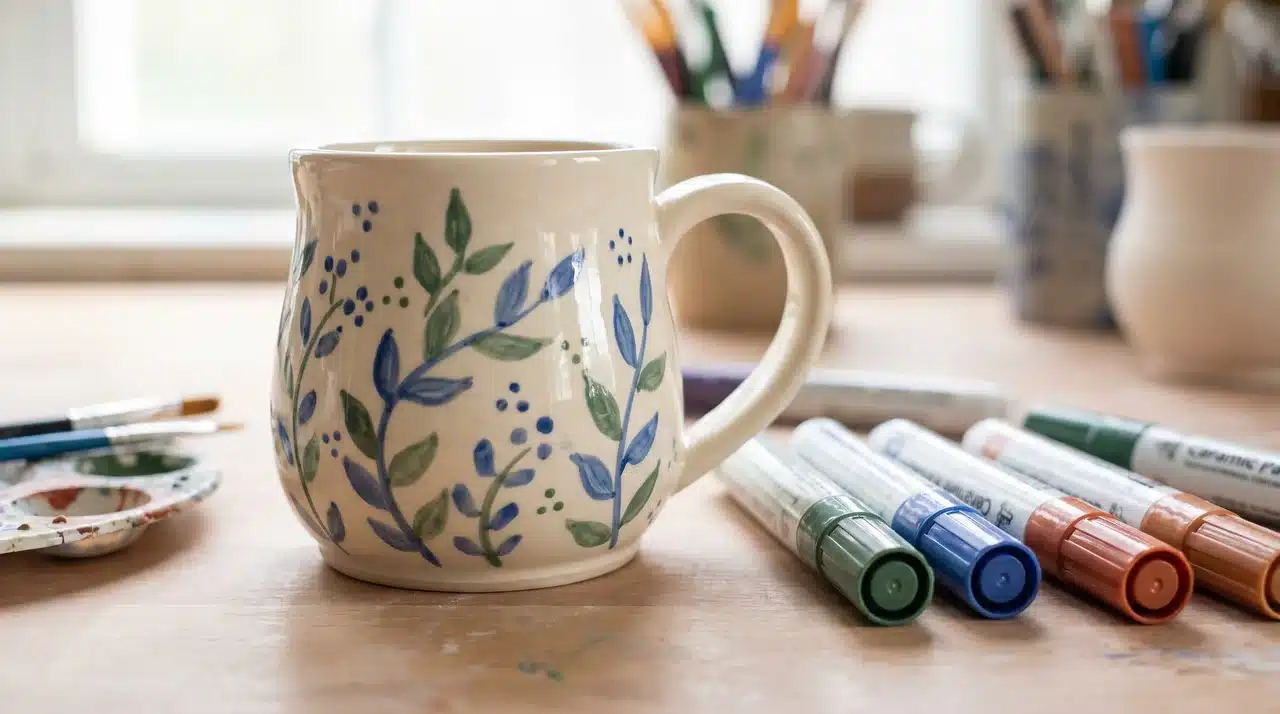
Turn a plain ceramic mug into a custom gift using ceramic paint pens or markers made for glazed surfaces. Add a name, small illustration, favorite quote, or simple pattern.
Match the design to the recipient’s interests or favorite colors. Pair the finished mug with coffee, tea, or hot chocolate to make the gift feel more complete.
Estimated Cost: $5–$10
How to Make It:
- Wash and dry a plain ceramic mug so the surface is completely clean.
- Draw your design using ceramic-safe paint pens or markers.
- Let the design dry and set it according to the product instructions.
- Add coffee, tea, or hot chocolate before wrapping if desired.
2. Hand-Poured Candle
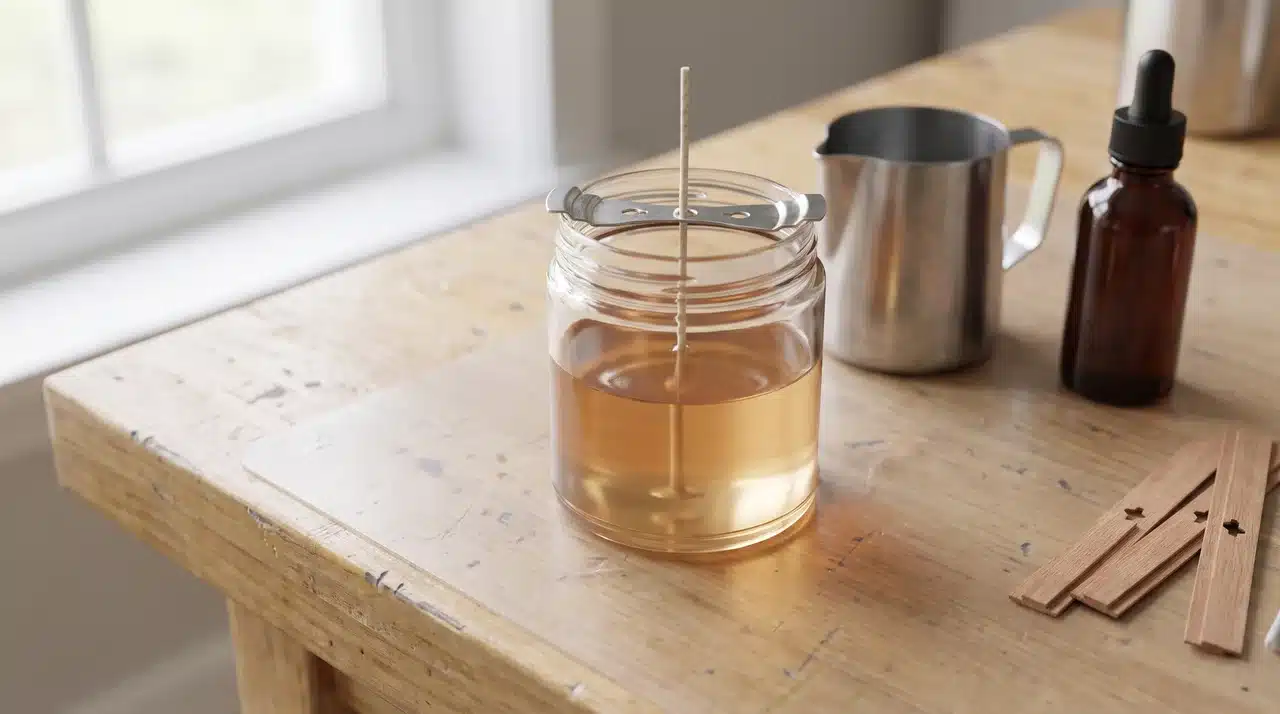
A homemade candle can be customized with the recipient’s favorite scent and a container that suits their style. You mainly need wax, a wick, fragrance oil, and a heat-safe jar.
Keep the decoration simple with a handwritten label or ribbon around the container. Let the candle cool and cure properly before wrapping it for gifting.
Estimated Cost: $8–$15
How to Make It:
- Secure a candle wick in the center of a clean, heat-safe container.
- Melt the candle wax slowly and add fragrance oil if desired.
- Pour the melted wax into the container while keeping the wick centered.
- Let the candle cool completely, trim the wick, and allow it to cure before gifting.
3. Painted Plant Pot
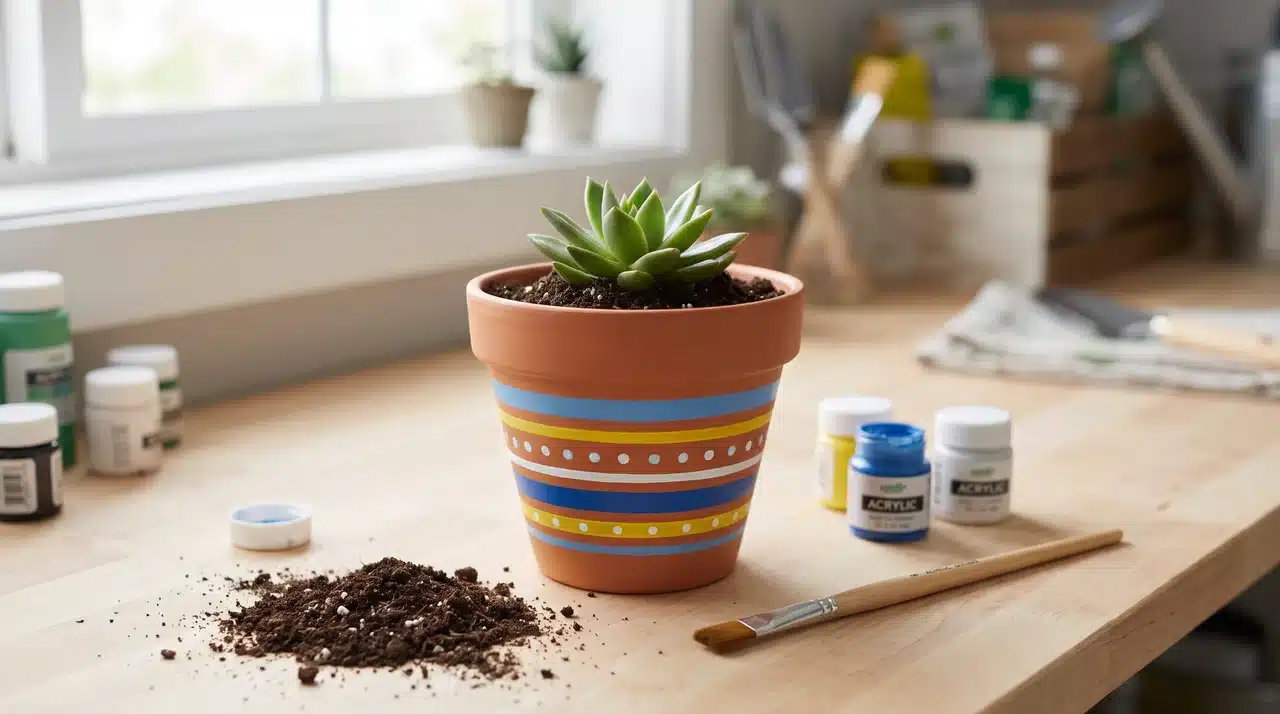
Start with an inexpensive terracotta pot and decorate it using acrylic paint. Stripes, dots, simple shapes, or small floral designs are easy to create without much painting experience.
Add a small houseplant, herb, or succulent before gifting it. Choosing a plant the recipient can easily care for makes this simple craft more practical.
Estimated Cost: $6–$12
How to Make It:
- Clean and dry a small terracotta pot before painting.
- Apply acrylic paint in stripes, dots, shapes, or another simple design.
- Let the paint dry completely and apply a suitable sealer if needed.
- Add soil and a small plant, herb, or succulent before gifting.
4. Handmade Bookmark
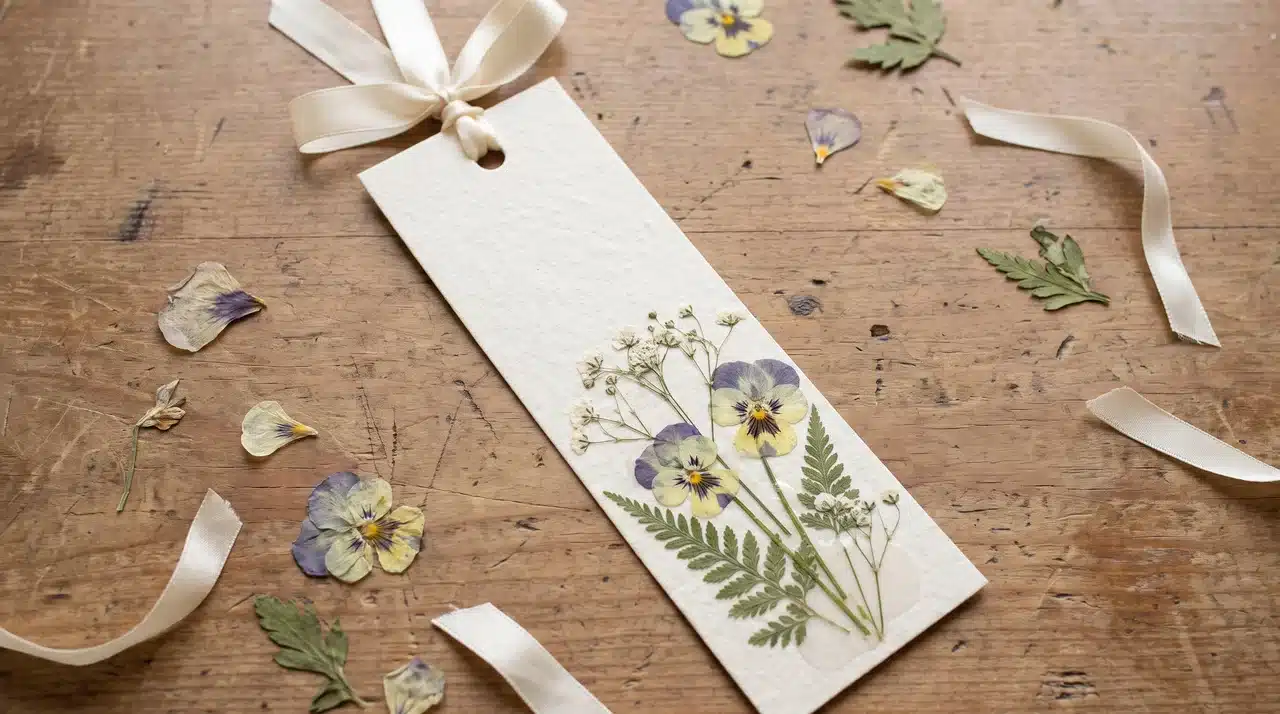
Bookmarks are quick to make and work especially well for readers, students, teachers, or coworkers. Use cardstock, fabric, felt, pressed flowers, ribbon, or thin painted wood.
Personalize one with initials, favorite colors, or a small illustration. You can also pair it with a book to turn a simple project into a fuller gift.
Estimated Cost: $2–$6
How to Make It:
- Cut cardstock, felt, fabric, or thin craft wood into a bookmark shape.
- Decorate it with paint, drawings, pressed flowers, or patterned paper.
- Add initials, a short message, or another personal detail.
- Punch a hole near the top and attach ribbon or a tassel if desired.
5. Decorated Trinket Dish
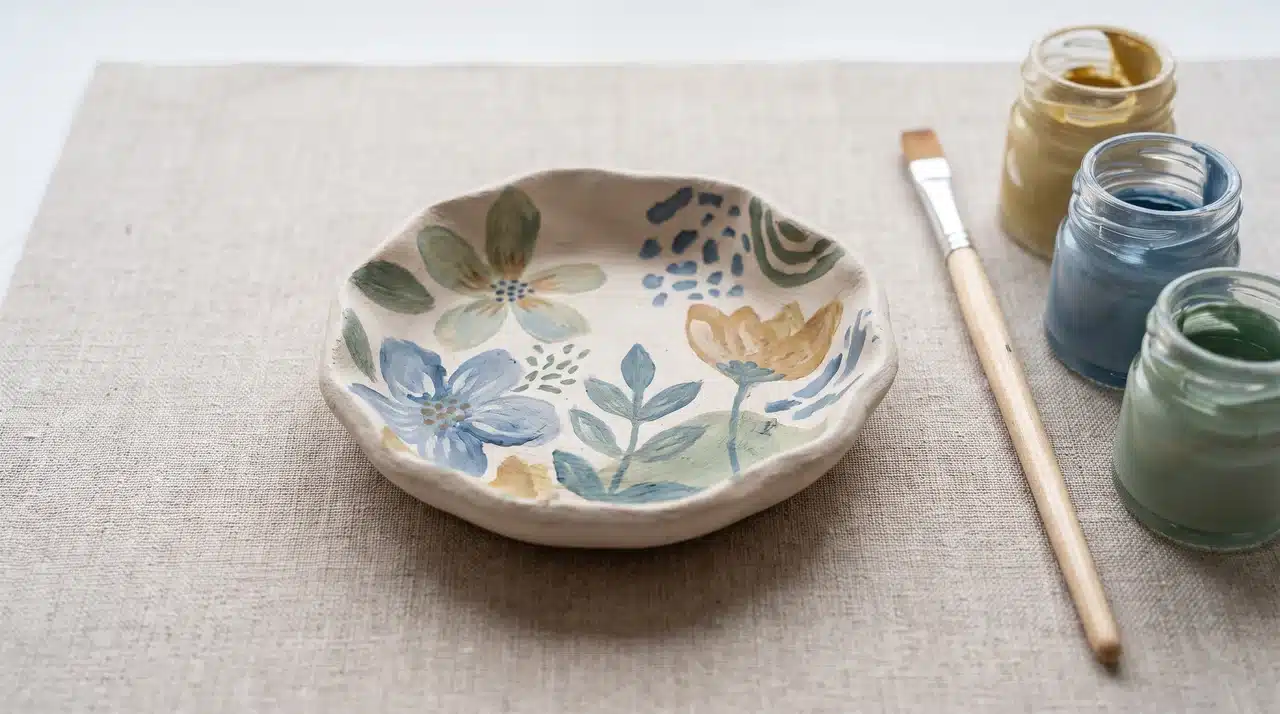
Use air-dry clay to shape a small dish for jewelry, keys, coins, or other everyday items. Smooth the surface, let it dry completely, then decorate it with paint.
Try initials, tiny flowers, abstract shapes, or a simple border. Because each dish is shaped by hand, small imperfections can make the finished gift feel more personal.
Estimated Cost: $4–$8
How to Make It:
- Shape air-dry clay into a small shallow dish using your hands.
- Smooth the edges and let the clay dry completely.
- Paint the dish with initials, patterns, flowers, or simple shapes.
- Apply a suitable protective sealer once the paint has dried.
Personalized DIY Gift Ideas
Personalized gifts feel more meaningful because they connect directly to the person receiving them. Names, photos, dates, favorite colors, and shared memories can turn simple projects into keepsakes.
6. Memory Jar
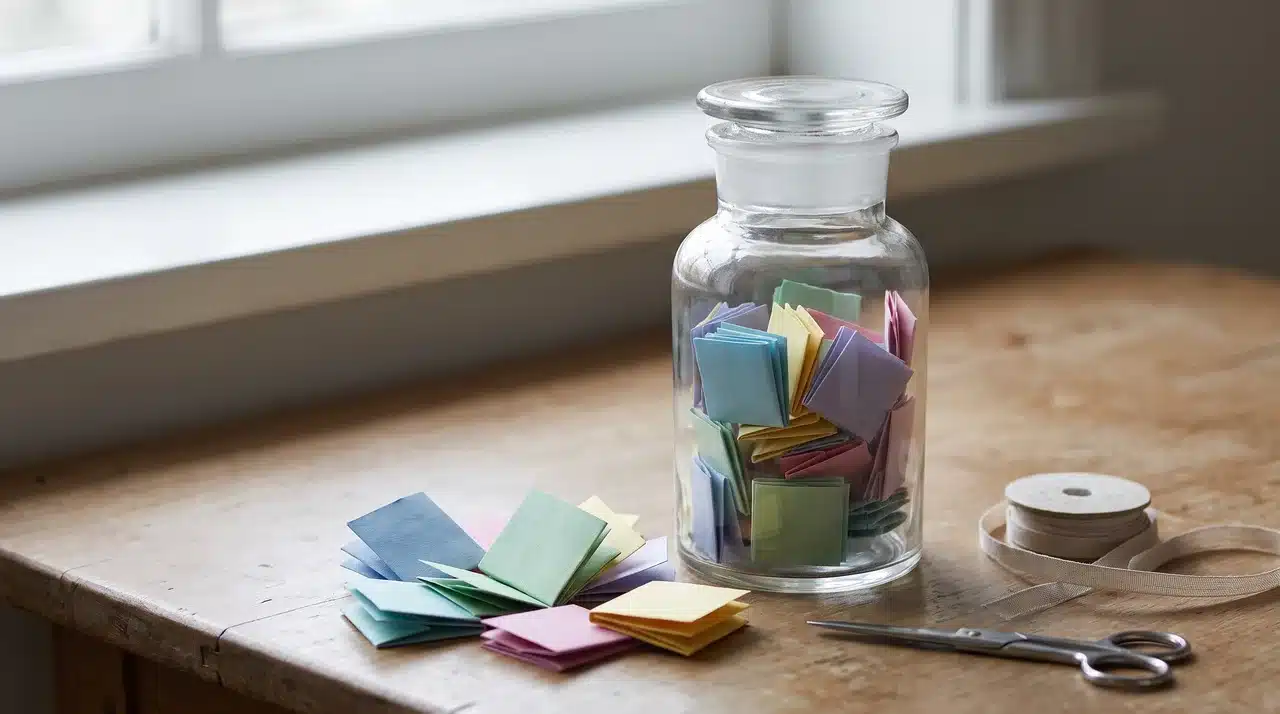
Fill a clean jar with handwritten notes about favorite memories, inside jokes, compliments, or reasons you appreciate someone. Fold each note and use colorful paper for extra personality.
You can also organize the notes by theme, such as memories, future plans, or encouraging messages. Add a simple label or ribbon to finish the gift.
Estimated Cost: $4–$10
How to Make It:
- Clean and dry a glass jar large enough to hold several folded notes.
- Write memories, compliments, jokes, or encouraging messages on small paper pieces.
- Fold the notes and place them inside the jar.
- Finish the jar with a label, ribbon, or handwritten tag.
7. Personalized Photo Album
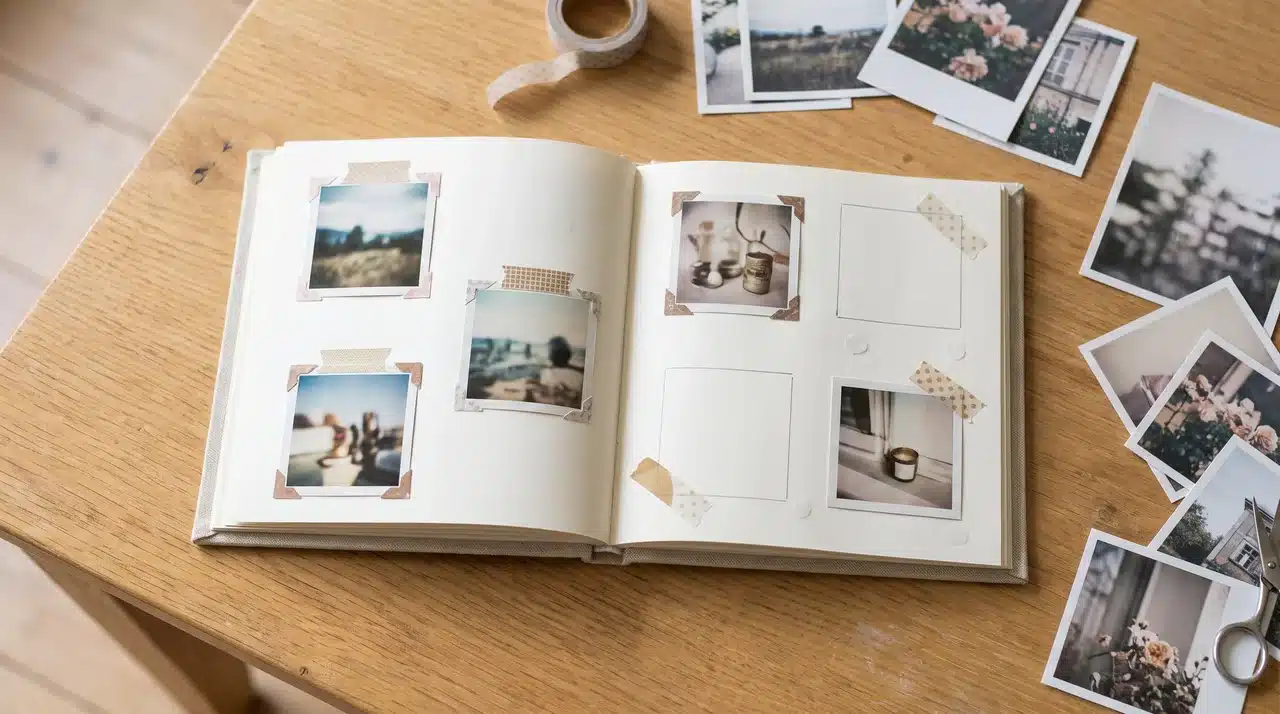
Choose photos that tell a story, such as family moments, trips, celebrations, or everyday memories. Arrange them in a small album with short captions or handwritten notes.
Add dates, locations, stickers, or decorative paper without making every page too busy. Leaving some blank space keeps the photos as the main focus.
Estimated Cost: $8–$20
How to Make It:
- Choose photos connected to meaningful events, trips, or everyday memories.
- Arrange the pictures in a small blank photo album.
- Add short captions, dates, locations, or handwritten messages beside selected photos.
- Decorate the cover with a name, date, or simple personal detail.
8. Custom Recipe Book
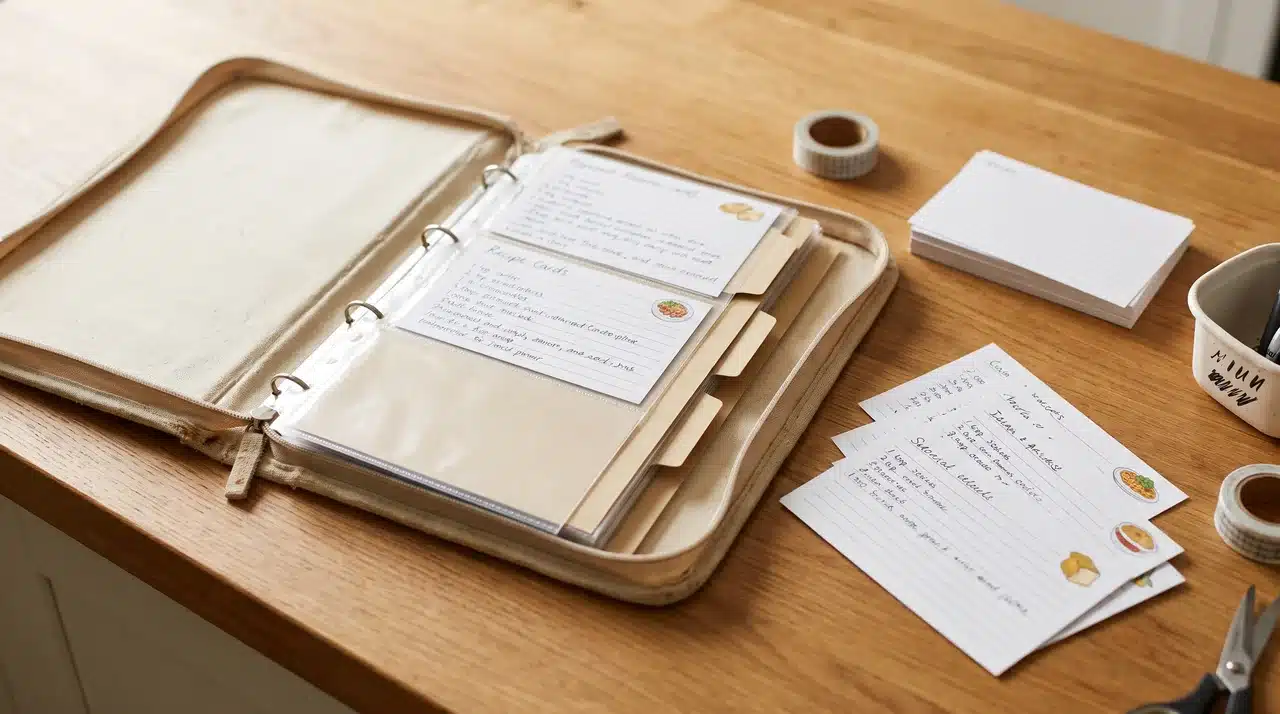
Collect favorite family recipes, personal specialties, or dishes connected to shared memories. Write or print them onto recipe cards, notebook pages, or a small binder.
Include notes about who makes each dish, when it is usually served, or why it matters. This works especially well for parents, grandparents, or newlyweds.
Estimated Cost: $6–$15
How to Make It:
- Collect favorite family recipes or dishes the recipient enjoys.
- Write or print each recipe onto cards or notebook pages.
- Add short notes about the recipe’s history, occasion, or person connected to it.
- Organize everything inside a binder, notebook, or recipe box.
9. Handmade Initial Bracelet
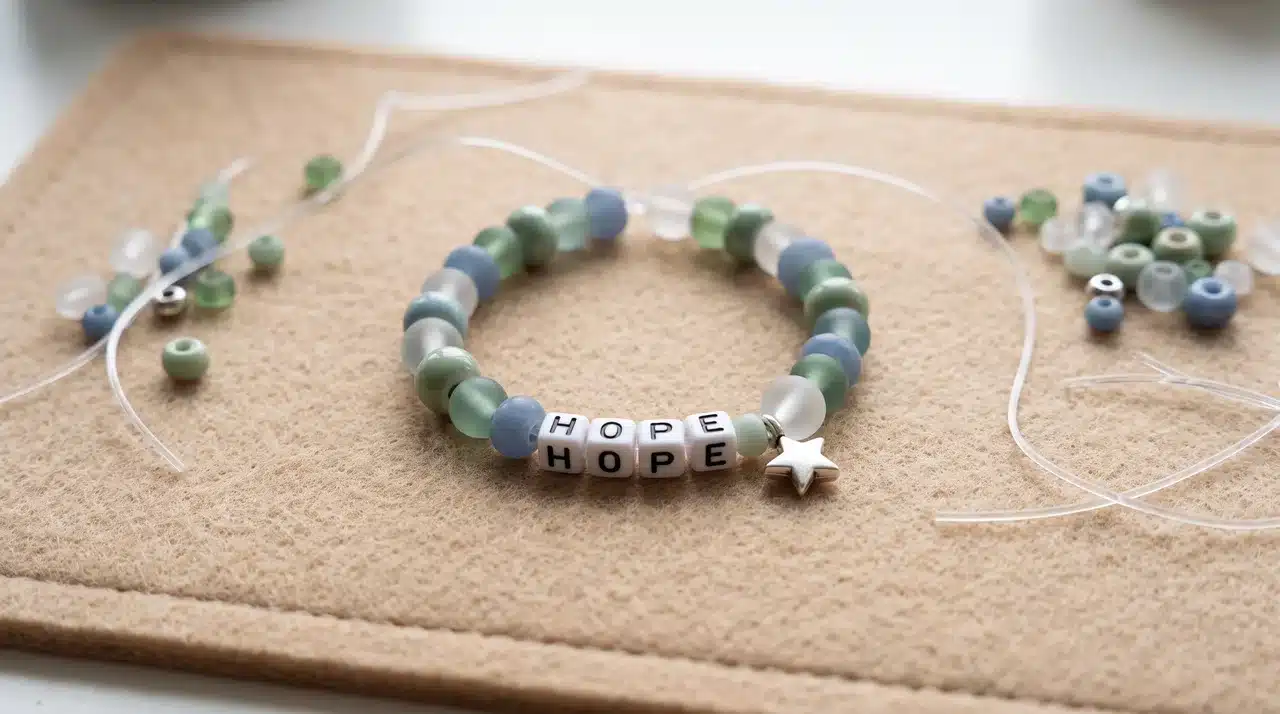
Create a simple bracelet using beads, cord, or elastic and add letter beads for initials or a short name. Choose colors that match the recipient’s usual style.
You can also add a small charm or birthstone-colored bead for another personal detail. Keep the design comfortable and simple enough for everyday wear.
Estimated Cost: $3–$8
How to Make It:
- Measure the recipient’s wrist and cut elastic or jewelry cord accordingly.
- Arrange beads and letter beads to create the desired design.
- Thread the beads onto the cord while checking the bracelet size.
- Secure the ends tightly and trim away excess cord.
10. DIY Map Keepsake
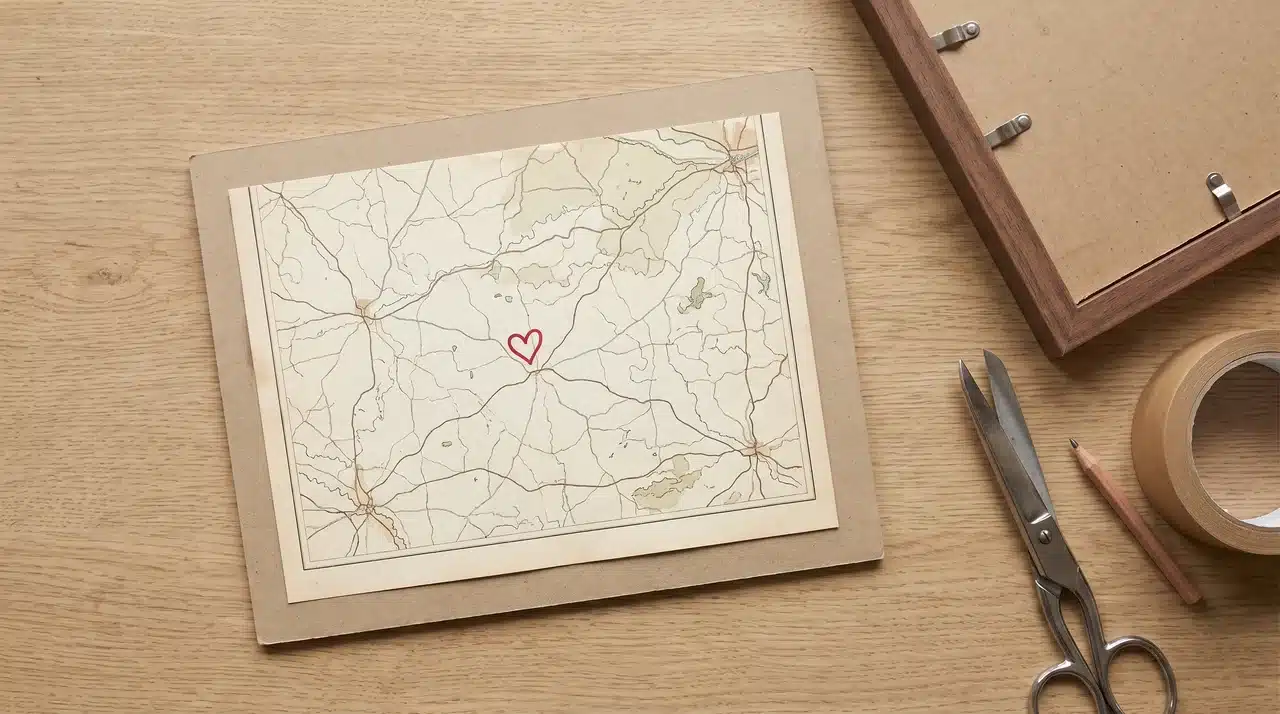
Print or cut out a map showing a meaningful location, such as a hometown, favorite vacation spot, or place connected to an important memory.
Mark the exact location with a small heart, pin, or date. Frame the finished map or mount it on sturdy cardstock for easy gifting.
Estimated Cost: $5–$15
How to Make It:
- Print a map showing a meaningful hometown, destination, or location.
- Cut the map neatly to fit the chosen frame or backing.
- Mark the important location with a heart, pin, date, or small symbol.
- Mount the map on cardstock or place it inside a simple frame.
DIY Birthday Gifts
The best DIY birthday gifts feel personal to the occasion, not like everyday crafts repackaged for a celebration. Photos, favorite treats, shared memories, and thoughtful details make them more memorable.
11. DIY Birthday Countdown Box
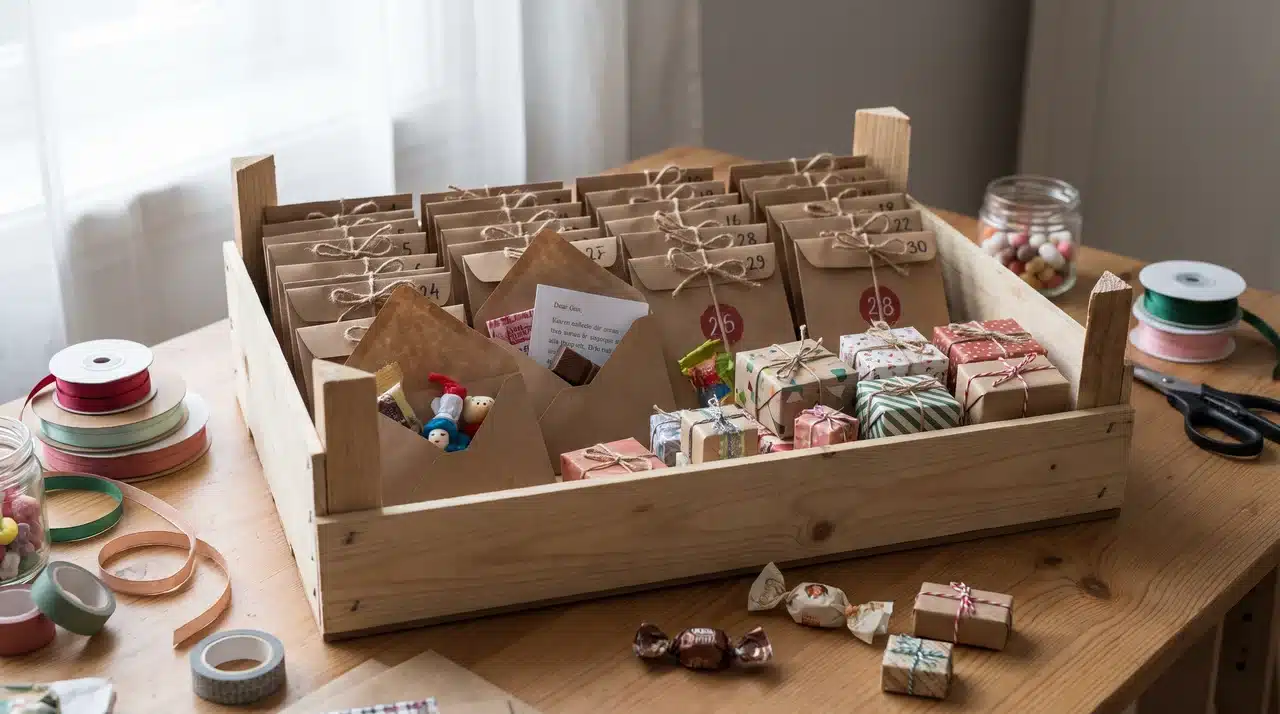
Build excitement before a birthday with a small countdown box filled with daily surprises. Use envelopes, small boxes, or paper bags numbered for each day leading up to the celebration.
Add short notes, jokes, small treats, or activity ideas that match the recipient’s personality. This gift turns the days before a birthday into part of the celebration.
Estimated Cost: $6–$15
How to Make It:
- Decide how many days before the birthday you want the countdown to begin.
- Number small envelopes, boxes, or paper bags for each day.
- Fill each one with a note, joke, small treat, or activity idea.
- Arrange the countdown pieces together and add instructions to open one each day.
12. Birthday Gift Basket
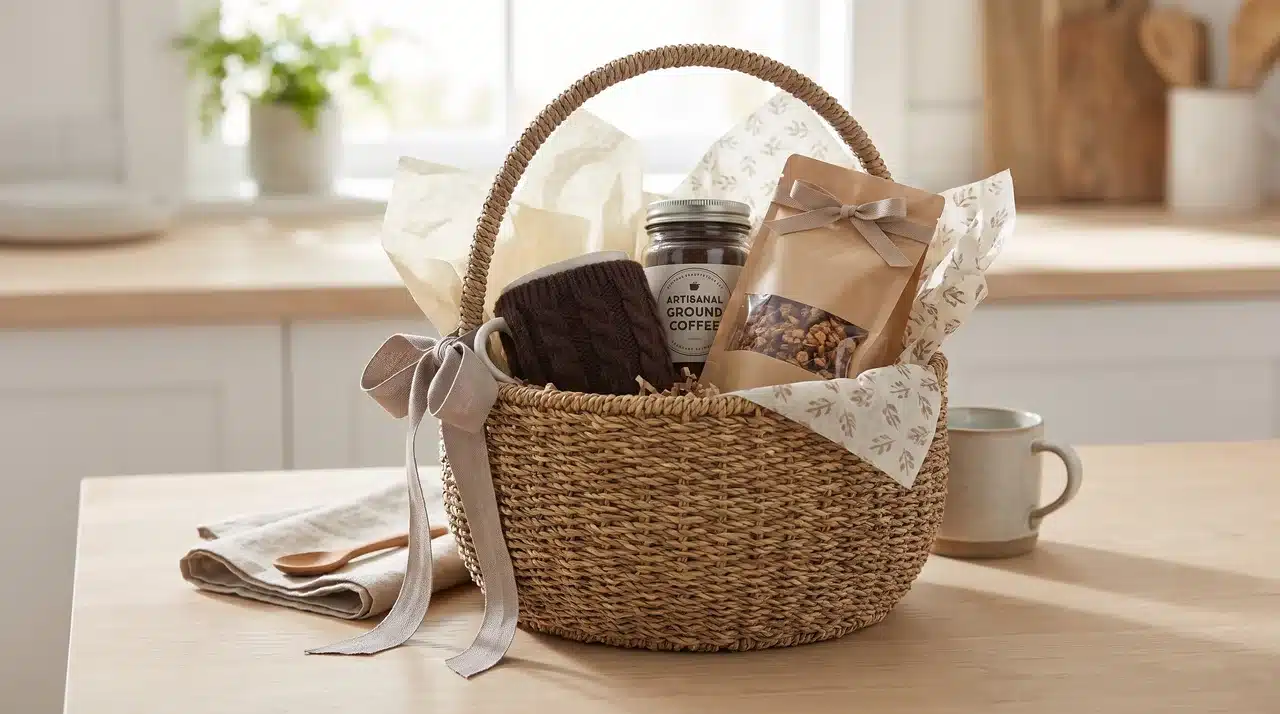
Build a basket around something the recipient already enjoys, such as coffee, movies, skincare, baking, gardening, or snacks. Homemade additions make the basket feel more personal.
Add one or two handmade items alongside inexpensive store-bought favorites. Finish it with tissue paper, ribbon, and a short birthday note explaining the theme.
Estimated Cost: $15–$30
How to Make It:
- Pick a theme based on the recipient’s interests.
- Choose several inexpensive items that fit the selected theme.
- Include at least one handmade item to make the basket more personal.
- Arrange everything in a basket or reusable container and finish with a birthday note.
13. Personalized Birthday Banner
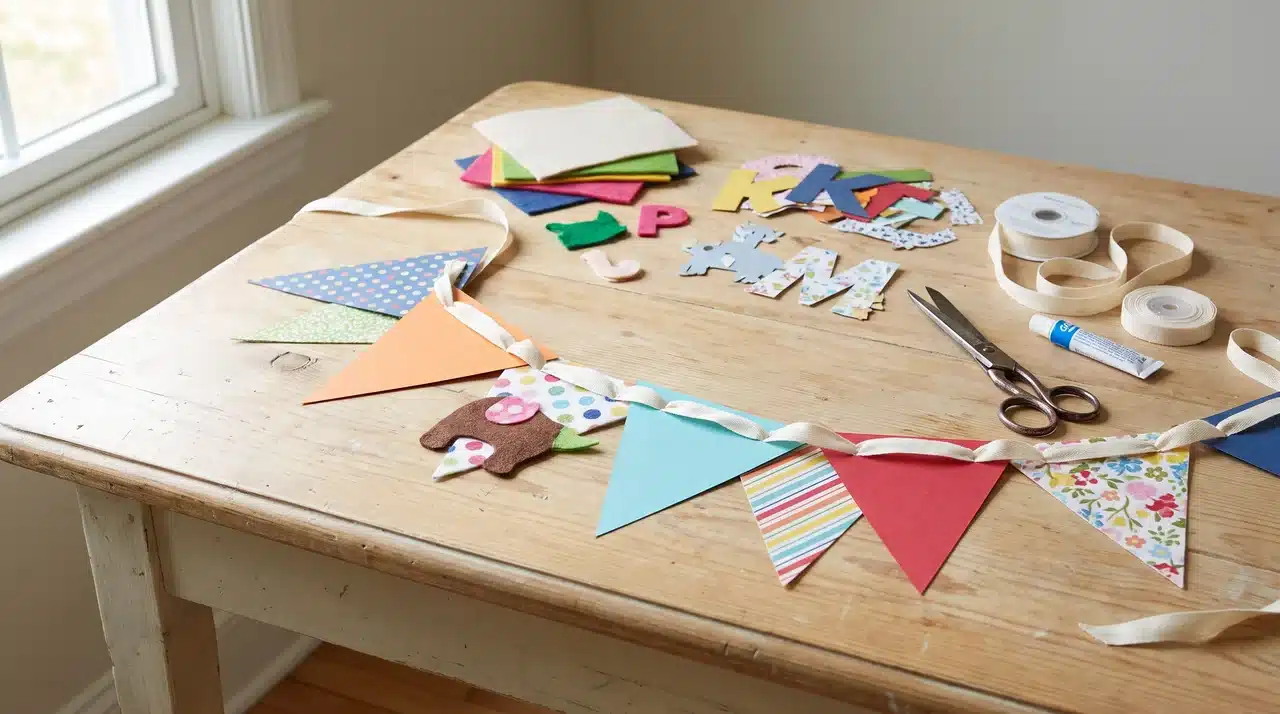
Create a custom birthday banner using cardstock, fabric, felt, or other simple materials. Add the recipient’s name, age, favorite colors, or a theme that matches their celebration.
This decoration can be reused for future birthdays if you choose durable materials. It also works well as a simple handmade addition to a larger gift.
Estimated Cost: $5–$12
How to Make It:
- Cut cardstock, fabric, or felt into equal-sized banner pieces.
- Add letters, shapes, or designs that match the birthday theme.
- Punch holes in each piece and thread them onto ribbon or twine.
- Arrange the finished banner and secure the ends for hanging.
14. Handmade Coupon Book
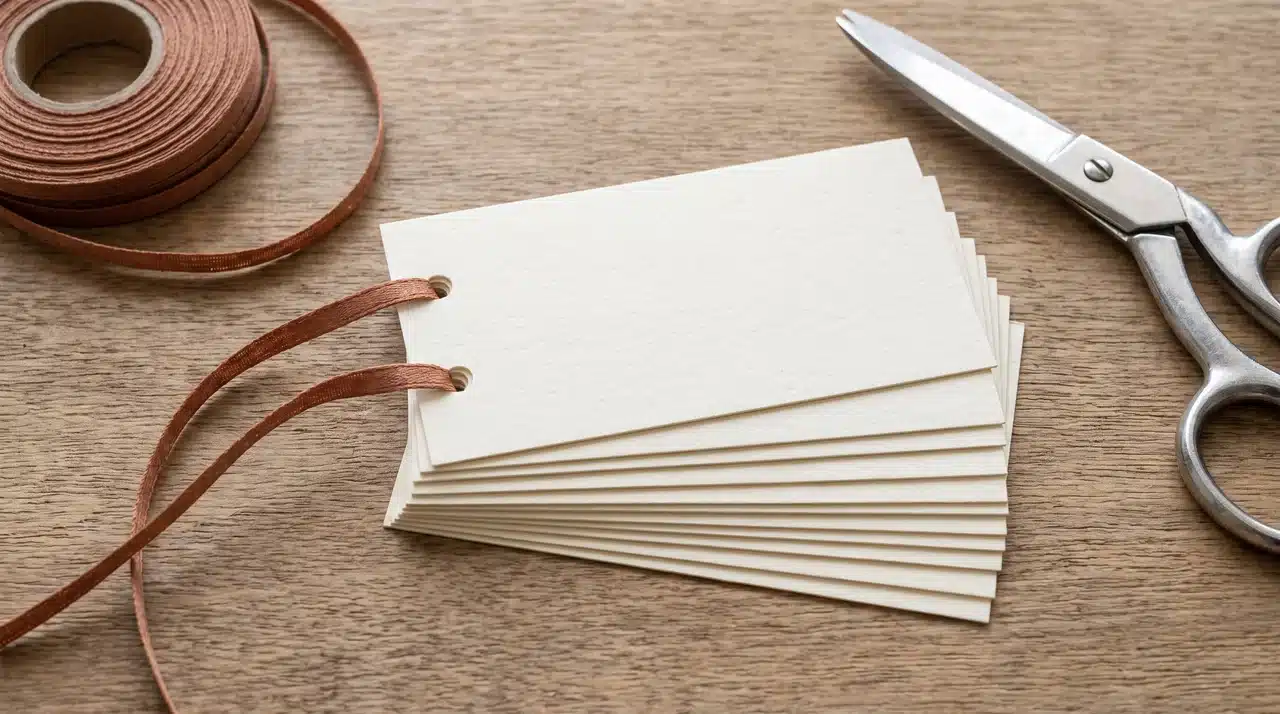
Create a small booklet filled with offers the recipient can use later. Ideas include a homemade dinner, movie night, coffee date, babysitting, or help with chores.
Make each coupon specific and realistic so it feels useful rather than symbolic. Staple the pages together or tie them with ribbon for simple presentation.
Estimated Cost: $2–$6
How to Make It:
- Decide on useful offers such as dinner, babysitting, coffee, errands, or movie night.
- Write or print one offer on each small piece of cardstock.
- Add simple decorations or conditions where necessary.
- Stack the coupons and staple, punch, or tie them together into a booklet.
15. DIY Birthday Photo Candle Holder
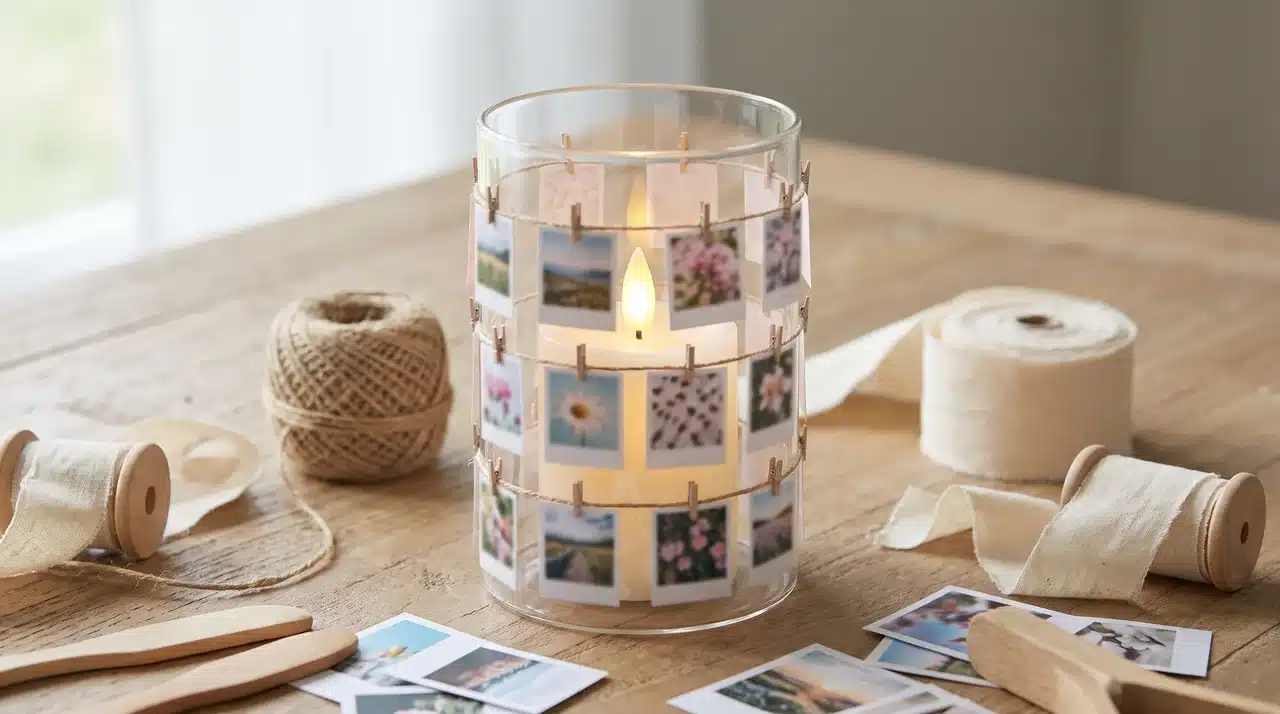
Turn a simple glass candle holder into a personalized birthday keepsake using printed photos and decorative materials. Add pictures, dates, or small details connected to meaningful memories.
Use a battery-operated candle for a safer option and to highlight the photos around the holder. This makes a simple decoration feel more personal.
Estimated Cost: $6–$15
How to Make It:
- Clean and dry a small glass candle holder before decorating.
- Print small photos that fit around the outside surface.
- Attach the photos using a suitable adhesive or clear craft medium.
- Add a battery-operated candle and finish with ribbon or simple decorations.
Useful DIY Gifts People Will Actually Use
Practical gifts can feel just as thoughtful as decorative ones when they solve a small everyday problem.
These projects are useful, customizable, and simple enough for regular use, and pair well with the home decor upgrade ideas on this site if you want to build a larger handmade gift set.
16. Rice Hand Warmers
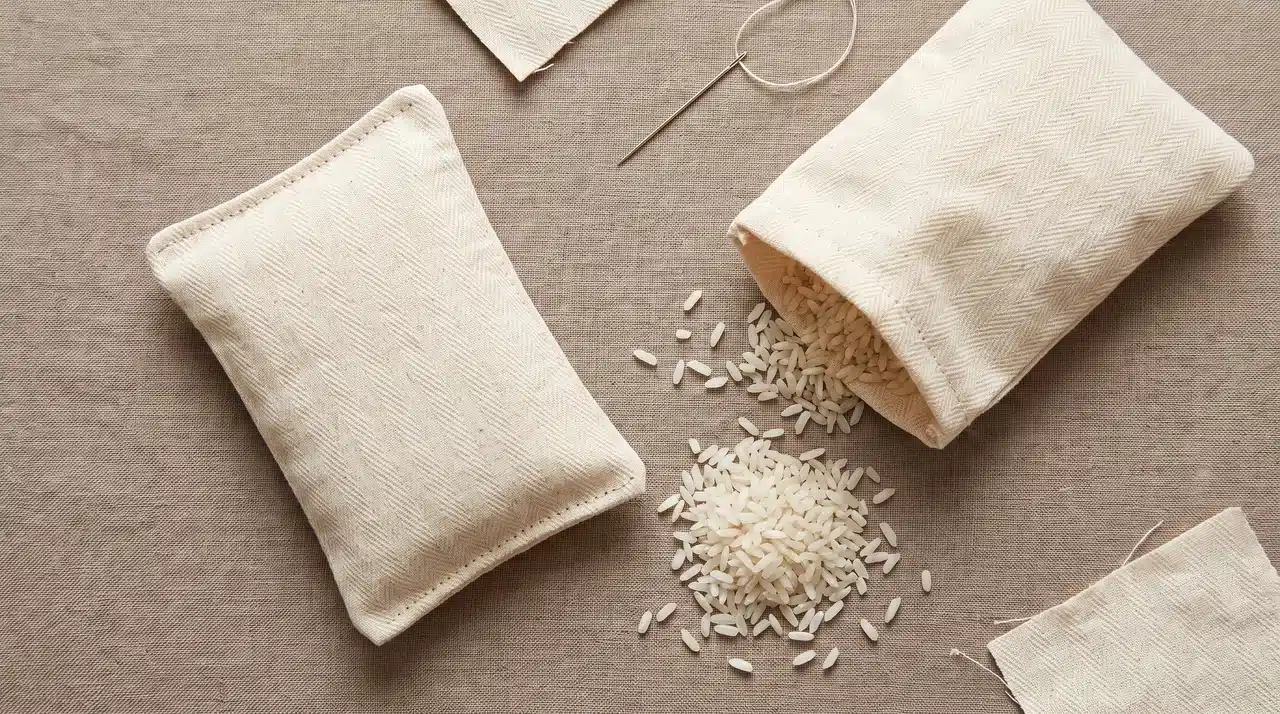
Sew two small cotton fabric pieces together, leaving a small opening for filling. Add uncooked rice, stitch the opening closed, and make a matching pair if desired.
Choose fabric in the recipient’s favorite colors or patterns. These hand warmers can be heated briefly in the microwave and used during cold mornings or outdoor activities.
Estimated Cost: $4–$8
How to Make It:
- Cut two matching pairs of cotton fabric into small squares or rectangles.
- Sew around each pair while leaving a small opening.
- Fill the pouches with uncooked rice without packing them too tightly.
- Sew the openings securely and include simple microwave-heating instructions.
17. Wooden Catch-All Tray
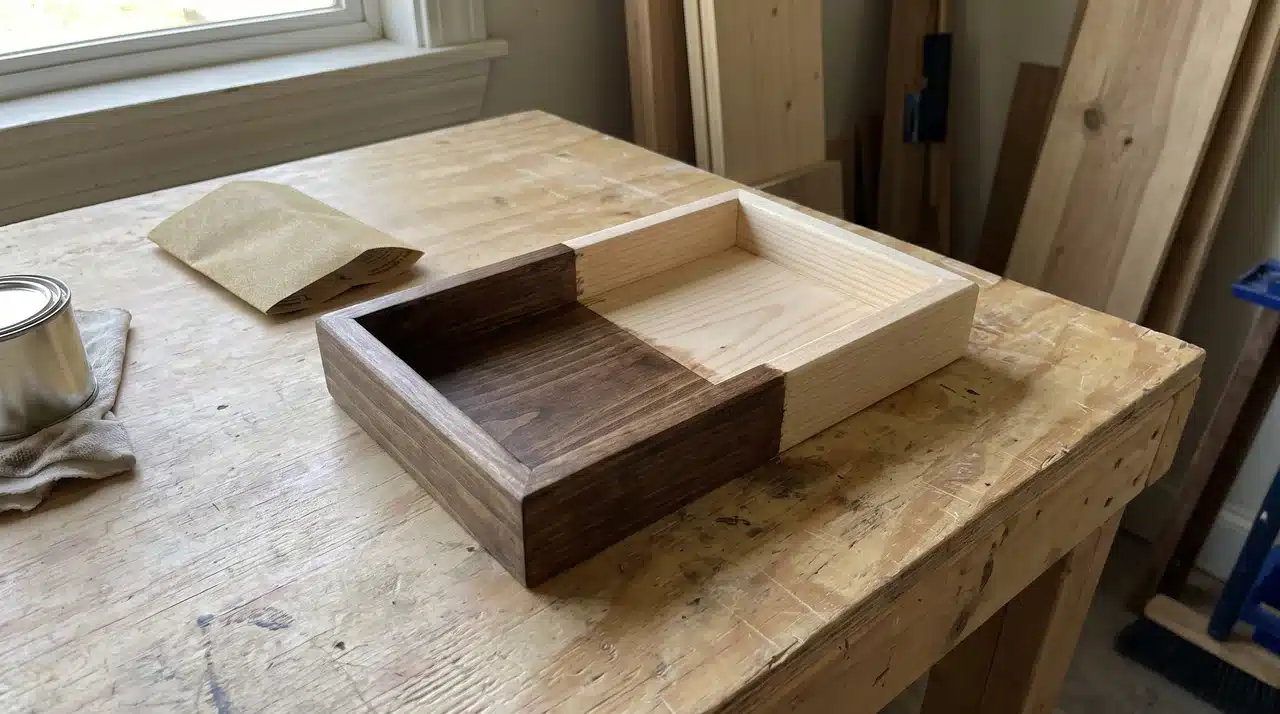
Use a small unfinished wood tray or shallow wooden piece as the base. Sand the surface, then stain, paint, or seal it for a cleaner finish.
The tray can hold keys, coins, watches, jewelry, or other everyday items. Add initials or a simple painted detail to make it more personal.
Estimated Cost: $8–$15
How to Make It:
- Start with a small unfinished wooden tray or shallow wooden base.
- Sand the surface and edges until they feel smooth.
- Apply paint, stain, or another suitable wood finish.
- Let it dry completely and add initials or a small decorative detail if desired.
18. Reusable Fabric Bowl Covers
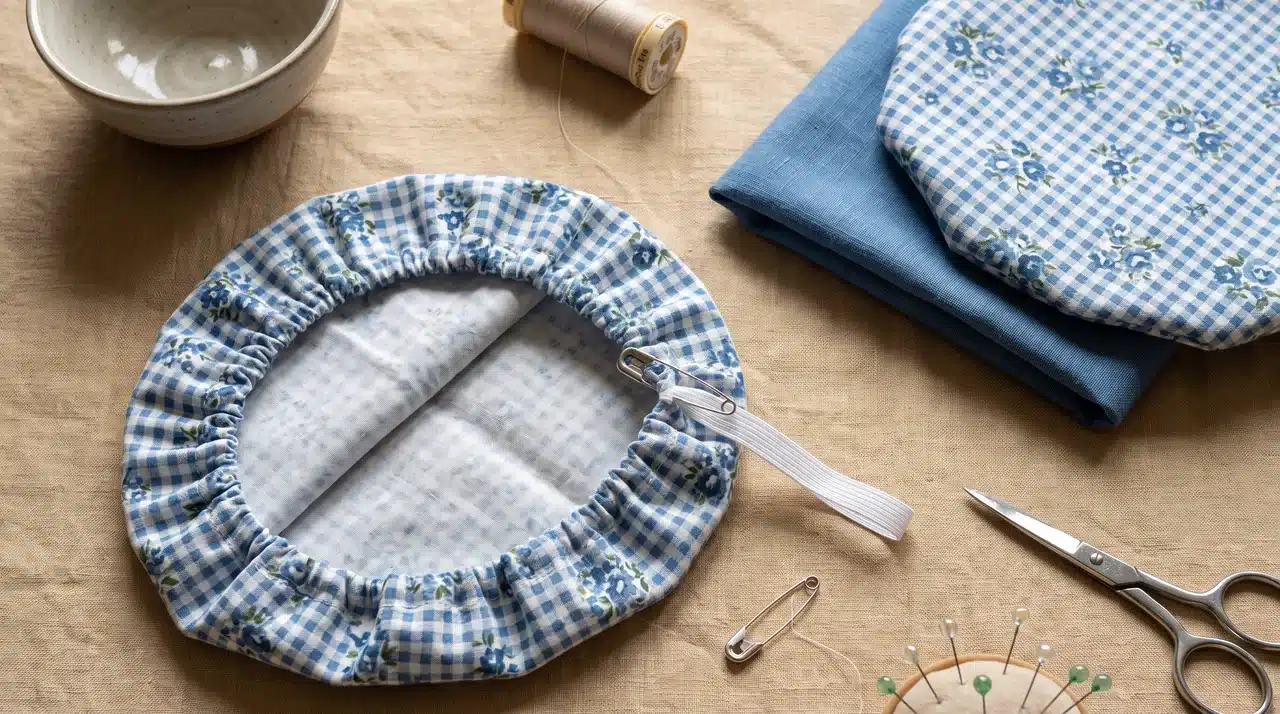
Cut washable cotton fabric slightly larger than common bowl sizes, then sew elastic around the edges. The finished covers can stretch over bowls and containers.
Use coordinated fabric patterns to create a small set. This gift works well for someone who cooks, bakes, stores leftovers, or frequently brings food to gatherings.
Estimated Cost: $5–$12
How to Make It:
- Measure several commonly used bowls and cut cotton fabric slightly larger than each one.
- Fold and sew a narrow casing around the edge of each fabric circle.
- Thread elastic through the casing and adjust it for a secure fit.
- Sew the elastic ends together and close the remaining opening.
19. Handmade Kitchen Towels
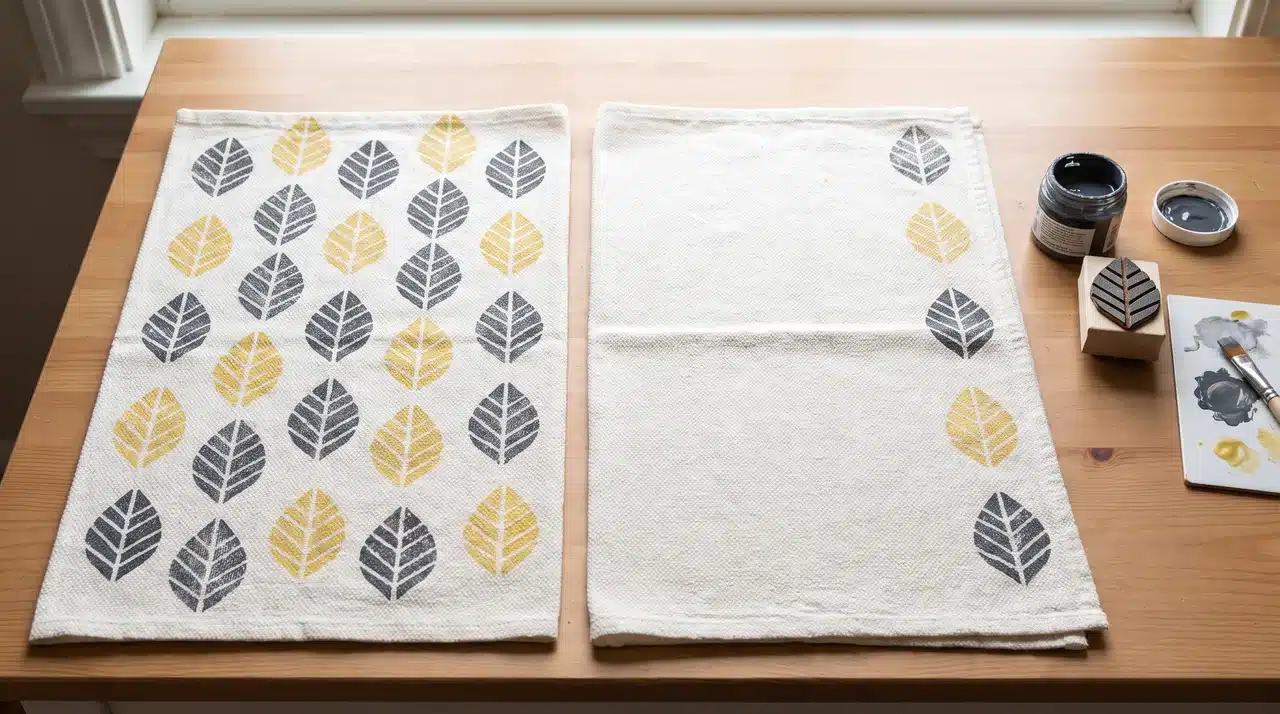
Start with plain cotton or flour-sack towels and decorate them using fabric paint, stamps, embroidery, or simple sewn trim. Keep the design practical for frequent washing.
Choose colors or patterns that match the recipient’s kitchen. A set of two or three towels feels more complete and can still be inexpensive to make.
Estimated Cost: $8–$15
How to Make It:
- Wash and dry plain cotton or flour-sack kitchen towels.
- Plan a simple design using fabric paint, stamps, embroidery, or trim.
- Apply or sew the decoration securely onto each towel.
- Let paint set properly or press the towels before folding them into a set.
20. DIY Phone Stand
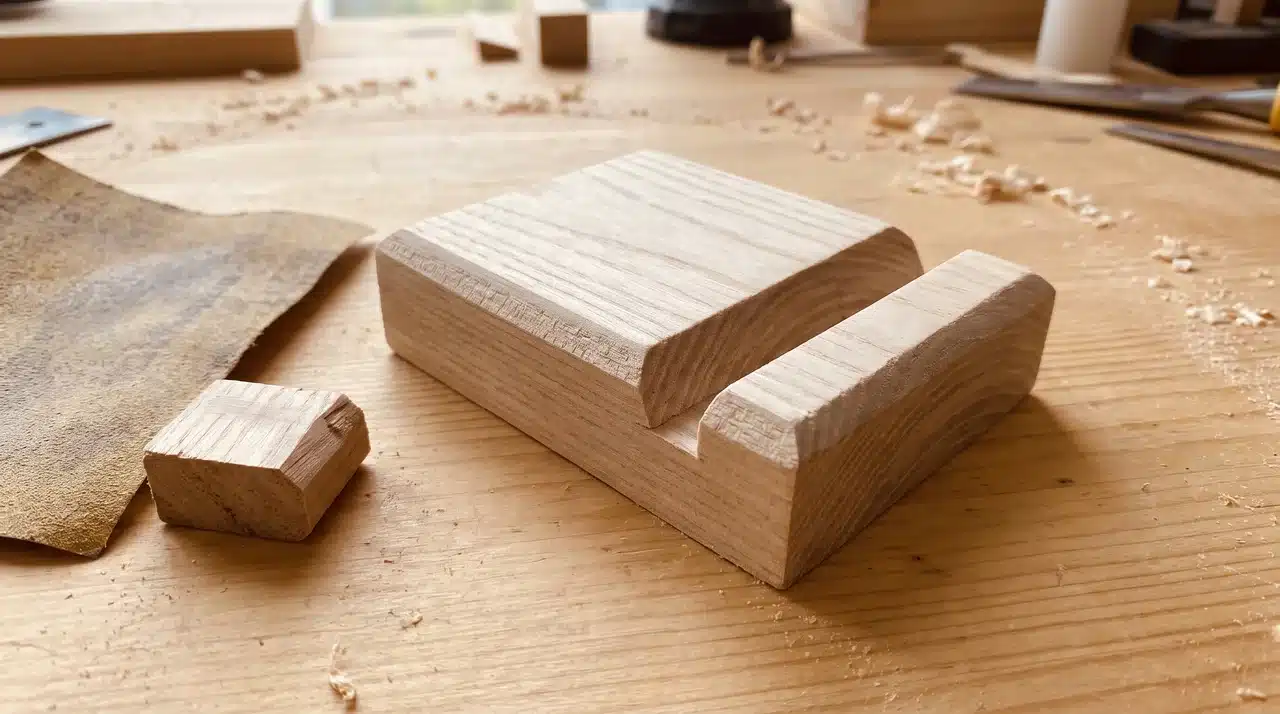
Make a simple phone stand from wood, sturdy cardboard, or another firm material. Cut a slot or angled support that holds a phone upright without slipping.
Keep the design compact enough for a desk, kitchen counter, or nightstand. Sand or cover rough edges and personalize the surface with paint or initials.
Estimated Cost: $5–$12
How to Make It:
- Cut a sturdy piece of wood or firm material into the desired stand size.
- Create a slot or angled support wide enough to hold a phone.
- Sand or cover all rough edges until the stand feels smooth.
- Paint, stain, or personalize the finished surface before gifting.
Homemade Food Gift Ideas
Edible gifts are a smart choice when you want something personal without adding more clutter. They are also easy to customize around favorite flavors, dietary preferences, or seasonal treats.
21. Homemade Chocolate Truffles
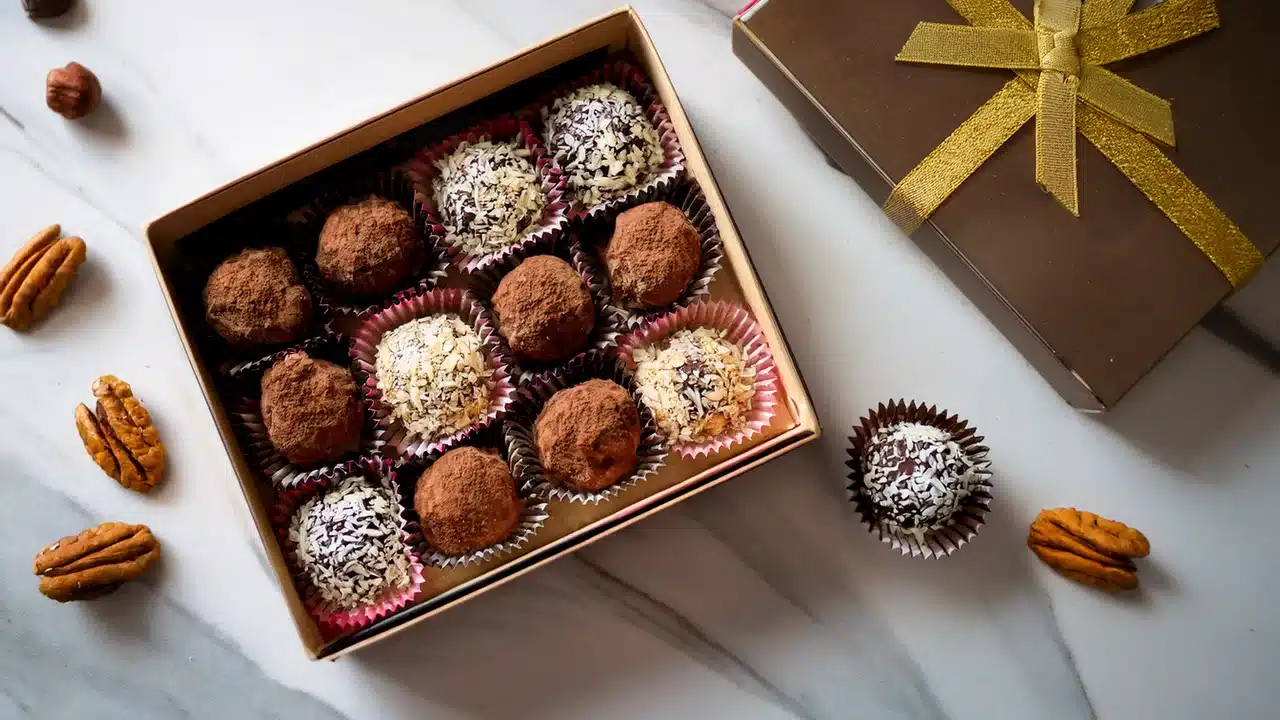
Homemade chocolate truffles make an elegant edible gift without requiring complicated ingredients. Customize them with cocoa powder, crushed nuts, coconut, or other coatings the recipient enjoys.
Package them in a small box or paper liners to create a gift that feels carefully prepared. They work well for birthdays, holidays, or thank-you gifts.
Estimated Cost: $8–$15
How to Make It:
- Melt chocolate and combine it with warm cream to create a smooth mixture.
- Chill the mixture until it becomes firm enough to shape.
- Roll small portions into balls and coat them with cocoa powder, nuts, or toppings.
- Place the truffles in liners or a gift box and store them properly.
22. DIY Hot Chocolate Mix
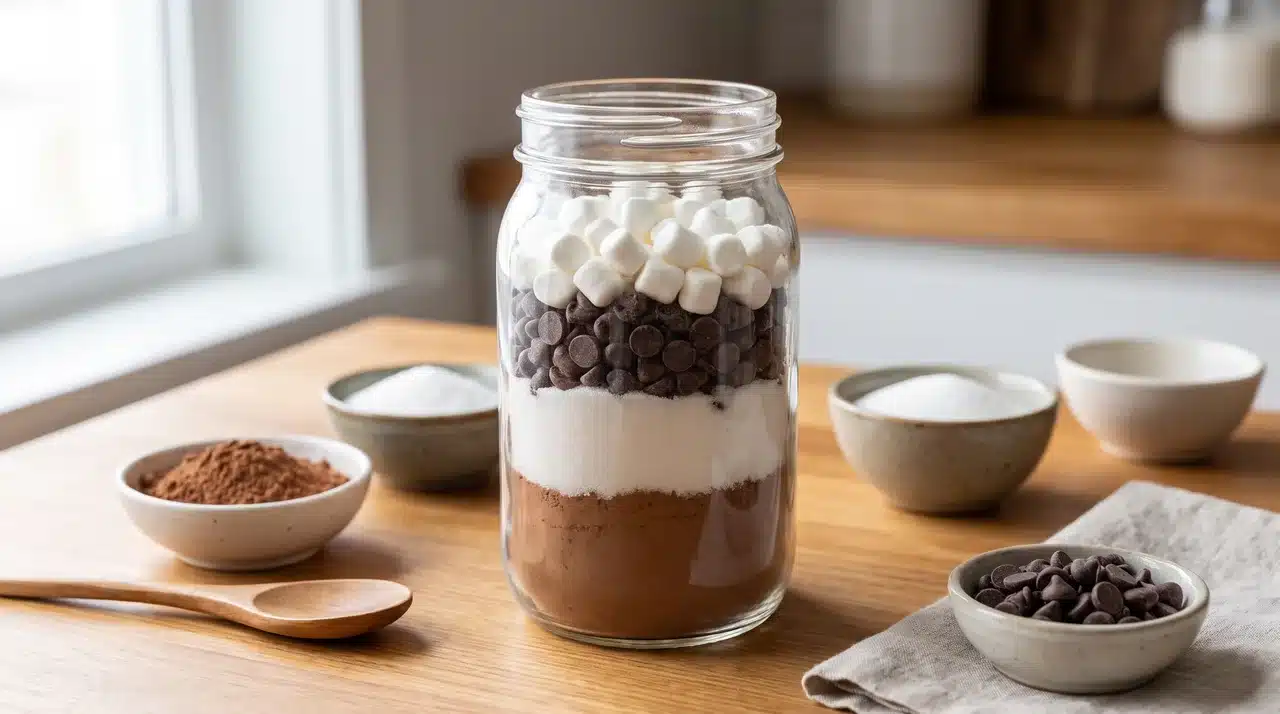
Layer cocoa powder, sugar, chocolate chips, and mini marshmallows in a clean jar. Keep the ingredients simple so the mix is easy to prepare at home.
Add a small tag with serving instructions and optional toppings. You can also pair it with a mug or spoon for a more complete gift.
Estimated Cost: $5–$10
How to Make It:
- Measure cocoa powder, sugar, chocolate chips, and other chosen ingredients.
- Layer the dry ingredients neatly inside a clean jar.
- Close the jar tightly to keep moisture away from the mixture.
- Add a tag explaining how much mix and hot milk or water to use.
23. Flavored Vanilla Extract
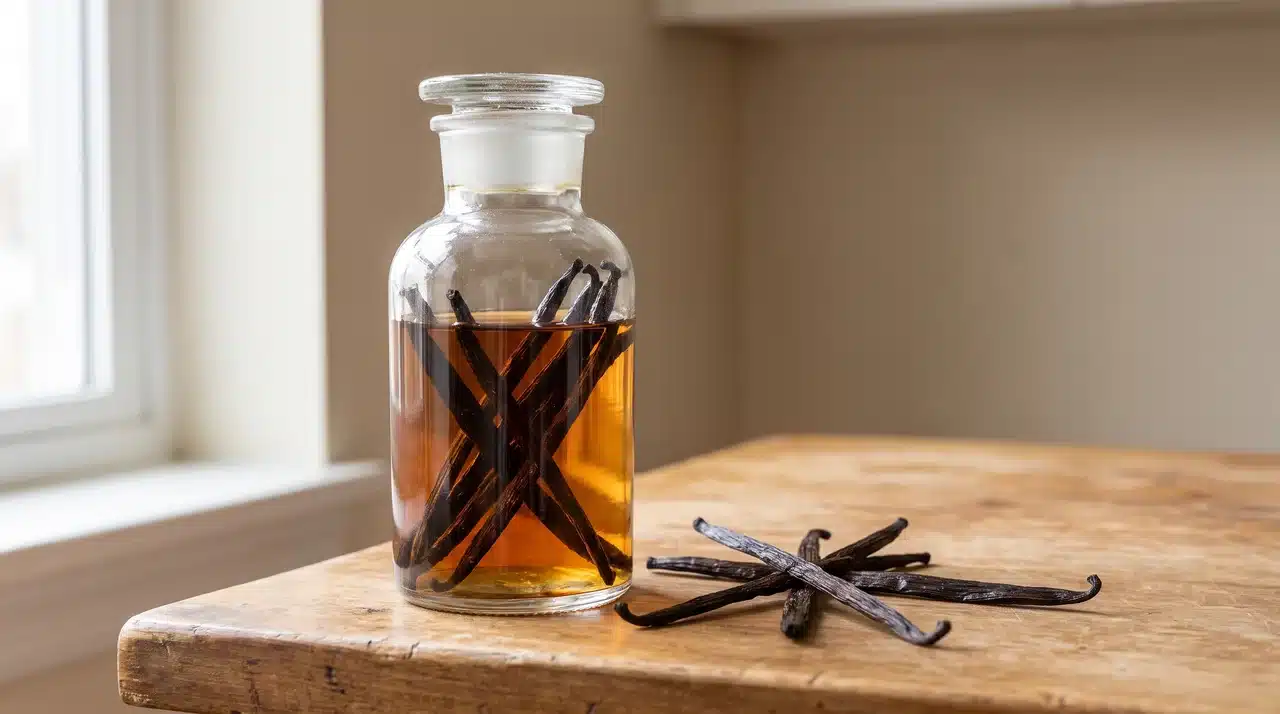
Split vanilla beans and place them inside a clean glass bottle with alcohol suitable for making extract. Seal the bottle tightly and store it away from direct light.
Because vanilla extract needs time to develop, make this gift well in advance. Add a label with the preparation date and simple storage instructions.
Estimated Cost: $10–$20
How to Make It:
- Split vanilla beans lengthwise to expose the seeds inside.
- Place the beans inside a clean glass bottle or jar.
- Cover them completely with alcohol suitable for making vanilla extract and seal tightly.
- Label the bottle with the preparation date and allow several weeks or months for infusion.
24. Homemade Granola
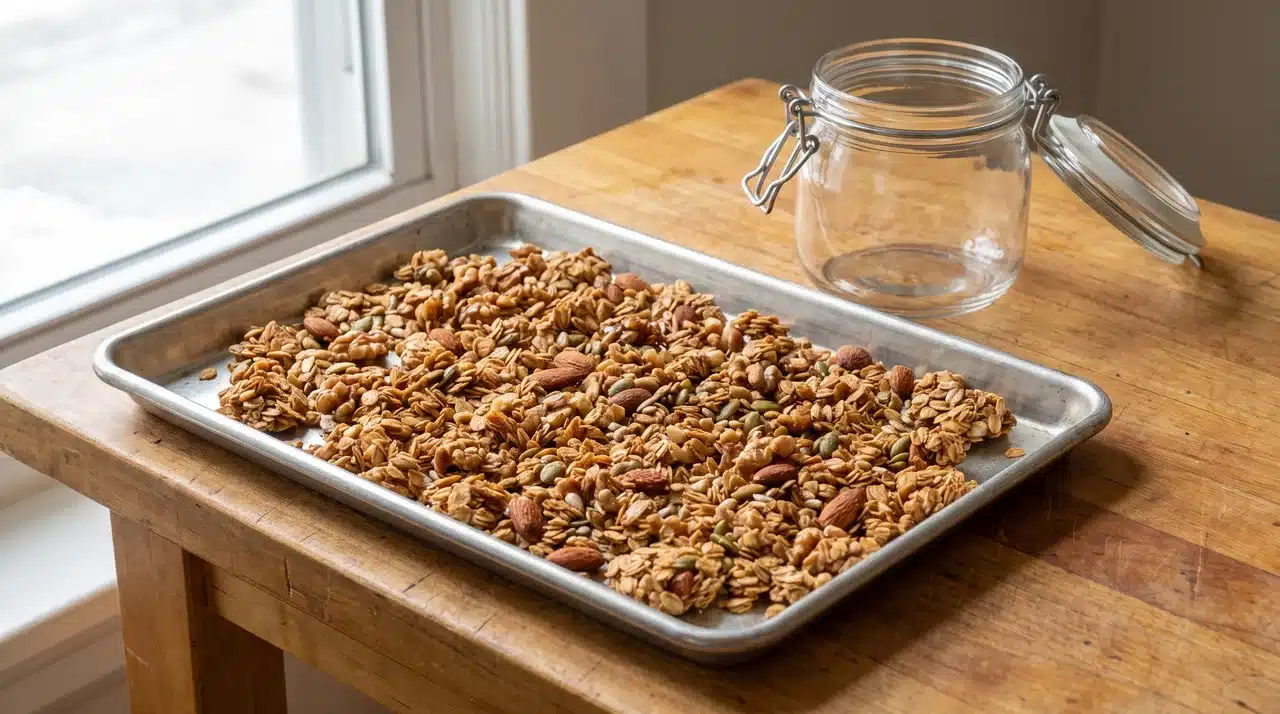
Bake oats with nuts, seeds, dried fruit, or spices to create a homemade granola blend. Choose ingredients that match the recipient’s usual breakfast or snack preferences.
Package it in a sealed jar or food-safe bag to keep it fresh. A small ingredient label is especially useful when nuts or other allergens are included.
Estimated Cost: $6–$12
How to Make It:
- Combine oats with nuts, seeds, spices, or other chosen dry ingredients.
- Mix with the recipe’s sweetener and oil before spreading everything onto a baking sheet.
- Bake until lightly golden, then let the granola cool completely.
- Package it in an airtight container and add an ingredient and allergen label.
25. DIY Spice Blend
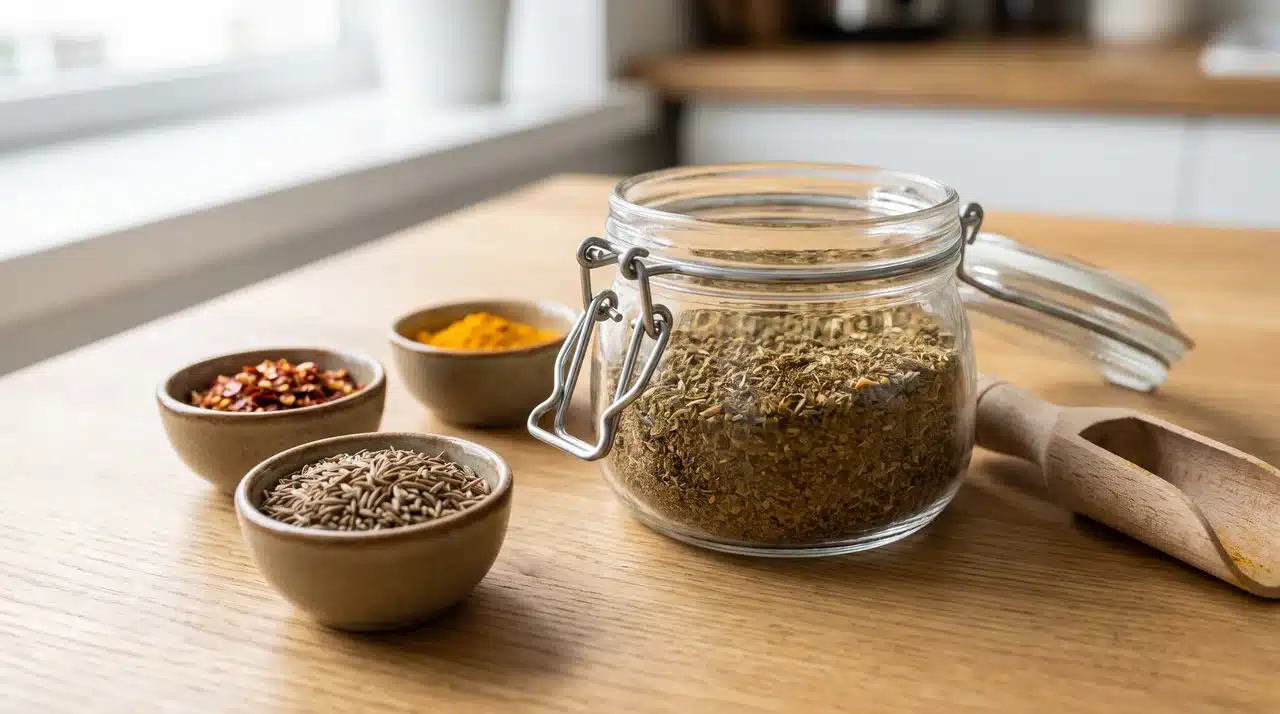
Combine dried herbs and spices to create a seasoning mix for grilling, tacos, roasted vegetables, popcorn, or another favorite food.
Package the blend in a small airtight jar and label the ingredients clearly. Adding a short note about how to use it makes the gift more practical.
Estimated Cost: $4–$10
How to Make It:
- Choose a seasoning theme such as tacos, grilling, vegetables, or popcorn.
- Measure the dried herbs and spices according to your recipe.
- Mix everything thoroughly so the ingredients are evenly distributed.
- Transfer the blend to an airtight jar and add ingredients and suggested uses to the label.
DIY Gift Ideas for Friends
Gifts for friends can feel personal without being expensive or complicated. Shared memories, hobbies, favorite colors, and inside jokes give you plenty of easy ways to customize each project.
26. DIY Friendship Key Holder
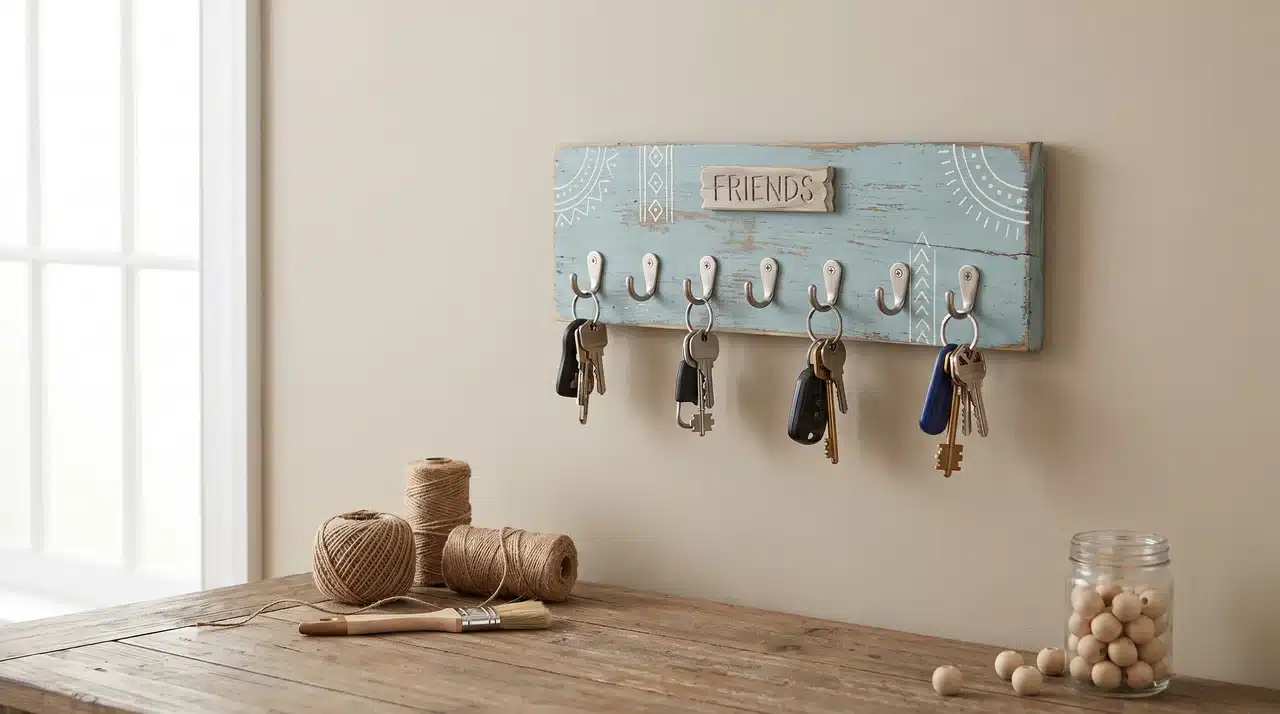
Create a useful wall key holder using a wooden board, hooks, and personalized details. Add colors, patterns, or small decorations that represent your friendship.
This practical gift helps organize everyday items while adding a handmade touch to an entryway or workspace.
Estimated Cost: $8–$18
How to Make It:
- Sand a small wooden board and prepare the surface for decorating.
- Paint, stain, or add a simple design that matches your friend’s style.
- Attach small hooks evenly across the board.
- Add a personal detail such as initials, a date, or a decorative element.
27. DIY “World’s Best Friend” Trophy
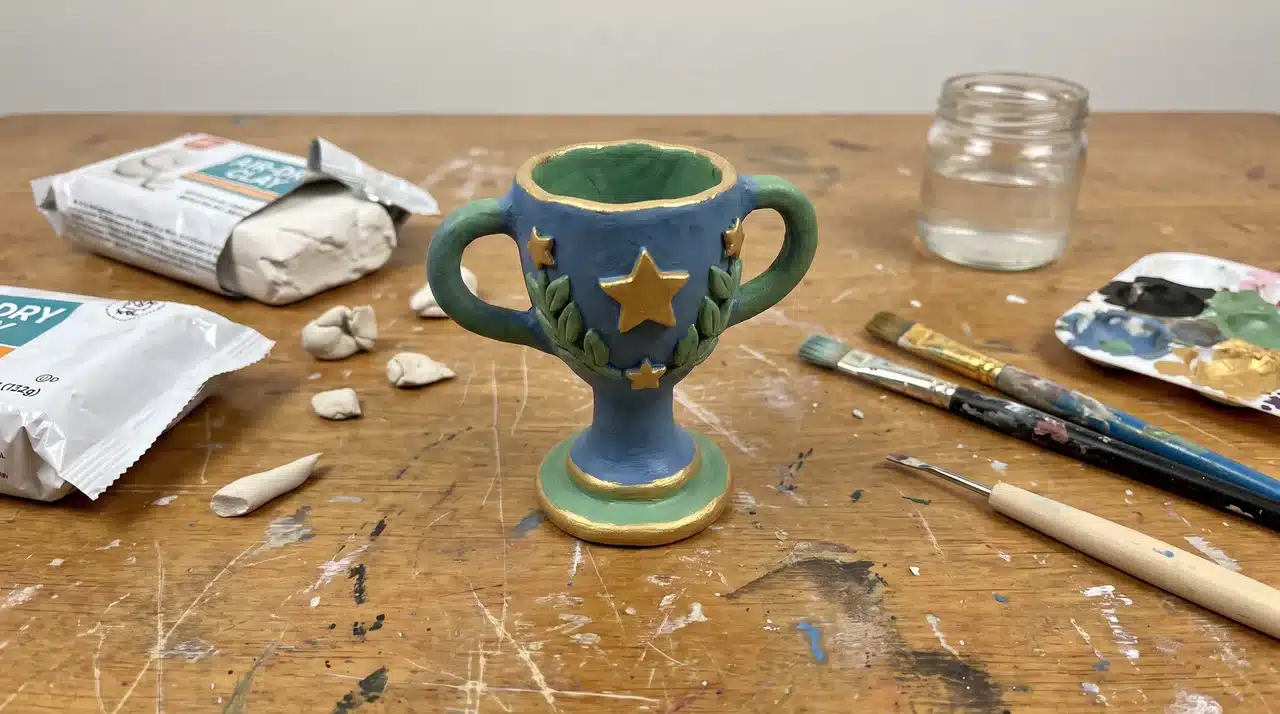
Create a playful award that celebrates your friendship with a personalized title only your friend would understand. Use air-dry clay, wood scraps, or simple craft materials to shape a small trophy.
Add a funny award name based on an inside joke, personality trait, or shared memory. This lighthearted gift works well as a desk decoration or keepsake.
Estimated Cost: $5–$12
How to Make It:
- Shape a simple trophy form using air-dry clay or assemble one from small wood pieces.
- Let the material dry or set completely before decorating.
- Paint the trophy in a fun color and allow the finish to dry.
- Add a handwritten or painted award title based on your friendship.
28. DIY Movie Night Box
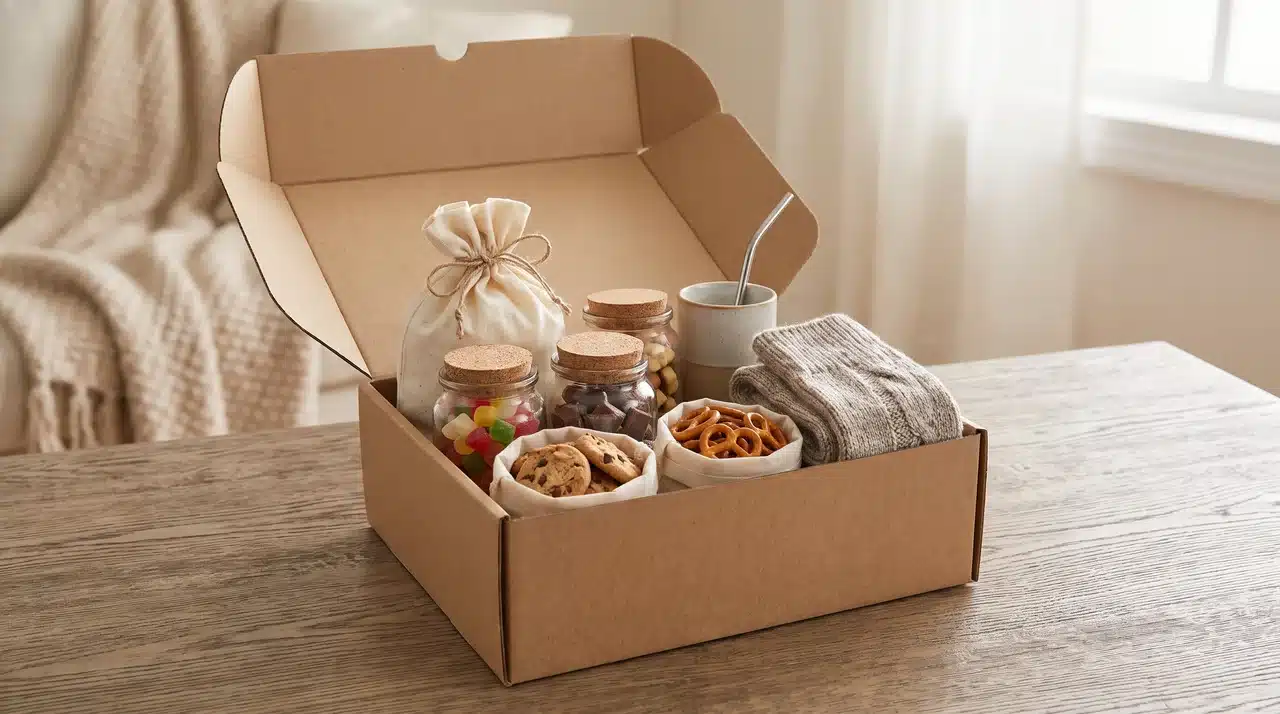
Fill a box with popcorn, candy, homemade snacks, and a handwritten list of movies. Build the theme around a favorite genre or something you both enjoy watching.
Add small extras such as cozy socks, a reusable cup, or homemade cookies. Keeping the box focused on one theme makes it feel more thoughtful and organized.
Estimated Cost: $12–$25
How to Make It:
- Choose a movie theme, genre, or list of films you both enjoy.
- Add popcorn, candy, homemade snacks, and favorite drinks or drink mixes.
- Include a handwritten movie list or simple viewing schedule.
- Arrange everything neatly inside a reusable box or basket.
29. Personalized Bag Charm
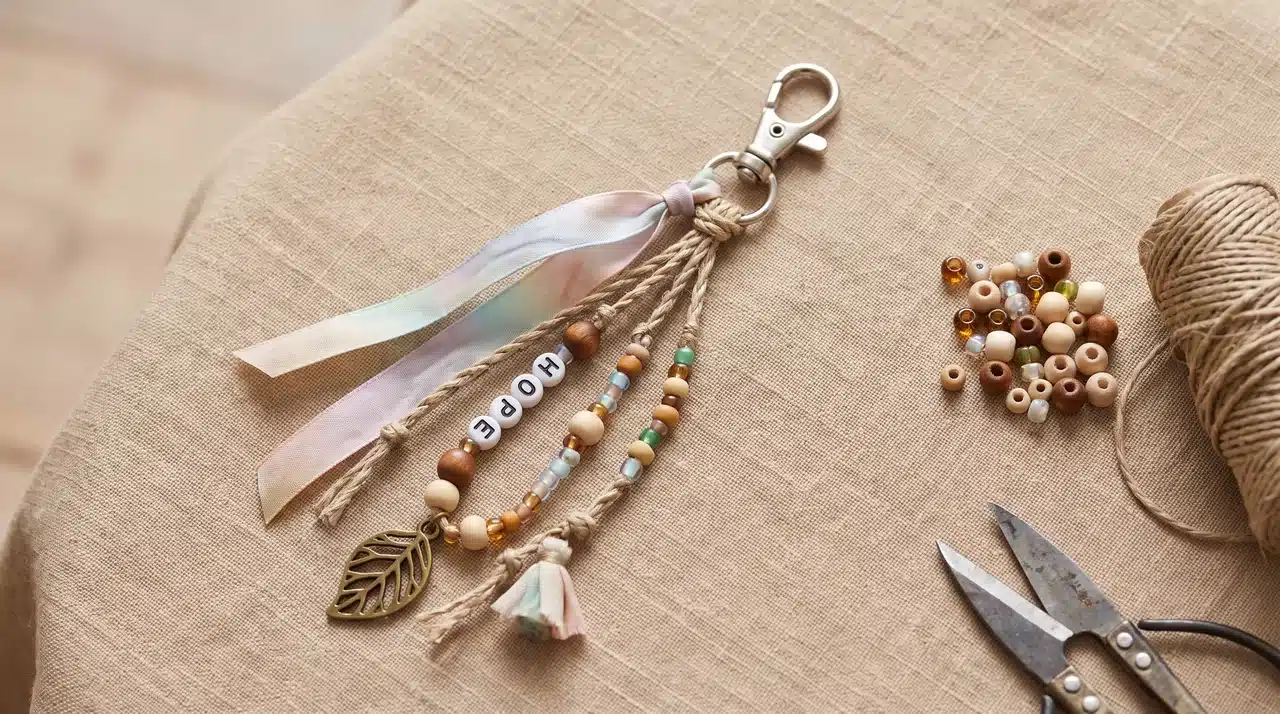
Create a bag charm using beads, ribbon, cord, initials, or small charms. Choose details that match your friend’s personality, hobbies, or favorite colors.
Attach everything securely to a key ring or clasp. Keep the finished charm lightweight so it works comfortably on a backpack, tote, purse, or travel bag.
Estimated Cost: $3–$8
How to Make It:
- Choose beads, cord, ribbon, letters, or small charms that suit your friend.
- Plan a short arrangement that will remain lightweight.
- Thread or attach everything securely to strong cord or wire.
- Connect the finished charm to a key ring or bag clasp.
30. DIY Photo Puzzle
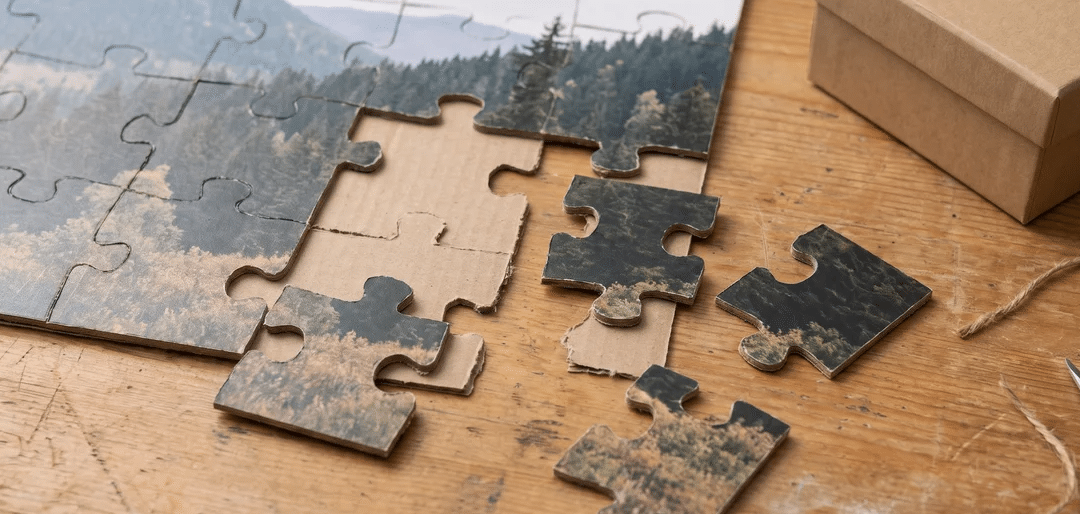
Turn a favorite shared photo into an interactive keepsake by creating a homemade puzzle. It adds an activity element while preserving a meaningful memory.
Choose a photo connected to a trip, celebration, or funny moment. Package the finished pieces with a short note explaining why the memory matters.
Estimated Cost: $6–$15
How to Make It:
- Print a favorite photo at a size that fits sturdy cardboard or foam board.
- Attach the photo securely to the board and let it dry completely.
- Draw puzzle shapes on the back and cut the pieces carefully.
- Place the pieces in a small box or bag with a personal note.
DIY Gift Ideas for Him
Useful gifts often work best when they also reflect his routine or interests.
These projects can be personalized without relying on predictable themes, and the wood-based ones pair naturally with the upcycled furniture guide if he already likes hands-on projects.
31. DIY Wooden Beverage Caddy
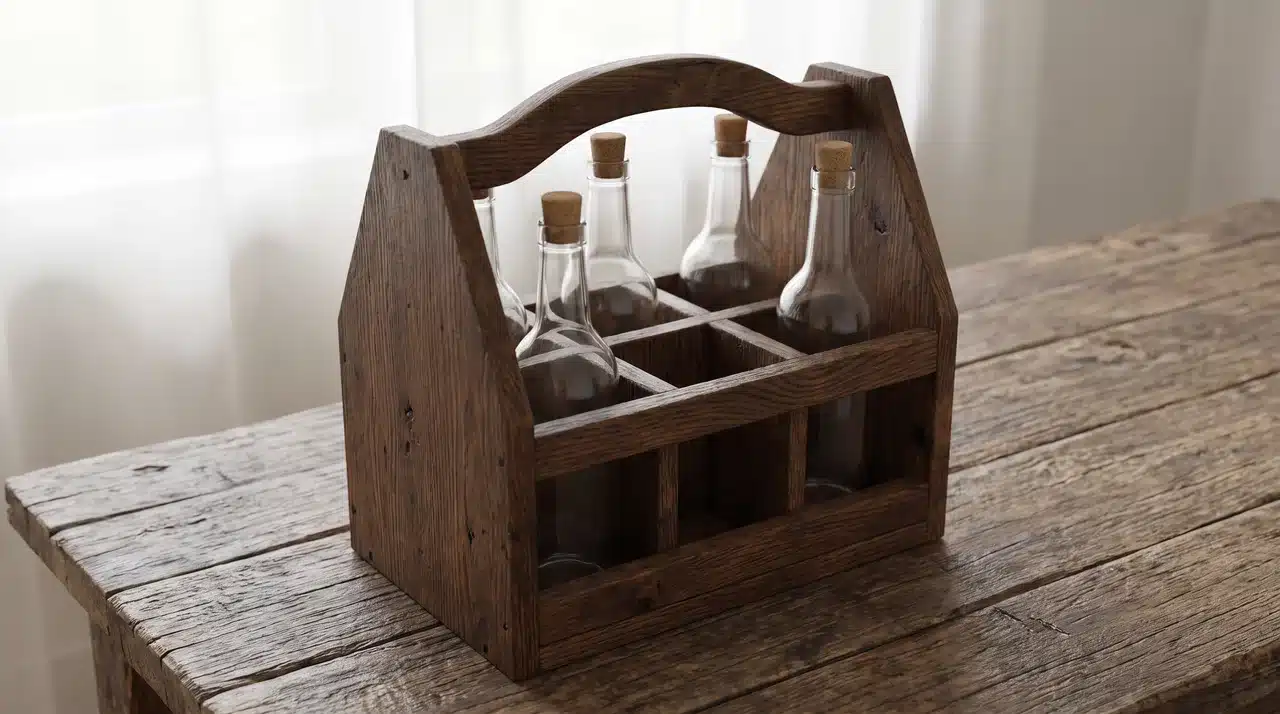
A wooden beverage caddy makes a practical handmade gift for someone who enjoys hosting, grilling, or relaxing with drinks. It can hold bottles, cans, or other items while adding a rustic touch.
Customize the finish with stain, paint, initials, or a small design. Choose sturdy wood and smooth all edges so it remains comfortable to carry.
Estimated Cost: $10–$20
How to Make It:
- Cut a wooden base, side panels, and center handle piece to the desired size.
- Sand all edges until the pieces are smooth and safe to handle.
- Assemble the parts using wood glue and suitable fasteners.
- Apply stain, paint, or a personalized detail before gifting.
32. Homemade Beard Oil
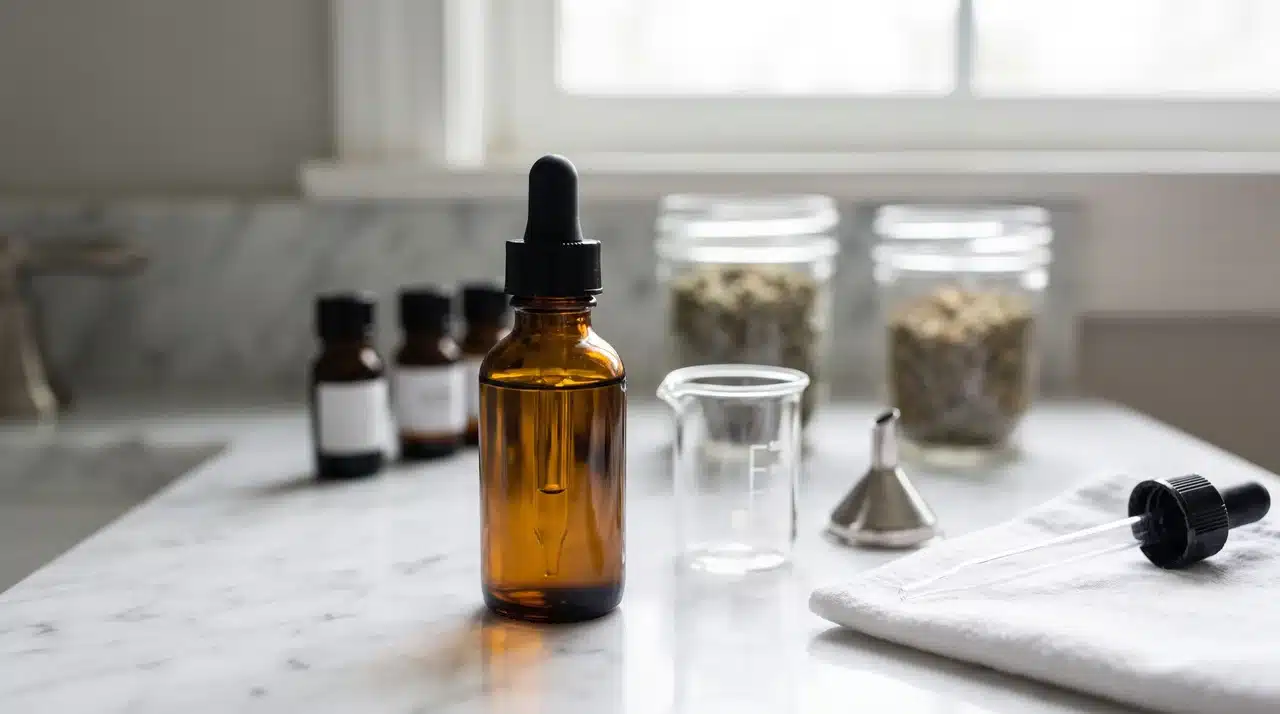
Make a simple grooming gift by combining lightweight oils with a scent that matches the recipient’s preferences. A small bottle makes this easy to store and use daily.
Choose skin-friendly ingredients and keep the fragrance subtle. Add a personalized label with the scent name and basic usage instructions.
Estimated Cost: $8–$15
How to Make It:
- Choose a lightweight carrier oil such as jojoba or another suitable grooming oil.
- Add a few drops of beard-safe essential oil for fragrance if desired.
- Mix the oils thoroughly and transfer them into a small dropper bottle.
- Label the bottle with the scent details and simple usage instructions.
33. DIY Wood Slice Coasters
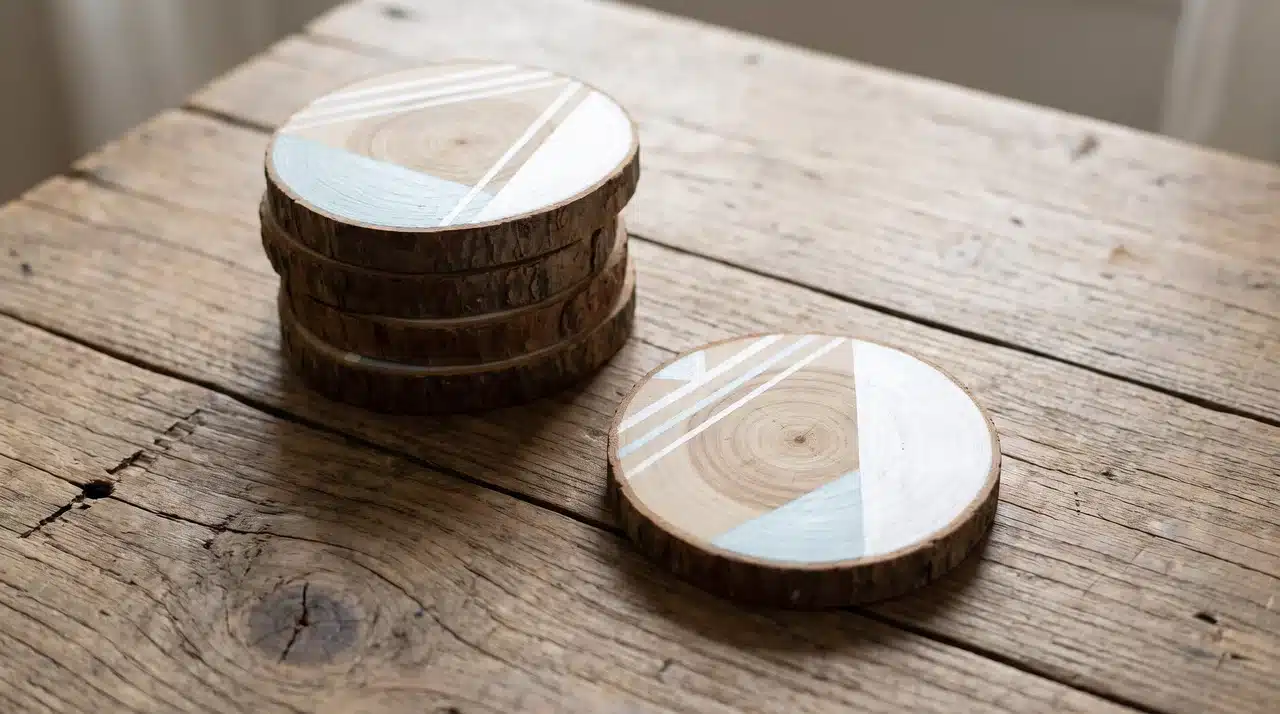
Create a useful coaster set from wood slices for a handmade gift that fits into everyday routines. The natural material gives each piece a slightly different appearance.
Add initials, simple patterns, or small designs to personalize the set. A protective finish helps the coasters handle moisture from regular use.
Estimated Cost: $6–$14
How to Make It:
- Sand wood slices or pre-cut wooden rounds until the surfaces feel smooth.
- Apply a suitable protective finish to help prevent moisture damage.
- Add initials, patterns, or designs using paint or wood-burning tools.
- Let the coasters cure fully before stacking and packaging the set.
34. DIY Leather Card Holder
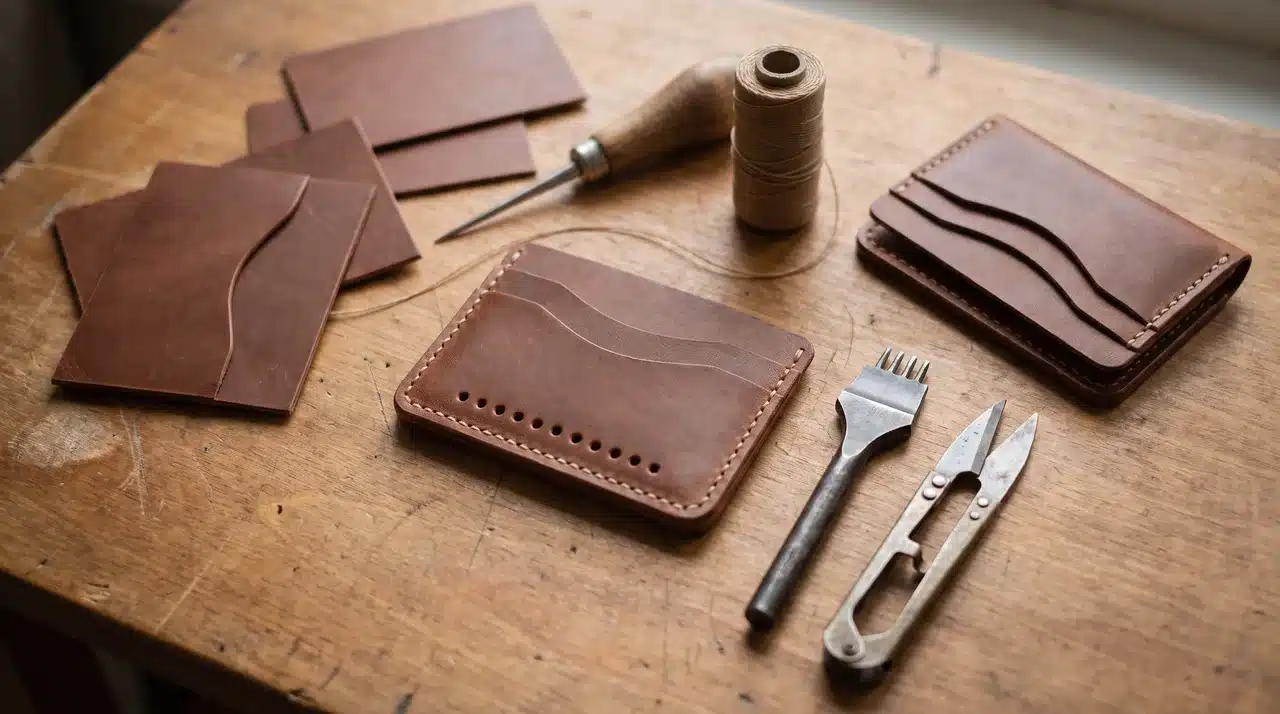
Make a compact leather card holder using a few pieces of leather and basic stitching supplies. It creates a practical everyday gift that can hold cards, IDs, or small notes.
Choose leather colors that match the recipient’s style and add initials for a personalized finish.
Estimated Cost: $10–$20
How to Make It:
- Cut two matching leather pieces slightly larger than standard cards.
- Mark and punch stitching holes along the edges.
- Stitch the pieces together while leaving the top opening accessible.
- Trim uneven edges and add initials or a small decorative detail if desired.
35. Custom Desk Organizer
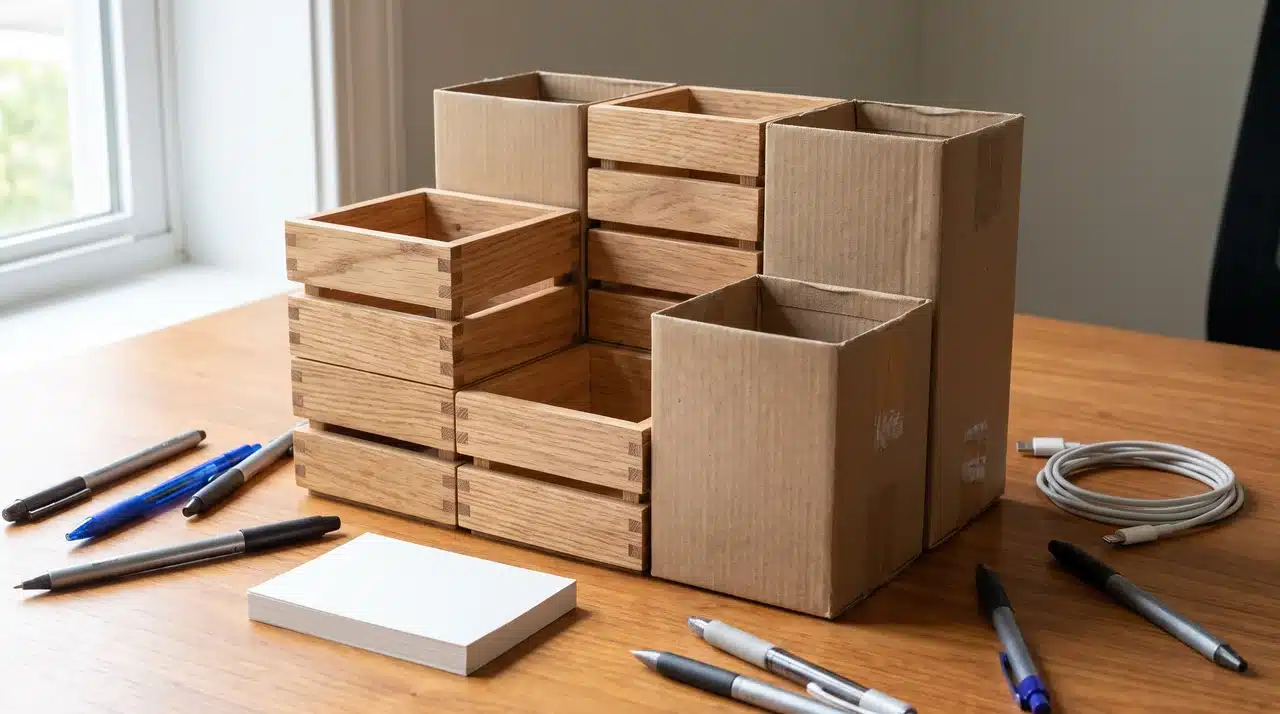
Use small wooden boxes, sturdy containers, or recycled materials to create compartments for pens, chargers, notes, keys, and other frequently used desk items.
Paint or finish the organizer to match his workspace. Keep the size compact enough to add useful storage without taking over the entire desk.
Estimated Cost: $8–$18
How to Make It:
- Gather small wooden boxes or sturdy containers in different sizes.
- Arrange them to create compartments for pens, notes, chargers, and other supplies.
- Glue or secure the pieces together once the layout works.
- Paint, stain, or cover the organizer to suit the recipient’s workspace.
DIY Gift Ideas for Her
These projects combine useful, decorative, and personal details without requiring advanced crafting skills. Favorite colors, photos, scents, and everyday interests can make each idea feel more individual.
36. DIY Lip Balm
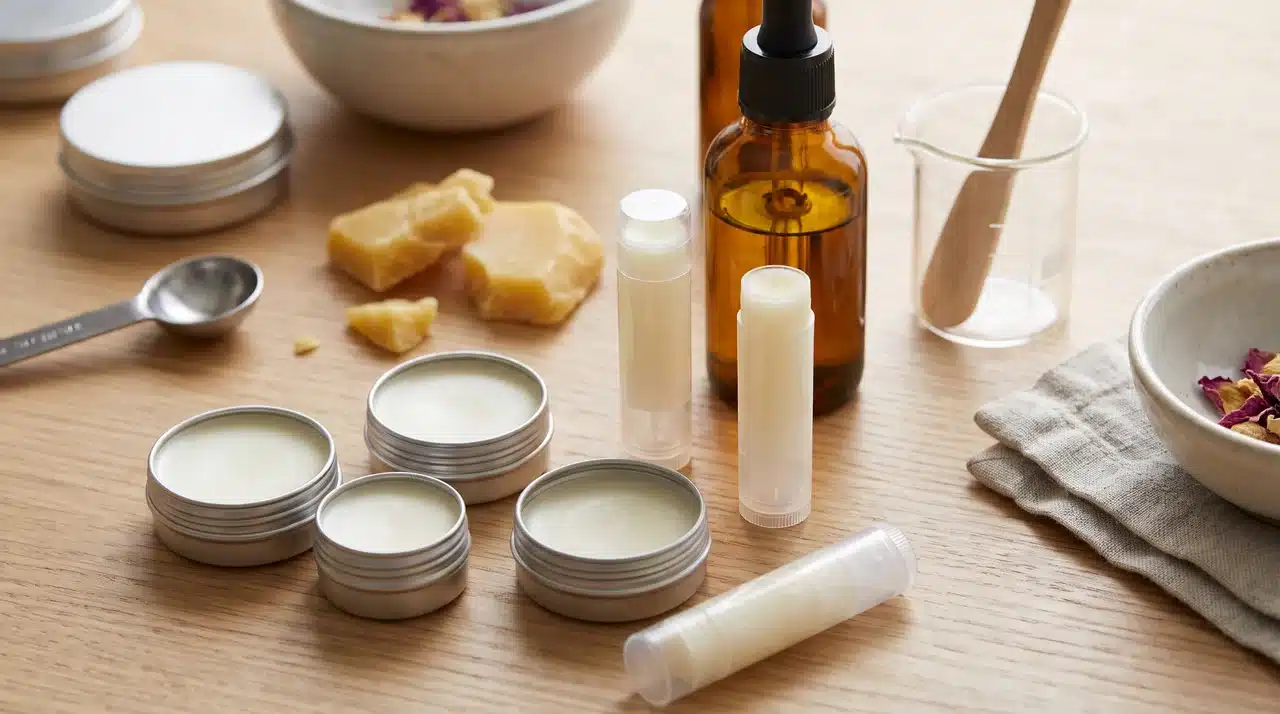
Homemade lip balm is a small, practical gift that can be customized with different scents and containers. It works well as a simple addition to gift baskets or self-care sets.
Use skin-safe ingredients and keep the formula simple. Small tins or tubes make the finished product easy to carry and use.
Estimated Cost: $6–$12
How to Make It:
- Melt beeswax with a nourishing oil such as coconut or sweet almond oil.
- Add a small amount of mild flavoring or skin-safe essential oil if desired.
- Pour the mixture into clean lip balm tins or tubes.
- Let the balm cool completely before sealing and labeling the containers.
37. Pressed Flower Frame
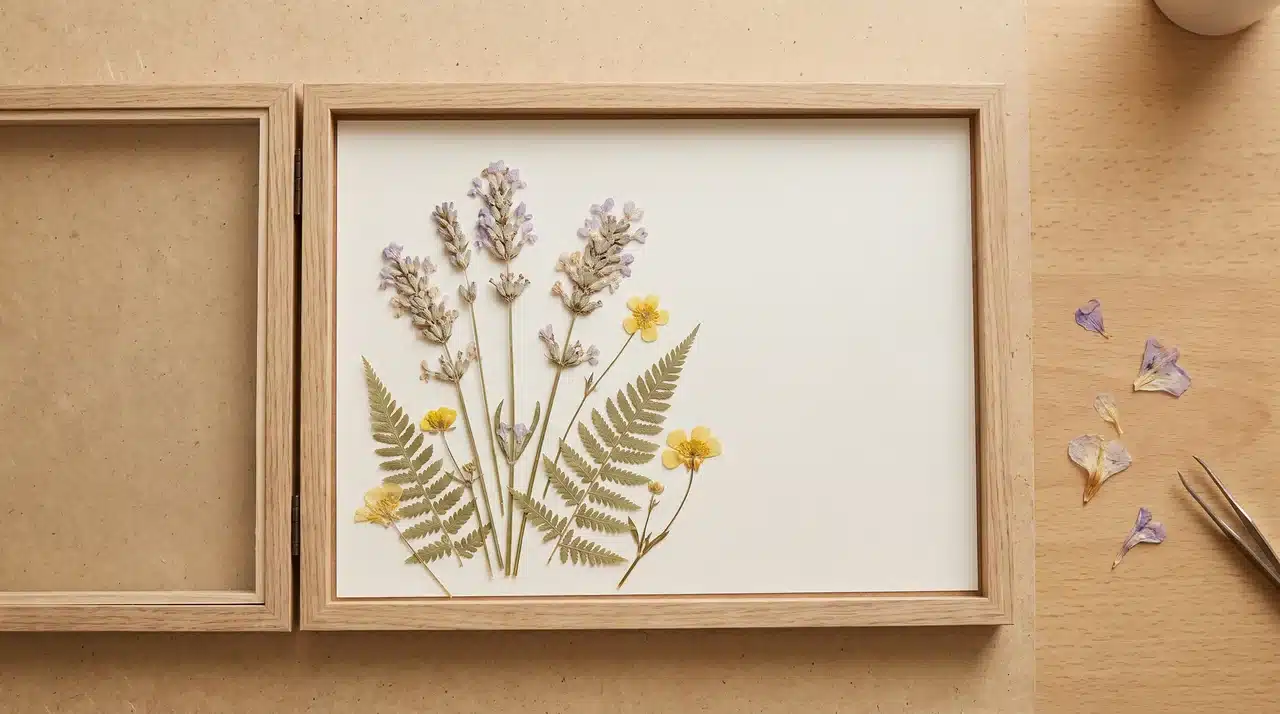
Arrange dried pressed flowers on cardstock or between suitable frame layers. Choose flowers with colors that fit her room, favorite palette, or a meaningful occasion.
Keep plenty of open space around the arrangement so it does not look crowded. Add a small date or note if the flowers connect to a memory.
Estimated Cost: $8–$18
How to Make It:
- Place flowers between absorbent paper and press them until completely dry.
- Arrange the pressed flowers on cardstock or suitable frame backing.
- Secure each flower carefully without using excessive adhesive.
- Place the arrangement inside a frame and add a date or note if desired.
38. Handmade Hair Accessories Set
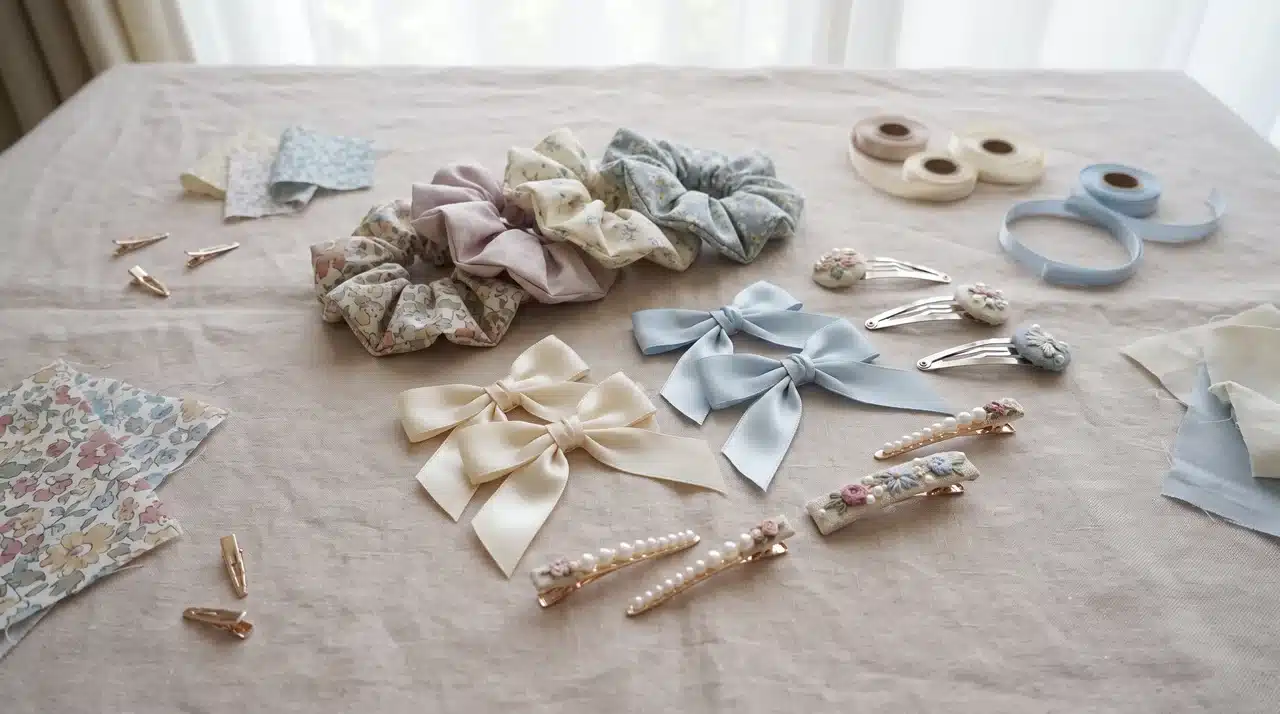
Create a small collection of handmade hair accessories using fabric, ribbons, clips, or elastic bands. Choose colors and patterns that match the recipient’s style.
A set of scrunchies, bows, or decorated clips makes a practical gift that can be used regularly.
Estimated Cost: $5–$15
How to Make It:
- Choose fabric, ribbons, clips, or elastic materials for the accessories.
- Cut and prepare the materials according to the desired accessory style.
- Sew, tie, or attach the pieces securely to create each item.
- Arrange multiple finished accessories together as a coordinated set.
39. DIY Toiletry Bag
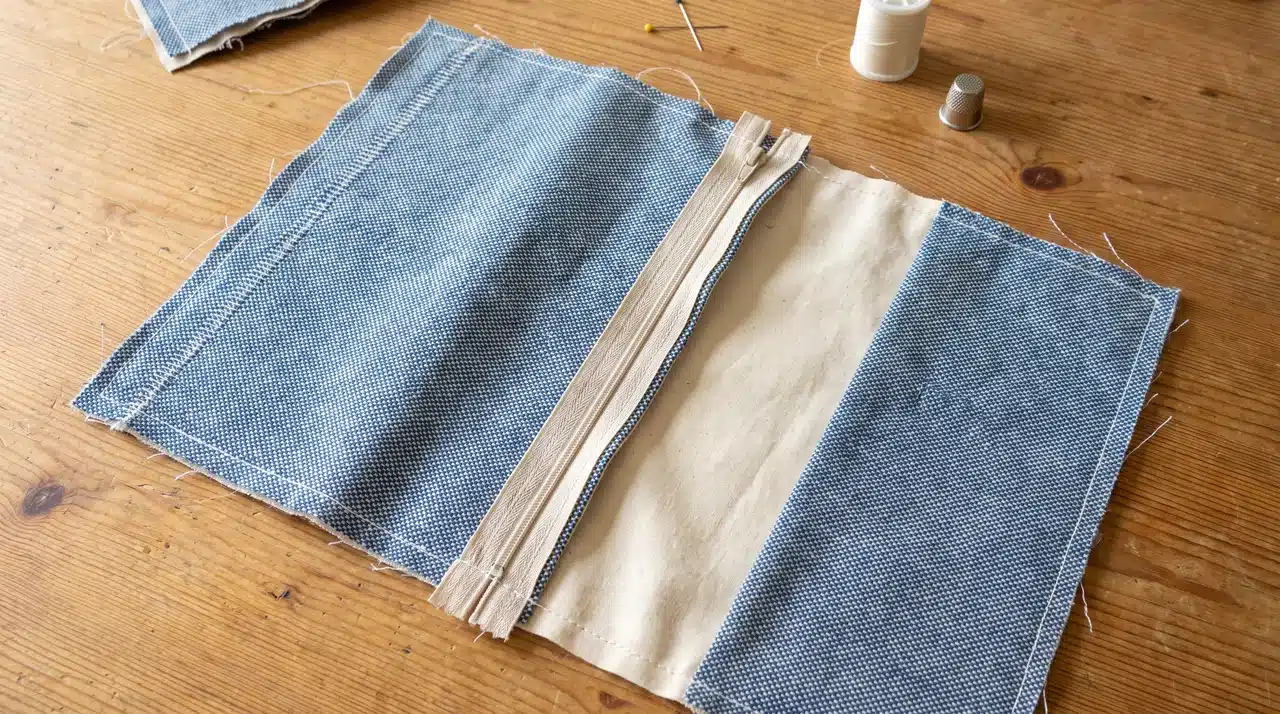
Sew a small pouch from durable washable fabric and add a zipper or simple closure. Choose a size that can hold makeup, toiletries, chargers, or travel essentials.
Use fabric that matches her style and consider adding an interior lining. A small initial or fabric tag can provide personalization without making the design too busy.
Estimated Cost: $8–$18
How to Make It:
- Decide on the pouch size and cut two matching pieces of washable fabric.
- Add lining or lightweight padding if you want additional structure.
- Sew in a zipper or another secure closure.
- Join the remaining edges, turn the pouch right-side out, and press it neatly.
40. DIY Shadow Box Display
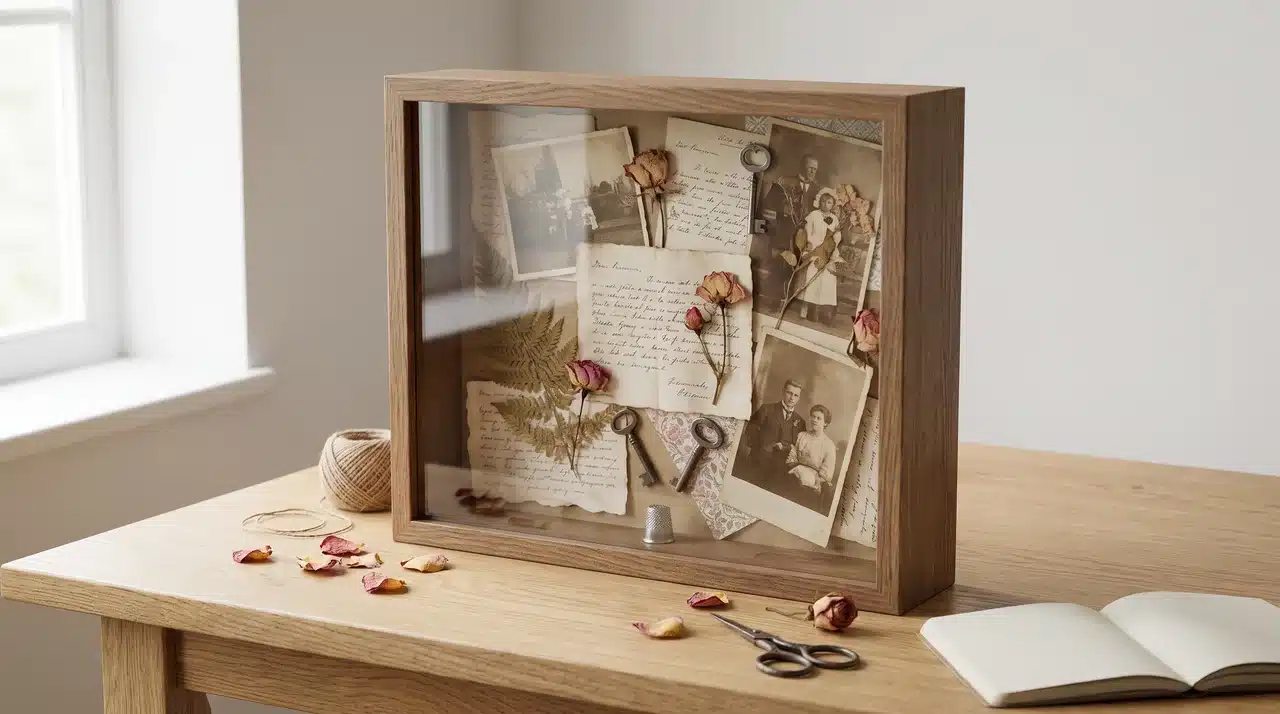
Create a shadow box display to preserve small keepsakes, photos, tickets, dried flowers, or meaningful objects. The deeper frame allows you to create a layered arrangement.
This gift works well for birthdays, anniversaries, or memories connected to special moments.
Estimated Cost: $10–$25
How to Make It:
- Choose a deep frame or shadow box suitable for the items you want to display.
- Arrange photos, keepsakes, or decorative pieces inside the frame.
- Secure each item carefully using adhesive or mounting materials.
- Close the frame and add a personal label or decorative border if desired.
DIY Gift Ideas for Kids
DIY gifts for kids are more fun when they encourage drawing, building, experimenting, or playing. Choose age-appropriate materials and keep small parts away from younger children.
41. Homemade Craft Kit
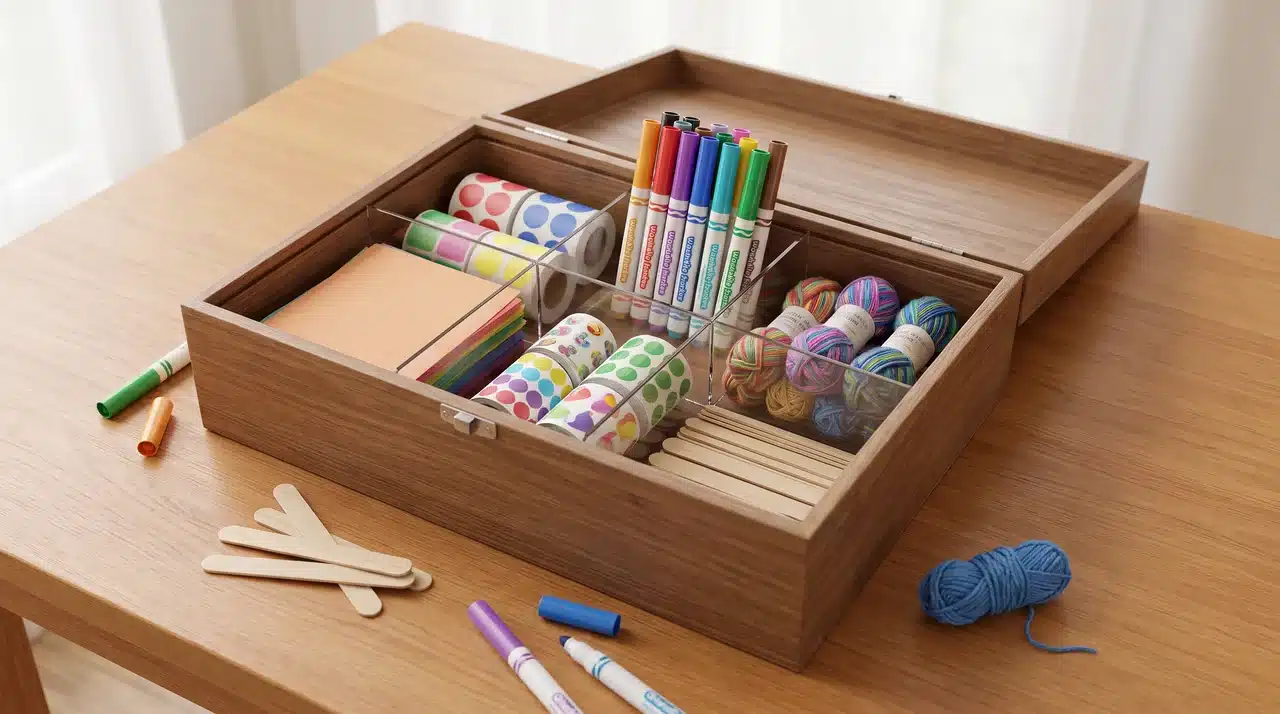
Fill a sturdy box with paper, stickers, washable markers, yarn, craft sticks, and other age-appropriate supplies. Choose materials that allow several different projects.
Organize items into small containers or compartments so the kit stays manageable. Include a few simple project cards if the child needs help getting started.
Estimated Cost: $10–$20
How to Make It:
- Choose age-appropriate supplies such as paper, washable markers, yarn, and stickers.
- Divide the materials into small containers or compartments.
- Create a few simple project cards showing things the child can make.
- Arrange everything inside a sturdy reusable box and label it clearly.
42. DIY Crayon Set
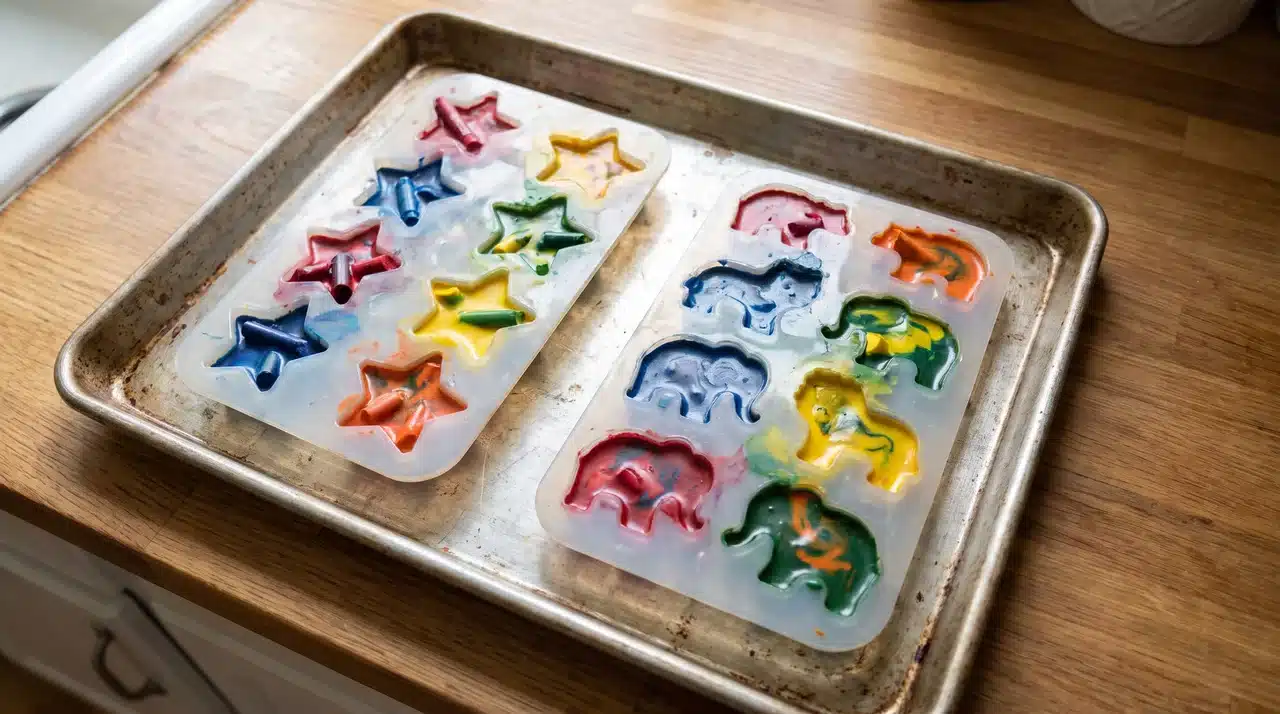
Melt broken crayons in silicone molds to create new shapes and color combinations. This is a useful way to turn leftover crayons into something more exciting.
Choose molds that fit the child’s interests, such as stars or animals. Make the crayons thick enough to hold comfortably during drawing and coloring.
Estimated Cost: $3–$8
How to Make It:
- Remove the paper wrappers from broken or leftover crayons.
- Break the crayons into small pieces and place them inside silicone molds.
- Have an adult melt them carefully in the oven according to the mold and crayon instructions.
- Let the crayons cool completely before removing them from the molds.
43. Homemade Play Dough Kit
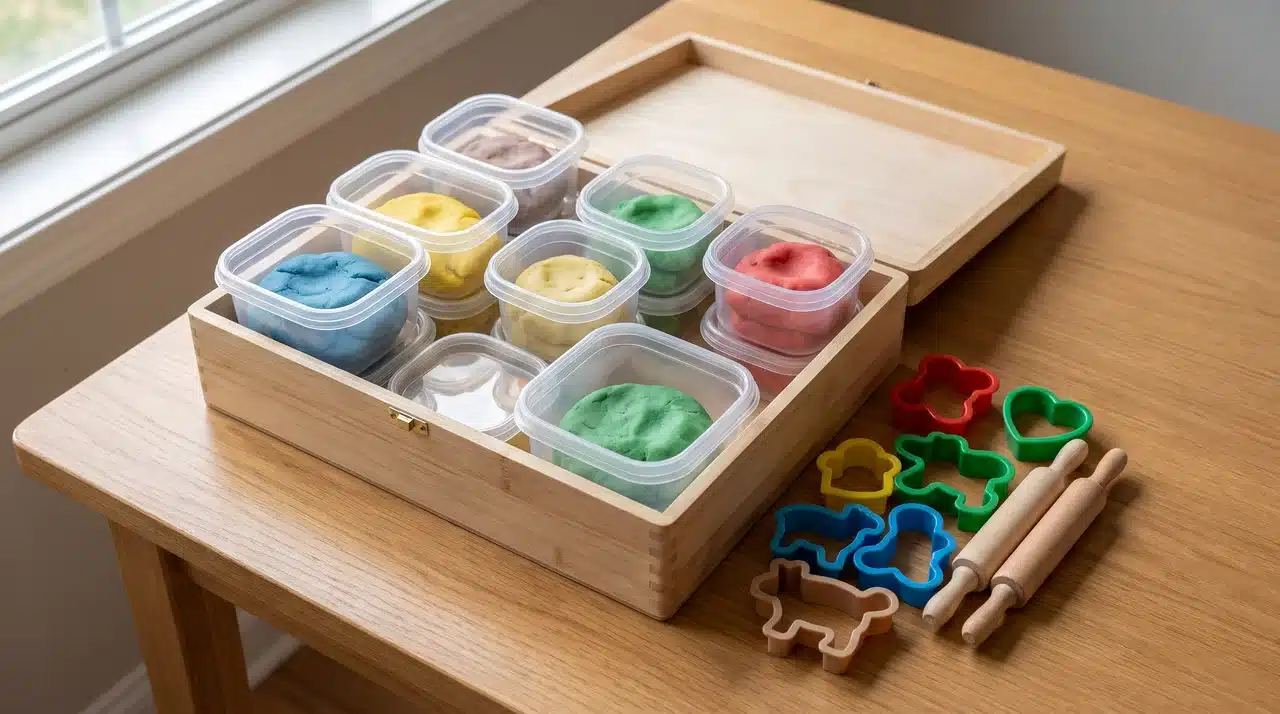
Prepare homemade play dough in several colors and place each one in a sealed container. Add child-safe cutters, rollers, or simple shaping tools.
Keep the ingredients clearly labeled, especially if allergies are a concern. Store everything together in a reusable box so cleanup and future play stay easier.
Estimated Cost: $6–$12
How to Make It:
- Prepare a simple homemade play dough recipe and divide it into several portions.
- Add different child-safe colors to each portion and knead until evenly mixed.
- Store each color in a separate airtight container.
- Pack the containers with age-appropriate cutters or shaping tools in a reusable box.
44. Handmade Memory Game
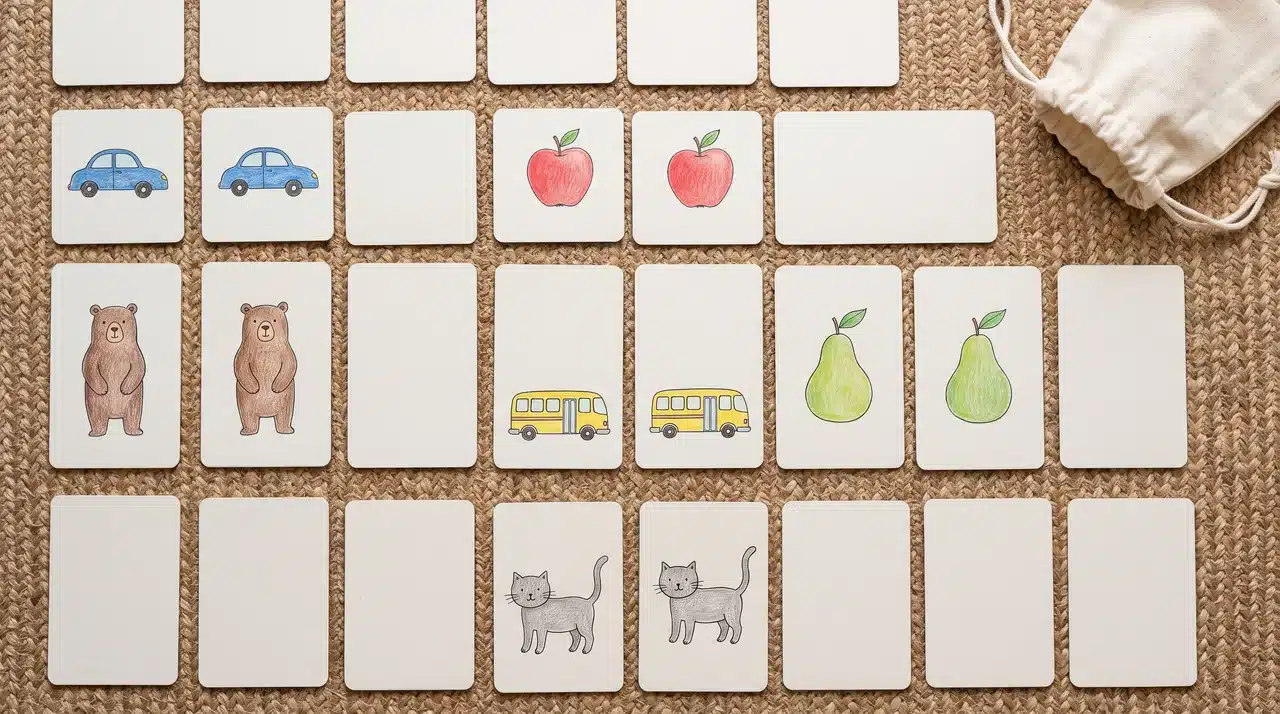
Create matching pairs of cards using sturdy cardstock, printed pictures, stickers, or simple drawings. Choose themes the child likes, such as animals, vehicles, or foods.
Make enough pairs to keep the game interesting without becoming overwhelming. Laminate or cover the cards if you want them to handle repeated play more easily.
Estimated Cost: $4–$10
How to Make It:
- Cut sturdy cardstock into an even number of equal-sized cards.
- Create two identical cards for every picture, shape, or design.
- Let all paint or markers dry before covering or laminating the cards if desired.
- Shuffle the completed cards and store them together in a small pouch or box.
Cheap DIY Gift Ideas
A thoughtful gift does not need expensive supplies. These projects use low-cost materials and simple techniques, making them useful when you want something personal without overspending.
45. Decorated Mason Jar
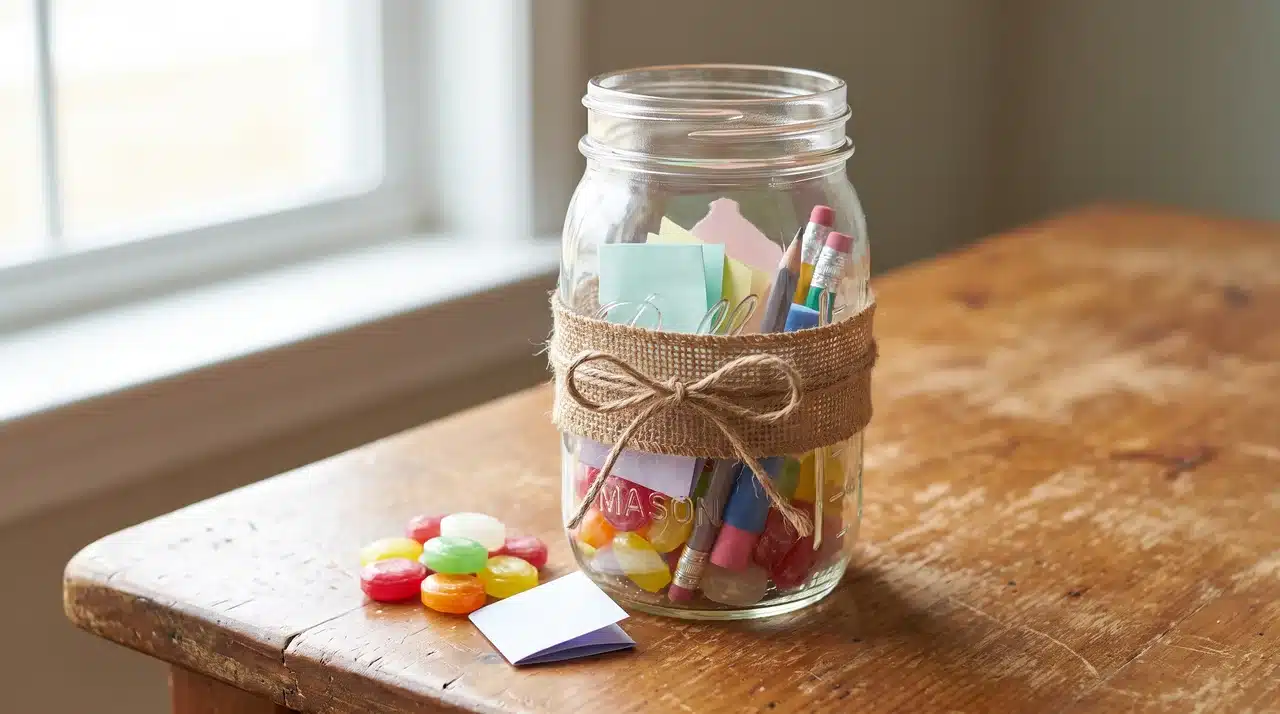
Turn a plain mason jar into a useful container with paint, ribbon, twine, or a simple label. Keep the decoration light so the jar remains practical.
Fill it with candy, stationery, coffee packets, small notes, or craft supplies. Changing the contents lets you adapt the same project for different recipients.
Estimated Cost: $3–$8
How to Make It:
- Wash and completely dry a mason jar before decorating it.
- Add paint, ribbon, twine, a label, or another simple decorative feature.
- Fill the jar with candy, notes, stationery, or another inexpensive item.
- Secure the lid and finish it with a handwritten gift tag.
46. DIY Flavored Popcorn Mix
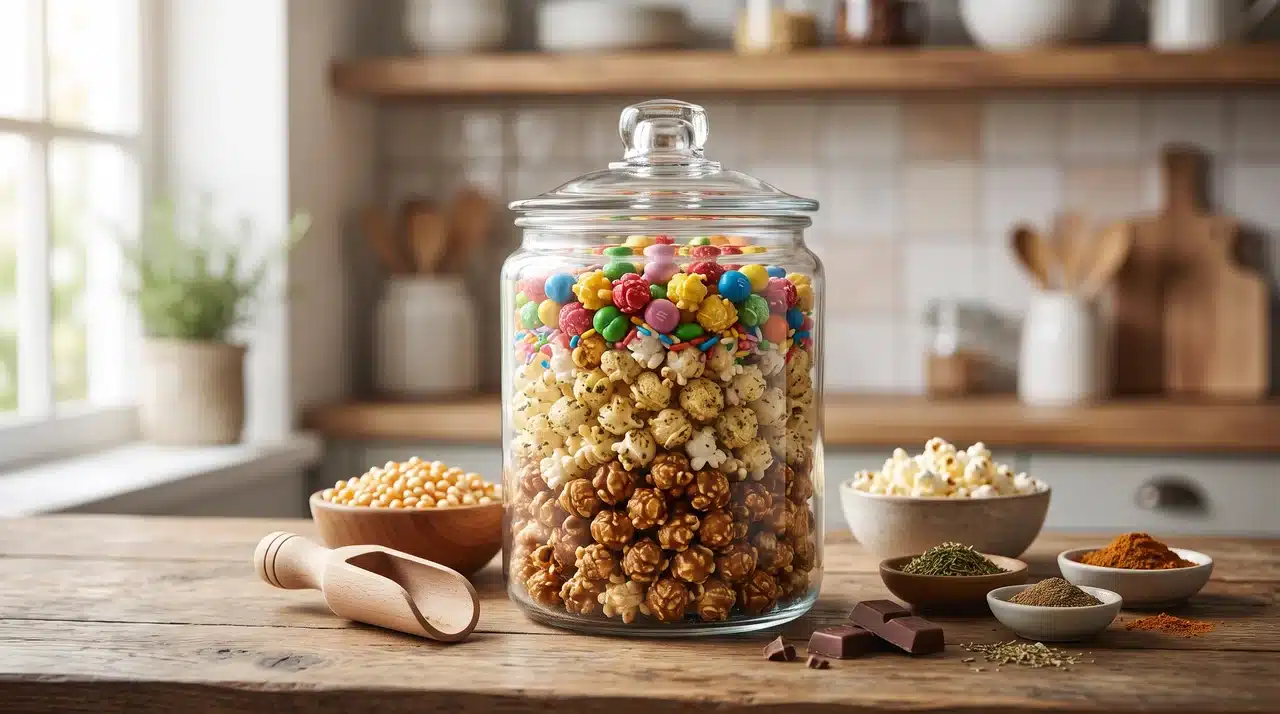
Create a customized popcorn gift by combining popcorn with sweet or savory seasonings. Choose flavors based on the recipient’s preferences, such as caramel, cinnamon, cheese, or spicy blends.
Package the mix in a jar or gift bag for an inexpensive and easy-to-share treat.
Estimated Cost: $5–$10
How to Make It:
- Prepare plain popcorn and allow it to cool completely.
- Mix the popcorn with chosen seasonings or flavor coatings.
- Place the finished mix into an airtight jar or food-safe bag.
- Add a label with the flavor details and storage instructions.
47. Sugar Scrub
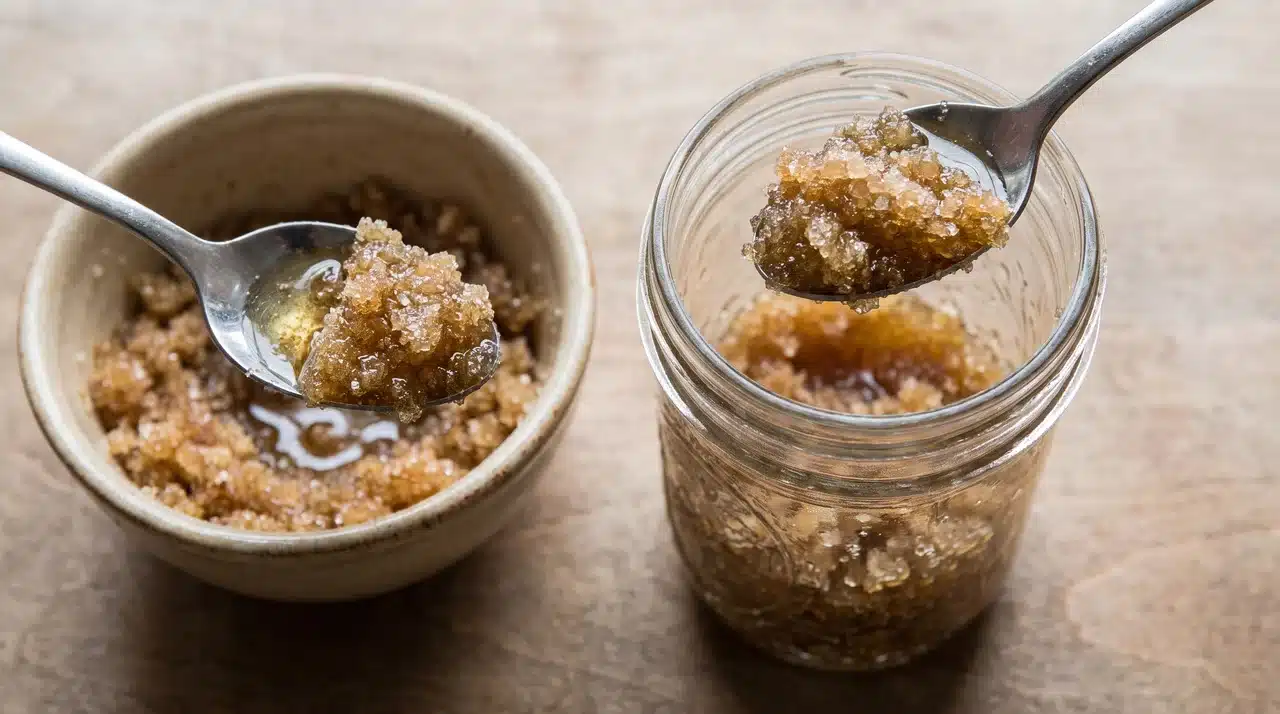
Mix sugar with a skin-safe carrier oil to create a simple homemade scrub. Keep it unscented or add a mild fragrance the recipient already likes.
Place the scrub in a small clean jar and add a basic label. Since the ingredients are inexpensive, this works well for small gifts or gift baskets.
Estimated Cost: $4–$8
How to Make It:
- Combine granulated sugar with a skin-safe carrier oil in a clean bowl.
- Mix until the scrub has a scoopable consistency without becoming too oily.
- Add a mild skin-safe fragrance only if appropriate for the recipient.
- Spoon the mixture into a clean jar and label the ingredients and basic use instructions.
48. Handmade Journal Cover
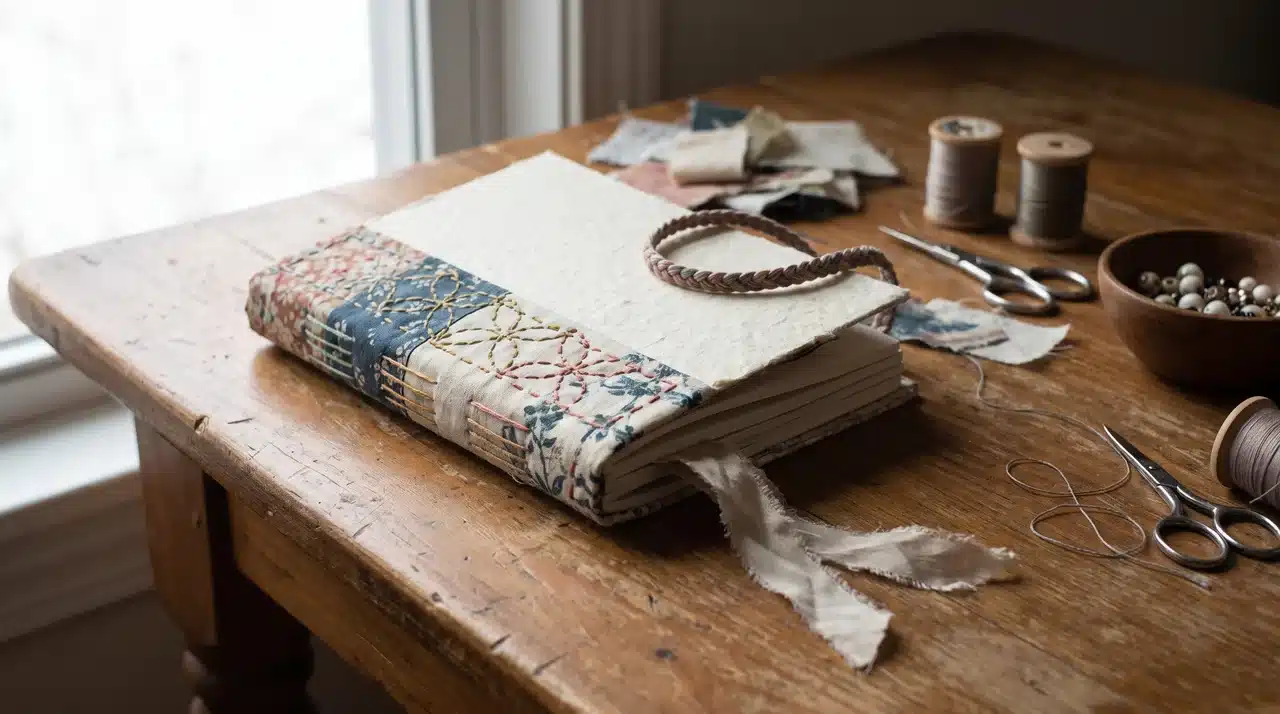
Transform a plain notebook into a personalized journal by creating a custom fabric, leather, or paper cover. Add colors, patterns, or details that match the recipient’s style.
This simple project turns an ordinary notebook into a thoughtful everyday item.
Estimated Cost: $5–$15
How to Make It:
- Measure the notebook and cut the cover material slightly larger than the pages.
- Attach the material around the notebook using glue, stitching, or elastic.
- Add decorative details such as patterns, initials, or a ribbon bookmark.
- Allow adhesives or stitching to set before gifting the finished journal.
Last-Minute DIY Gift Ideas
When time is short, choose projects that need minimal drying, curing, or preparation. These ideas can usually be completed the same day with common supplies.
49. DIY Tea Blend Jar
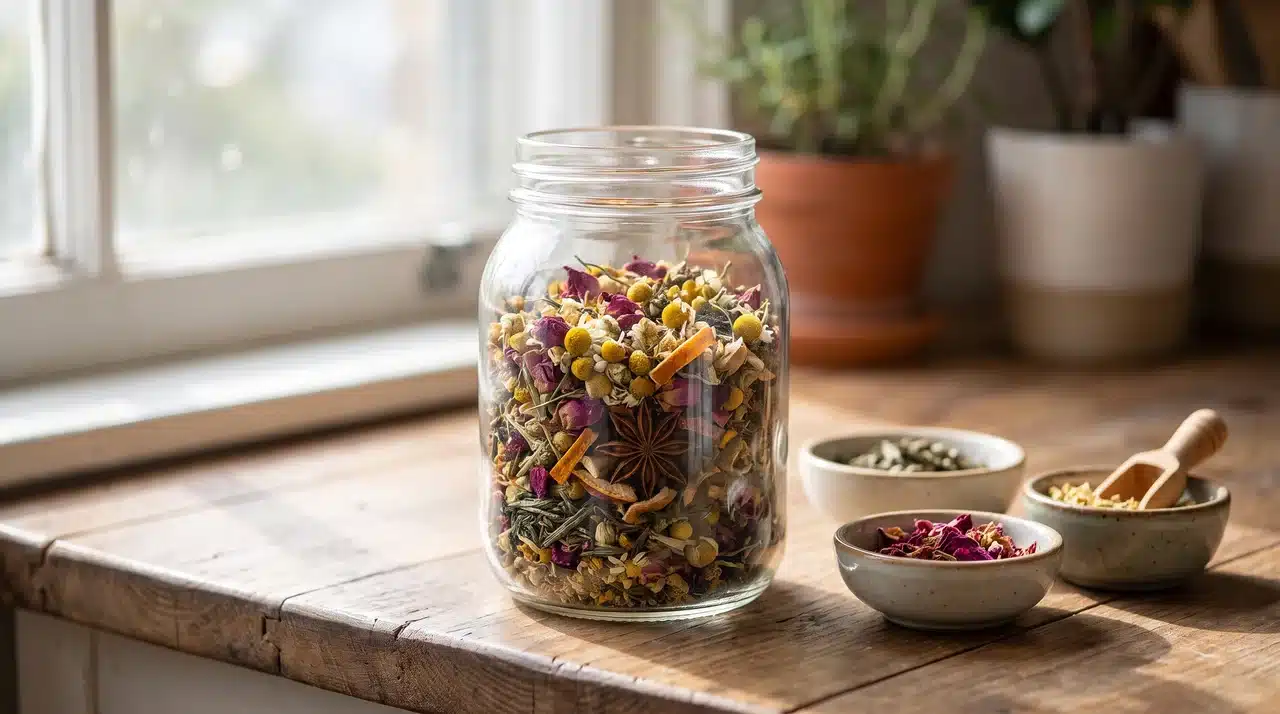
Create a custom tea blend by combining dried herbs, flowers, spices, or tea leaves based on the recipient’s preferences. Package the mixture in a clear jar for a simple handmade gift.
Add serving suggestions so the recipient knows how to prepare and enjoy the blend.
Estimated Cost: $6–$15
How to Make It:
- Choose dried tea ingredients that combine well together.
- Measure and mix the ingredients evenly in a clean bowl.
- Transfer the blend into an airtight glass jar.
- Add a label with ingredients and basic brewing instructions.
50. DIY Photo Magnets
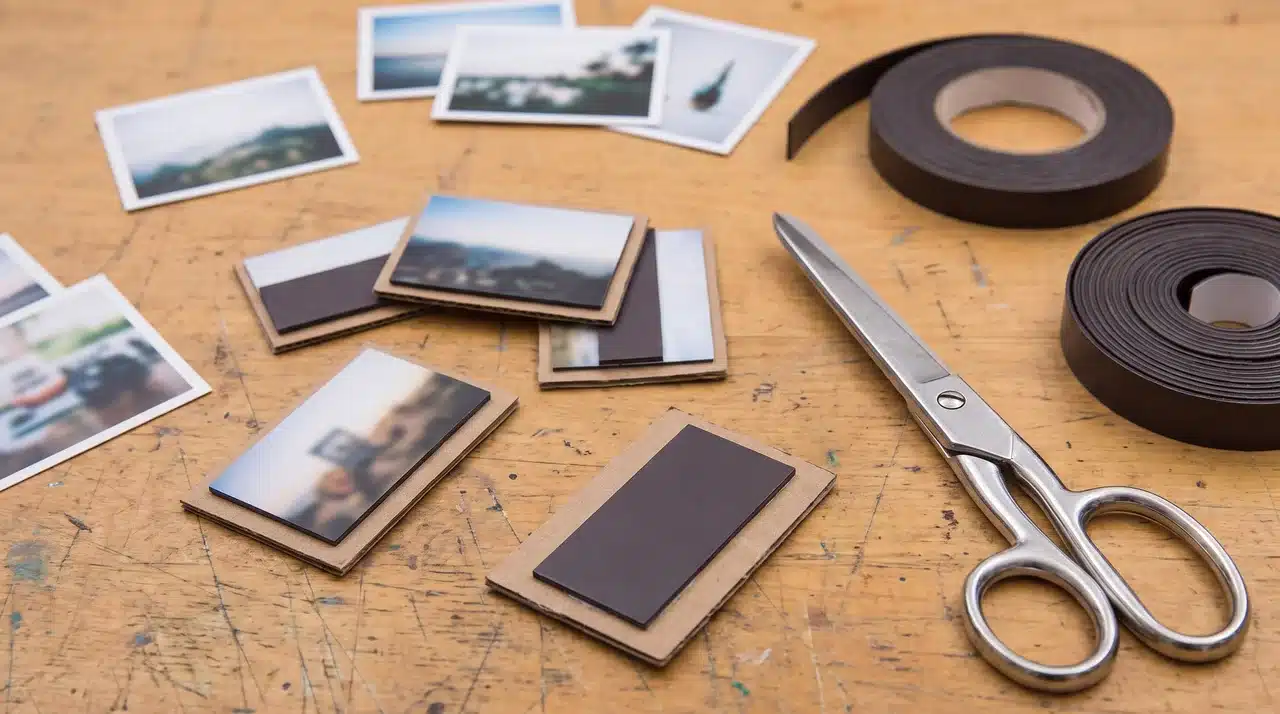
Create quick personalized magnets using favorite photos and simple craft materials. They are easy to make in a short time and work well for family, friends, or coworkers.
Choose photos that represent special moments or everyday memories. Package several magnets together to create a small set.
Estimated Cost: $4–$10
How to Make It:
- Print small photos that fit your chosen magnet size.
- Trim the photos and attach them to sturdy backing material.
- Add adhesive magnet strips to the back of each piece.
- Seal the front if desired and package the finished magnets as a set.
51. DIY Pancake Mix Jar
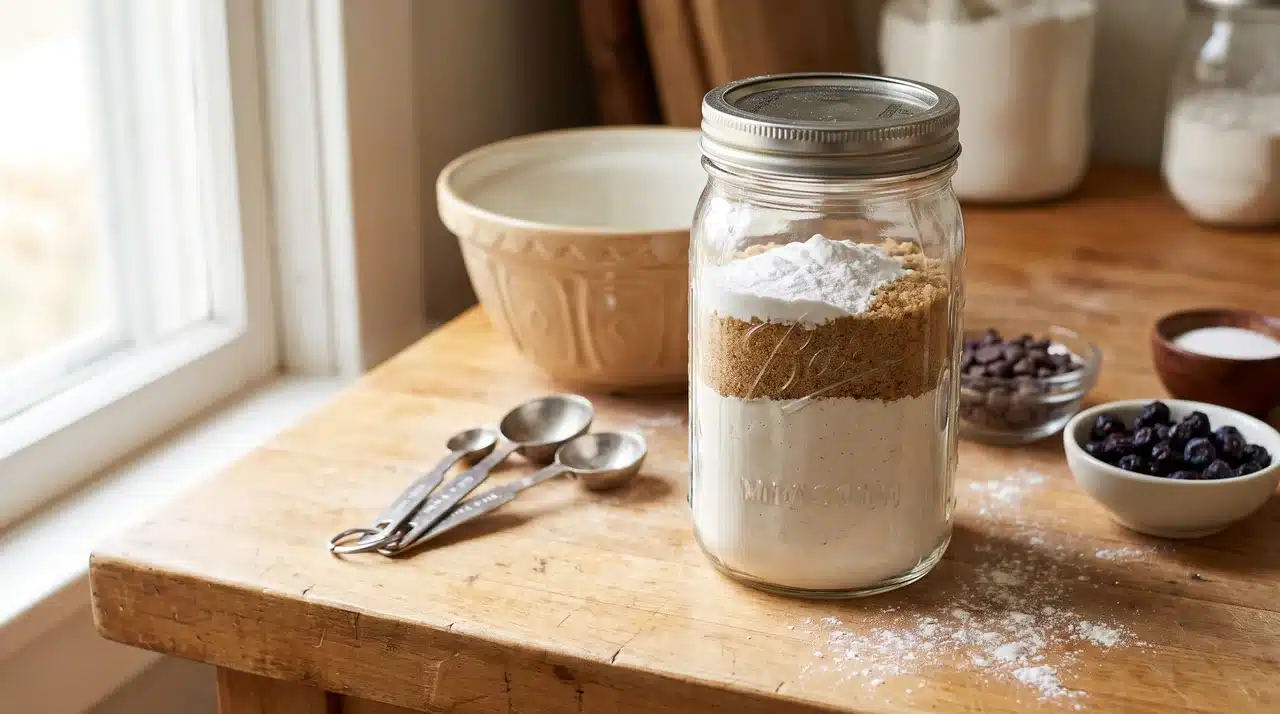
Layer dry pancake ingredients inside a jar to create an easy homemade breakfast gift. Add optional toppings or flavor additions to make the mix more personalized.
This gift is practical, affordable, and easy to prepare whenever the recipient wants a quick breakfast.
Estimated Cost: $5–$10
How to Make It:
- Measure dry pancake ingredients such as flour, sugar, and baking powder.
- Layer the ingredients neatly inside a clean jar.
- Seal the jar tightly to keep the mixture fresh.
- Add a tag with preparation instructions and suggested toppings.
52. Handmade Card With Gift Pocket
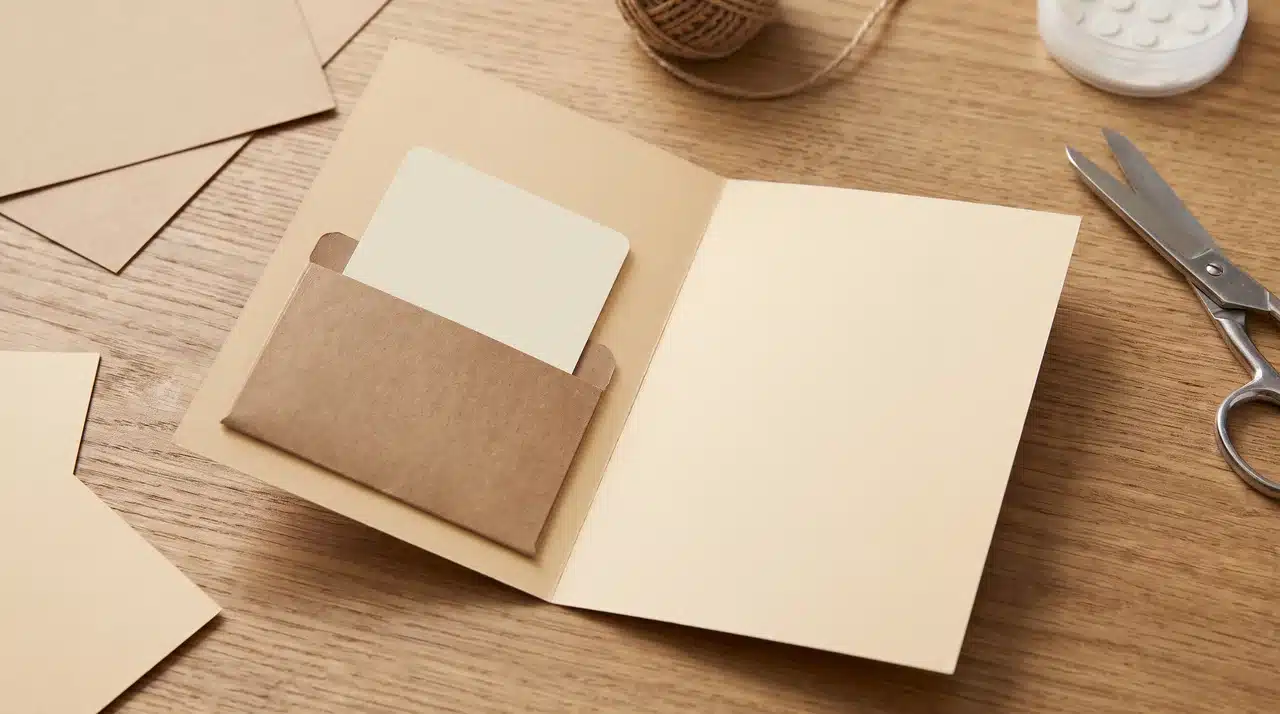
Fold cardstock into a simple card and attach a small paper pocket inside. Use the pocket for a gift card, cash, note, or printed coupon.
Decorate the front with a simple drawing, pattern, or message. This is one of the fastest ways to make a purchased gift feel more personal.
Estimated Cost: $2–$5
How to Make It:
- Fold a piece of sturdy cardstock in half to create the card.
- Cut a smaller paper rectangle and attach three sides inside to form a pocket.
- Place cash, a gift card, coupon, or personal note inside the pocket.
- Decorate the front and write a personal message inside the card.
DIY Christmas Gift Ideas
Christmas gifts often work best when they feel festive without becoming overly complicated. These projects are easy to personalize and can fit into larger holiday gift baskets.
53. Handmade Ornament
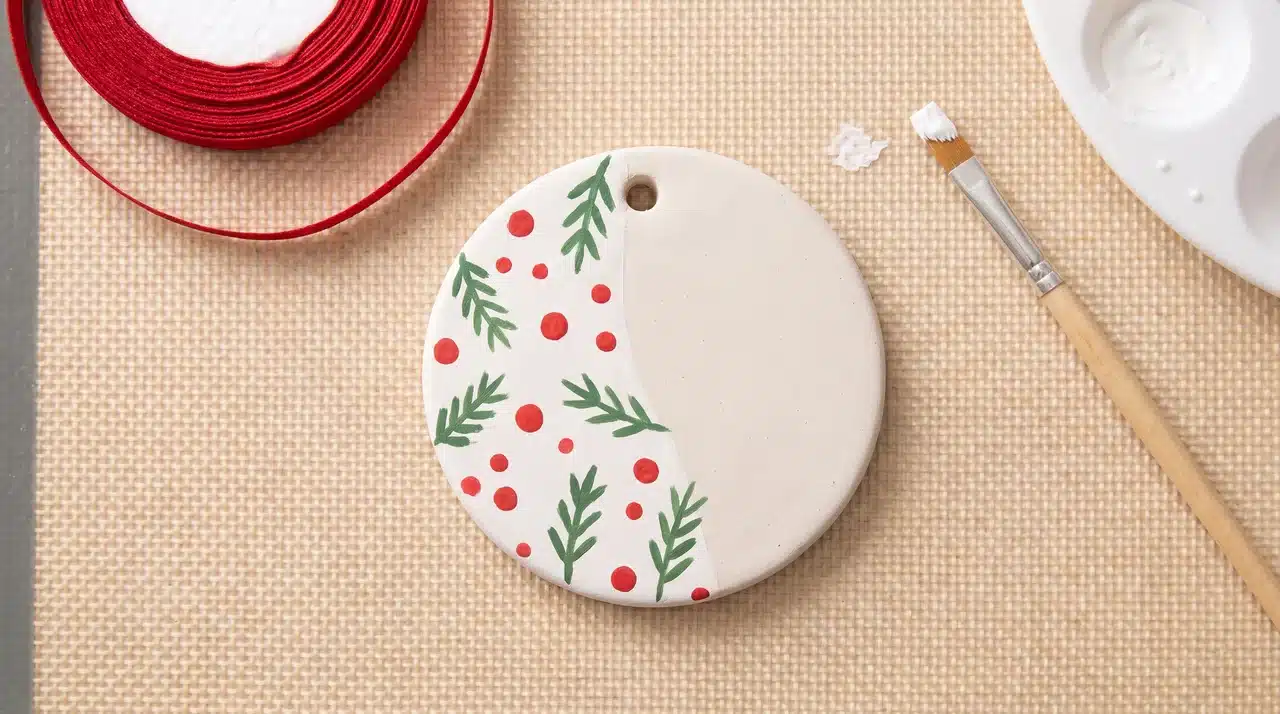
Create an ornament from air-dry clay, wood, felt, or salt dough. Add a name, date, initials, or a simple holiday design.
Tie it with ribbon or twine for hanging. Personalized ornaments can become keepsakes that the recipient brings out again each year.
Estimated Cost: $3–$8
How to Make It:
- Choose air-dry clay, felt, wood, or salt dough as the ornament base.
- Cut or shape the material into a simple holiday design.
- Add a name, initials, date, paint, or other decorative details.
- Create a hanging hole or loop and attach ribbon or twine once finished.
54. DIY Hand-Stamped Wrapping Paper
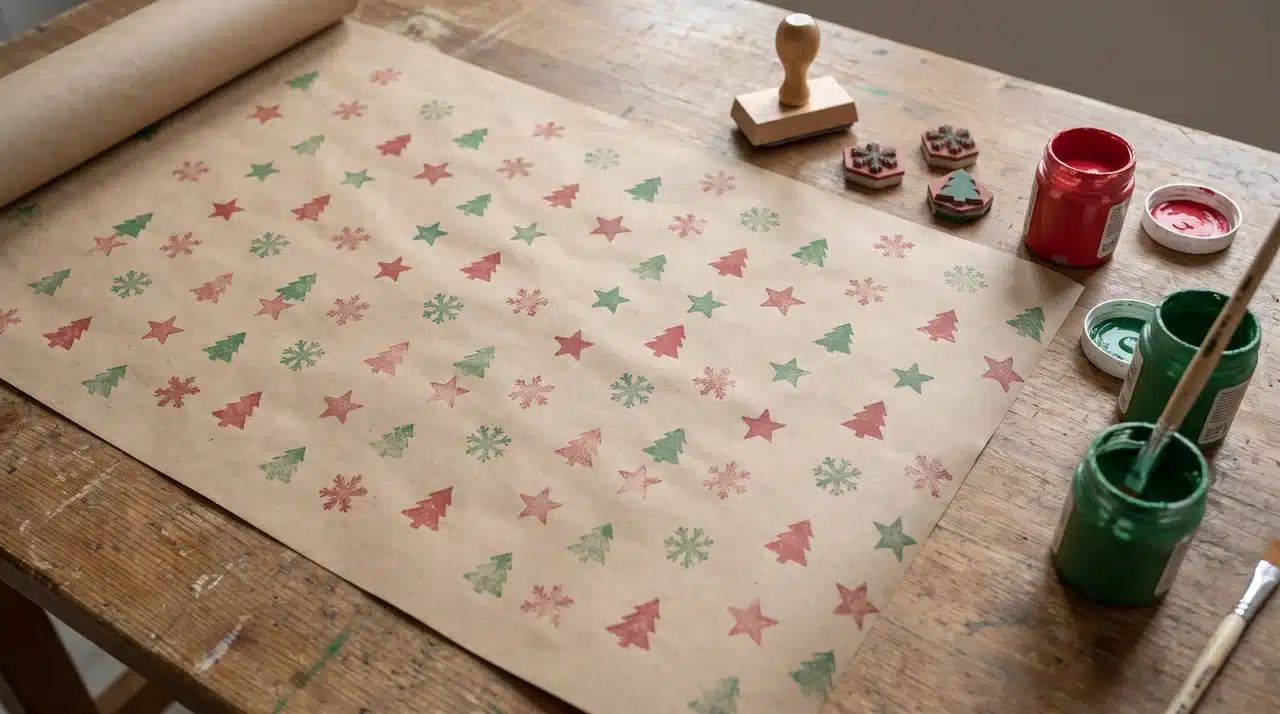
Make the gift presentation more personal by creating your own stamped wrapping paper. This project adds a handmade detail while giving you custom paper for future gifts.
Use simple holiday shapes such as stars, trees, or snowflakes to create a repeating pattern. Choose colors that match the occasion or recipient’s style.
Estimated Cost: $6–$12
How to Make It:
- Create or choose a stamp design suitable for the wrapping paper.
- Apply craft paint to the stamp and press it onto plain paper.
- Repeat the pattern across the paper while keeping the spacing consistent.
- Let the paper dry completely before using it for wrapping.
55. DIY Hot Cocoa Bombs
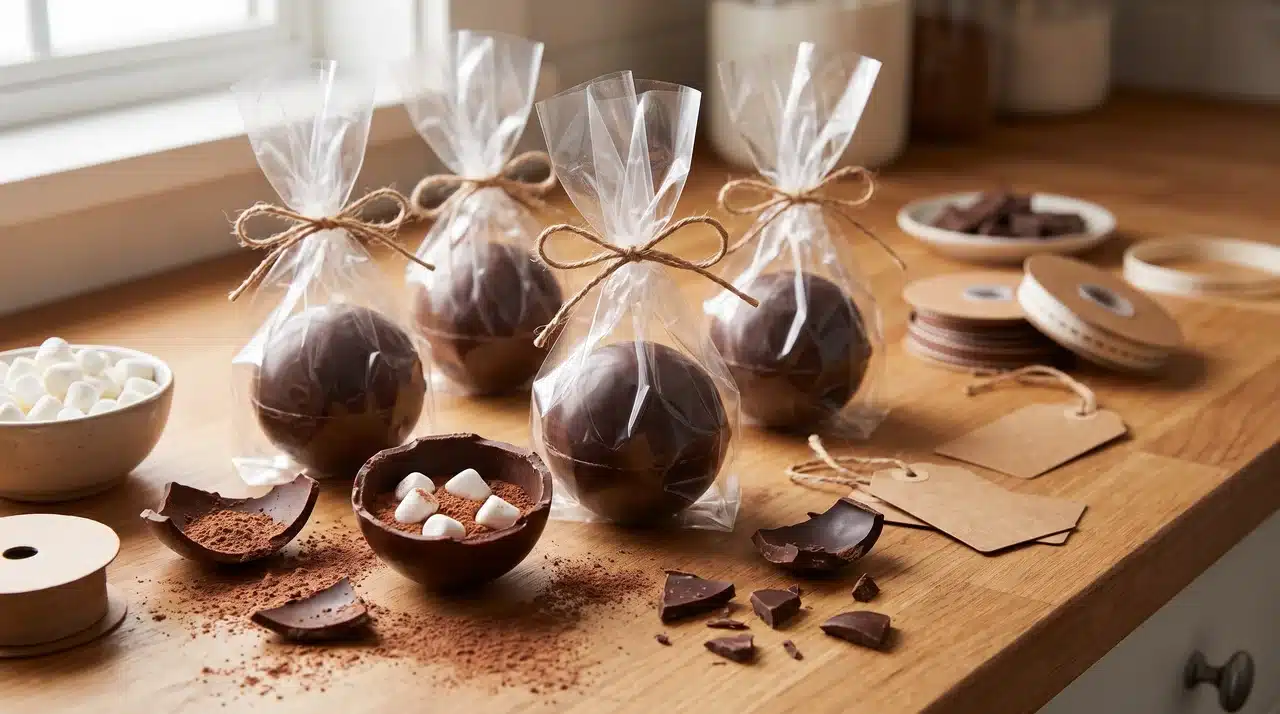
Hot cocoa bombs turn a familiar winter drink into a fun handmade gift. They create a small experience as the chocolate shell melts into warm milk and reveals the cocoa filling.
Customize them with marshmallows, sprinkles, or different chocolate flavors. Package each one separately to make them easy to gift during the holiday season.
Estimated Cost: $10–$18
How to Make It:
- Melt chocolate and coat silicone molds evenly before chilling until firm.
- Fill one chocolate half with cocoa mix and mini marshmallows.
- Warm the edge of the empty half and press both sides together to seal.
- Decorate with melted chocolate or toppings and package each cocoa bomb individually.
With 55 options covering personalized, practical, edible, budget-friendly, last-minute, and seasonal gifts, you can choose a DIY idea that fits both the recipient and the occasion.
Conclusion
A great handmade gift does not need perfect crafting skills to make an impression. What matters most is choosing something that feels suited to the person and the occasion.
The DIY gift ideas mentioned here give you plenty of ways to make something useful, personal, affordable, or fun without turning the process into a major project.
You can keep things simple, add a few meaningful details, and still create a gift that feels more considered than a quick store purchase.
The best project is the one you will actually enjoy making and feel confident giving. Choose your favorite idea, gather your supplies, and start creating something worth wrapping today.
Frequently Asked Questions
What Are the Best Homemade Gifts?
The best homemade gifts match the recipient’s interests, routine, or favorite colors rather than the hardest project available. A hand poured candle, a personalized mug, or a memory jar filled with notes usually feels more thoughtful than a rushed, overly complicated craft. Simple, well finished projects tend to feel more considered than something left looking unfinished.
What are Some Easy DIY Gifts I Can Make?
Easy DIY gifts include a personalized ceramic mug, a hand-poured candle, a painted terracotta plant pot, or a handmade bookmark made from cardstock or felt. Each of these uses basic materials and a few simple steps, so beginners can finish them neatly in an afternoon without needing special tools or prior craft experience.
What are Some Last-Minute DIY Gift Ideas?
Last-minute DIY gifts include a custom tea blend jar, quick photo magnets, a pancake mix jar layered with dry ingredients, or a handmade card with a small gift pocket for cash or a coupon. Each option needs little to no drying or curing time, so they can be finished and wrapped the same day.
What DIY Gifts Can I Make on a Budget?
Budget-friendly DIY gifts include a decorated mason jar filled with treats, a flavored popcorn mix, a homemade sugar scrub, or a fabric-covered journal. Most of these projects cost under ten dollars in supplies and reuse items already on hand, like an old jar or a plain notebook, to keep the total cost low.
What Homemade Gifts Do People Actually Use?
Useful homemade gifts include rice hand warmers, a wooden catch-all tray, reusable fabric bowl covers, and a handmade phone stand. Each one solves a small everyday task instead of sitting as pure decoration, which is why these tend to get used far more often than decorative handmade items that stay on a shelf.